B&D 18V Battery Connector
thingiverse
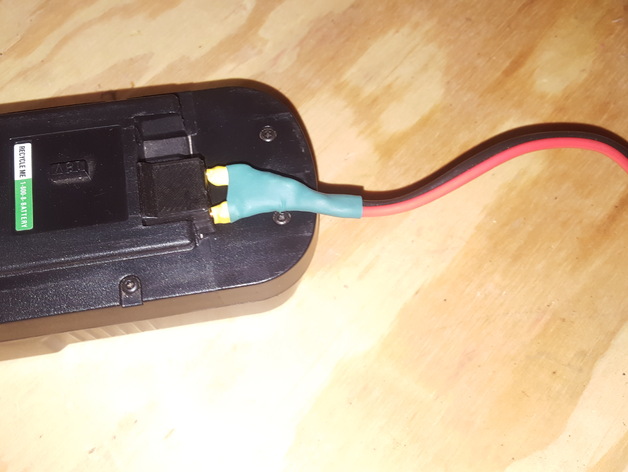
A printable connector for Black and Decker 18V battery packs. Can be used to easily tap one of these batteries as a power source for electronics projects. I designed this because I wanted a way to use the battery with a simple plug that left the battery unmodified, allowing it to still be used in B&D tools and charged using the manufacturer's battery charger. I use the plug as a way to power either a low-cost buck or boost converter, allowing me to deliver a few amps at output voltages in a range from a few volts to more than 30 V. Examples: Buck and Boost Pictures provided show the other end of the wire with PowerPole connectors attached to facilitate easy use on a workbench. PowerPoles are not configured using the standard for ham gear, but rather are stacked vertically to distinguish them from the standard orientation. This prevents the user from accidentally plugging into gear that is intended only for 12V/13.8V. The OpenSCAD script is included in addition to the STL file. Print Settings Printer Brand: Printrbot Printer: Simple Black Rafts: Doesn't Matter Supports: No Resolution: 0.2 mm Infill: 15-30% Notes: I printed the connector with the deep, narrow notch facing DOWN; it still prints just fine without supports. It's possible that the model may print better with the rectangular holes facing DOWN on the print bed. If you have better luck one way or the other, let me know in the comments section. Assembly Instructions The connector was designed to be assembled using solid 12 AWG wire. This can easily be taken from a piece of 12/2 wire commonly used for house wiring. Strip all the insulation from two wires that are just slightly longer than the connector length. Do not bend the wires; try to keep them as straight as possible. On each of the two wires, take a metal file (or sandpaper, or whatever you have) and file down the point of the wire on one end so that it is wedge shaped. The tip should look somewhat like a doorstop. The goal is not to sharpen the tip, but rather to remove one side of the cylindrical cross-section on the end of the wire to prevent the battery terminals from snagging on the end of the wire when inserted. The wire will be inserted in the small holes at the back. Orient each wire so that the slope that you created on the end of the wire faces the inside of each rectangular cavity; this allows the battery terminal to easily slide past the tip of the wire. The connector is designed so that the wires fit relatively snugly, so you may need a pair of pliers to push in each wire until it reaches the end of the internal channel. Test fit the connector on a battery to see if it slides on and off smoothly. If everything works out, the length of wire exposed in each opening will be pressed firmly against a battery terminal when plugged in, providing a solid connection and sufficient friction to prevent the connector from sliding off accidentally. I think that the approach works quite well. If the connector fits on the battery, unplug it and solder a longer wire to each terminal wire sticking out the back of the connector. You'll notice in the pictures provided that I used a short piece of red/black zipwire (making sure to attach red to the + terminal and black to the - terminal) to make the connection. I also used heat shrink tubing to help insulate the wires and solder joints. Disclaimer Like any do-it-yourself project, the quality of the constructed item can vary widely depending on the skills of the builder. This item worked well for me, but it may not be suitable for your purposes; use at your own risk.
With this file you will be able to print B&D 18V Battery Connector with your 3D printer. Click on the button and save the file on your computer to work, edit or customize your design. You can also find more 3D designs for printers on B&D 18V Battery Connector.