Ball Hopper for PickleBall, Tennis or Baseball
thingiverse
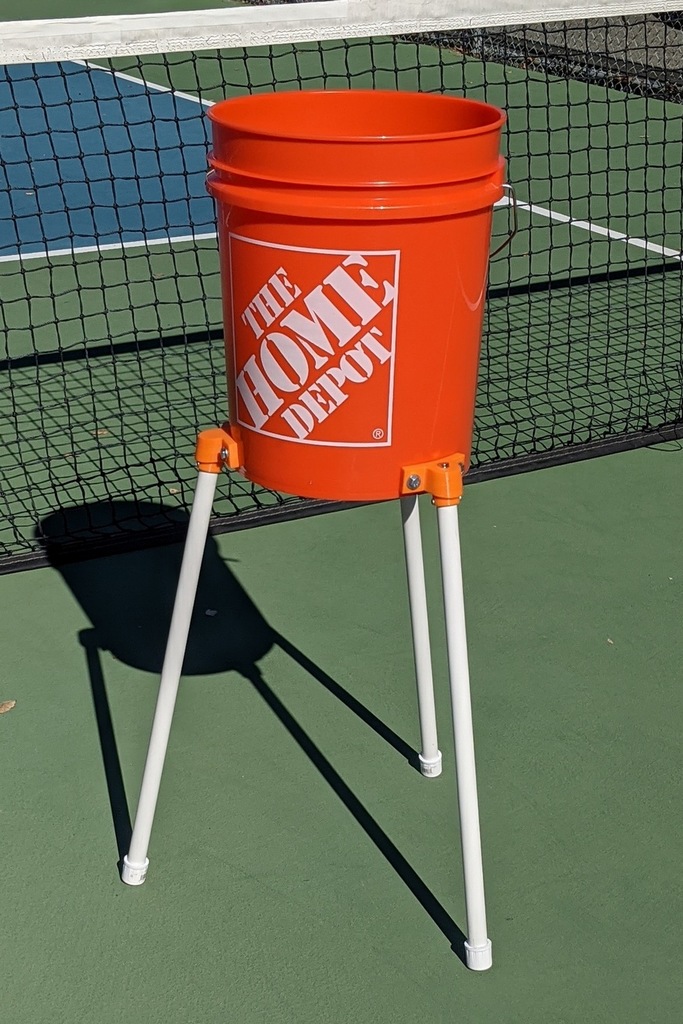
Here's an alternative to store-bought ball hoppers. Turn any 5 Gallon bucket into a hopper with PVC legs. Legs are detachable. Put them in the bucket for transport in your car. Firstly, I designed two different attach methods for the legs - threaded and magnetic. There are 2 files for each that you will use depending on which method you prefer. The filenames start with "threaded" or "magnetic" so hopefully self-explanatory. If you choose magnetic, then you need to buy the specific magnets that fit, so it will cost some $$. Both attach methods work great. I designed the screw-in legs to attach with just a couple of turns. Magnetic will self-center and click in. So it's your choice. All mounting holes are designed for 1/4 inch bolts. The holes are slighly larger, so no drilling should be required. BOM for Screw-In Attach: 3x ThreadedMalePVCEnd.stl 3x ThreadedFemaleBucketSide.stl 3x BackingPlate.stl 6x 1.25" long 1/4" bolts, can be longer 6x 1/4" nuts 1/4" washers, optional 3x 1/2" PVC cut to 21 inch length 3x 1/2" PVC end cap 6x #6 screws, optional BOM for Magnetic Attach: 3x MagneticPVCEndTapered.stl 3x MagneticFemaleBucketSide.stl 3x BackingPlate.stl 6x 1.25" long 1/4" bolts. Can be longer 6x 1/4" nuts 1/4" washers, optional 3x 1/2" PVC cut to 21 inch length 6x #6 screws, optional 12x Neodymium magnets. 12mm x 3mm To attach the PVC legs to the coupler (threaded or magnetic), I used CA glue and activator. Scuff up the PVC first with sandpaper. The photos show screws also, but these are not really necessary if you glue them. The magnets are Neodymium magnets from Home Depot. They are 12mm x 3mm. I found some on Amazon that are the same dimensions, but not Neodymium. These are likely not strong enough. Strength? I printed in PLA, 3 walls, 40% infill. I use is for pickleballs, which are light. So if you are using heavier balls you'll need to use your judgement whether you need to make print or material adjustments. Some notes about printing: -Print the mating parts one at a time. They need to fit together nicely, so we don't want any travels or retractions messing up the surface, especially for the threads. -The female parts should be printed with the opening facing up. I think I oriented the parts correctly, but if not, refer to the slicer photo. -If you need to support the mounting holes for the female parts, make sure there is no support in the thread area. -Support the male parts, only where the PVC is inserted and also in the magnet cavity (if you are using the magnetic version). No support in the thread area. For me, the first time I mated the screw-in parts, there was some friction and then the surfaces will smooth themselves out and the fit together very nicely. I just have a cheap Ender 3 tuned well and can print these fine. If you have a lousy printer or bad profile, you may have problems. The threads are being printed upwards on an angle but it's not too difficult. I experimented with clearance between the male and female threads and this version is pretty generous. I've included a file called "bucket-leg-spacing.pdf". You can print that off and lay it on the bottom of your bucket and use a sharpie to get the legs evenly spaced. The image is larger than a letter-sized page, but it will still work. Please post MAKES.
With this file you will be able to print Ball Hopper for PickleBall, Tennis or Baseball with your 3D printer. Click on the button and save the file on your computer to work, edit or customize your design. You can also find more 3D designs for printers on Ball Hopper for PickleBall, Tennis or Baseball.