Balsa Model Assembly Jig
prusaprinters
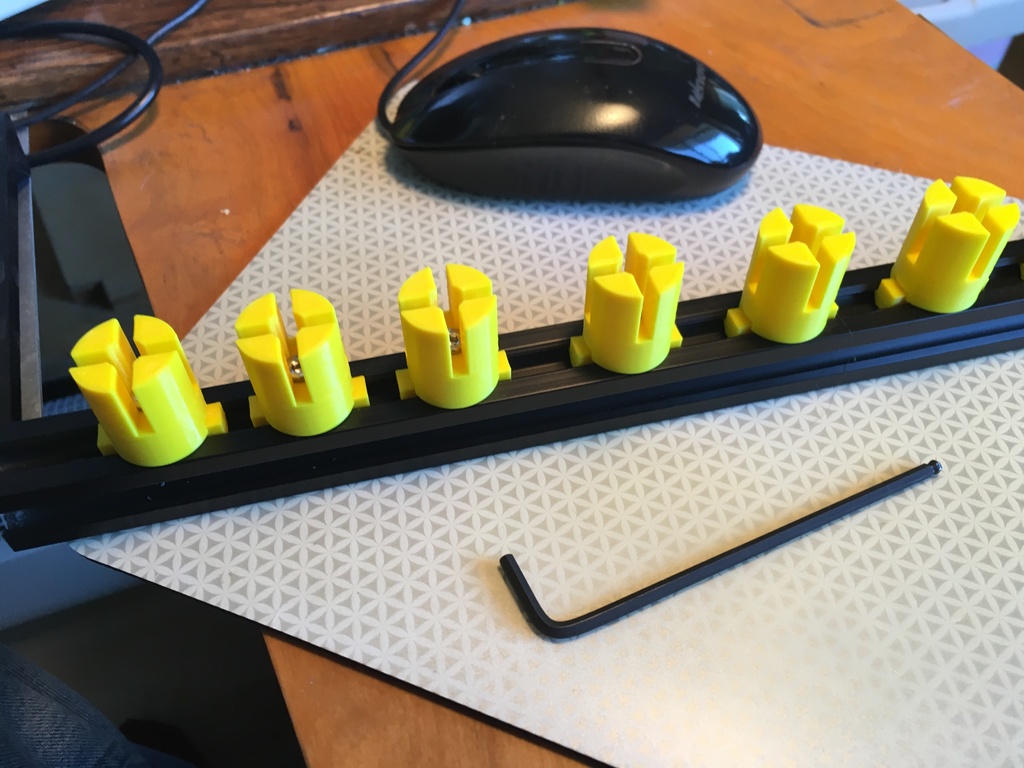
<p>The larger slotted one provides a way to hold 3/32" thick balsa or plywood pieces squarely for joining. The second narrower slotted one is for 1/16" thick pieces. The tall ones help align curved or slanted keels.</p> <p>Each slotted piece attaches to the rail with a Tee nut that's threaded M4. Threads are crap and need to be chased with a tap. Slotted pieces on top are good to go as is.</p> <p>Each assembly is held together and in place by an M4 x 12mm socket head cap screw.</p> <p>Each leg assembly is held in place with either M4 x 8mm set screws or socket head cap screws.</p> <p>Align the slot on the bottom of the fixtures with the protruding part of the Tee nut to ensure accuracy.</p> <p>Pieces attach to a 20x20mm section of 80/20; the longer the better!</p> <p>Minimum distance between two parallel slots is 1" but it can be reduced to 3/4" by nipping off the ends of the Tee nuts.</p> <p>No support is needed if printed as shown.</p> <p>I use them for building model boats and planes to keep ribs square to the keel while glue dries.</p> <h3>Print Settings</h3> <p><strong>Printer:</strong></p> <p>Ender 3</p> <p class="detail-setting rafts"><strong>Rafts: </strong> <div><p>Doesn't Matter</p></div> <p><strong>Supports:</strong></p> <p>No</p> <p><strong>Filament:</strong></p> Hatchbox PLA <p>Any</p> </p> Category: Hobby
With this file you will be able to print Balsa Model Assembly Jig with your 3D printer. Click on the button and save the file on your computer to work, edit or customize your design. You can also find more 3D designs for printers on Balsa Model Assembly Jig.