Banjo Ukulele (Banjolele)
thingiverse
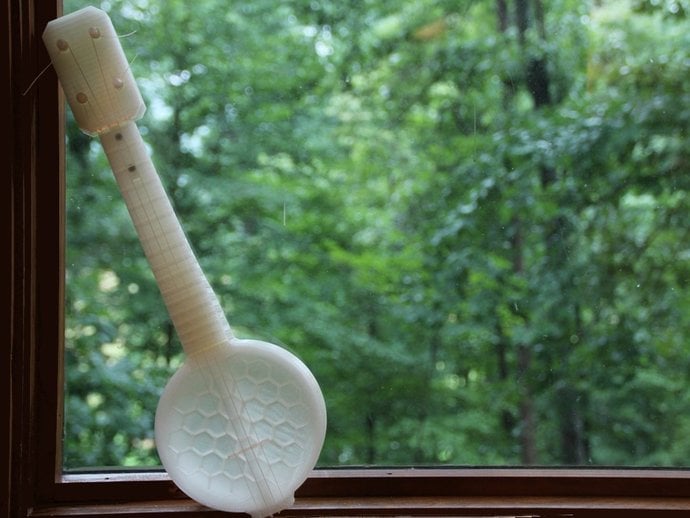
This banjo-ukulele is the result of a several weeks of iterative design and collaboration with Geoff Wiley of the wonderful Jalopy Theater in Brooklyn, NY. The project began in May of 2013 when I decided to learn more about music by printing out a a Makerlele and learning to play it. After showing the printed instrument to Geoff, we had a great discussion about musical instrument design and concluded that perhaps a banjo-ukulele would be well suited for adaptation to 3D-printing. Geoff lent me an old banjo-uke frame from which I took the basic measurements that informed my design. After several weeks of revising and testing and regular design discussions with Geoff, I arrived at a design that holds pitch and has a nice, full tone. It still needs some work, but it is at a point that I'm happy to share it and I'm beginning to actually learn chords on it. Please derive and post you design feedback. Musical instrument design with a technology as powerful and versatile as this is an exciting challenge. I've included old versions of the body for anybody who is curious. They have different bridge support structures (rev1), webbing designs (rev2 & rev3), and membrane thicknesses (rev4) that all impact the tone significantly. I designed the instrument to allow the head portion to be swappable to allow for easy exploration of head design. Finally, be sure to check out the spectrograms comparing open string plucks of the printed instrument and of a classic ukulele. More on that here. See the video on Vimeo! [And on Youtube!]( http://youtu.be/hS0AWEd63kU) Instructions You will need a set of soprano ukulele strings, six M4 nuts, four (you can get away with two) M4x50 socket head screws, and two M4x14 socket head screws. I bought the first couple sets of ukulele strings at Jalopy and subsequent sets from Amazon. The metric hardware can be purchased from BoltDepot: M4 hex nuts, M4x14 socket head cap screws, and M4x50 socket head cap screws. Slice the files. I used MakerWare 2.2 with at a layer height of 0.2, hexagonal infill at 30%, and 4 shells (all for additional strength). I recommend printing "PLATE 1.stl" without a raft and printing "PLATE 2.stl" with both rafts and supports. Prepare your build surface. I recommend using blue painter's tape for printing the first plate as it provides just the right level of adhesion to the thin membrane that composes the first two layers of the banjo "head" that it isn't damaged during removal from the build plate. If you don't have blue tape, wash the frosted size of the acrylic plate with soap and water (to normalize adhesion) and then vigorously rub your fingers over the middle of the build plate to deposit skin oils. This will reduce adhesion under the delicate middle of the head membrane and will maintain adhesion around the perimeter. Level your bed. The large, thin membrane of the head is only half a millimeter thick and is very sensitive to variations in build platform height. I recommend "hot leveling" the bed by starting the "PLATE 1" print and watching the perimeters of the first layer as the extruder lays them down to ensure that they both stick to the platform and are of a consistent width. After one or two rounds of hot leveling, the bed should be level enough to start the real print. Be sure to watch the first layer of the membrane as is goes down just to be safe. Print "PLATE 2" (with both raft and supports!). The solid raft gives both sides of the neck and head a similar surface finish, which is nice, and eliminates curling on the neck. After printing, remove support material from the neck and headstock. Pay special attention to the conical holes in the headstock-- an even surface is important when tuning. Drop the captive nuts into the neck and secure the headstock. Be careful not to over-tighten the bolts as they can cause the neck to crack. The neck can be secured to the head using the two M4x50mm bolts nearest to the back edge of the head frame. Technically, you can skip the two closest to the membrane and use epoxy on that portion of the joint as it will be in compression (and the bolted joint is in tension). Alternately, you can secure the neck with all four bolts, though the two nearest the membrane require a lot of patience. String the thing! Insert the nut into the matching gap between the neck and the headstock and tie your first string (use these knots) to hold it in place, then add the other three strings, following this diagram. Insert the bridge at the base of the neck, flip it to its target orientation, and then carefully slide it onto the membrane, while pulling back on the stings (too keep pressure off the edge of the membrane). The ideal location is about a third of the diameter of the body away from the edge, but try several different locations to get a feel for the different tones and volumes possible. To tune, get each string close, back out the peg, and then twist it into the headstock with pressure to lock it in. Adjust the nut depth either by carving the notches or by scaling in Z in MakerWare. Add notches to the bridge after marking where the strings lie. Iterate! This design is still active and has a long way to go. The next step is to eliminate the fasteners in favor of dovetail joinery. Fasteners really raise the barrier to manufacture one of these things, as they do many other projects. Additionally, the nut height, bridge geometry, webbing design, and fret and string spacing all could use optimization. I would love to see this instrument land in the hands of somebody with greater musical knowledge who can take the design the final distance.
With this file you will be able to print Banjo Ukulele (Banjolele) with your 3D printer. Click on the button and save the file on your computer to work, edit or customize your design. You can also find more 3D designs for printers on Banjo Ukulele (Banjolele).