Barrel Chest with Re-Keyable Lock
prusaprinters
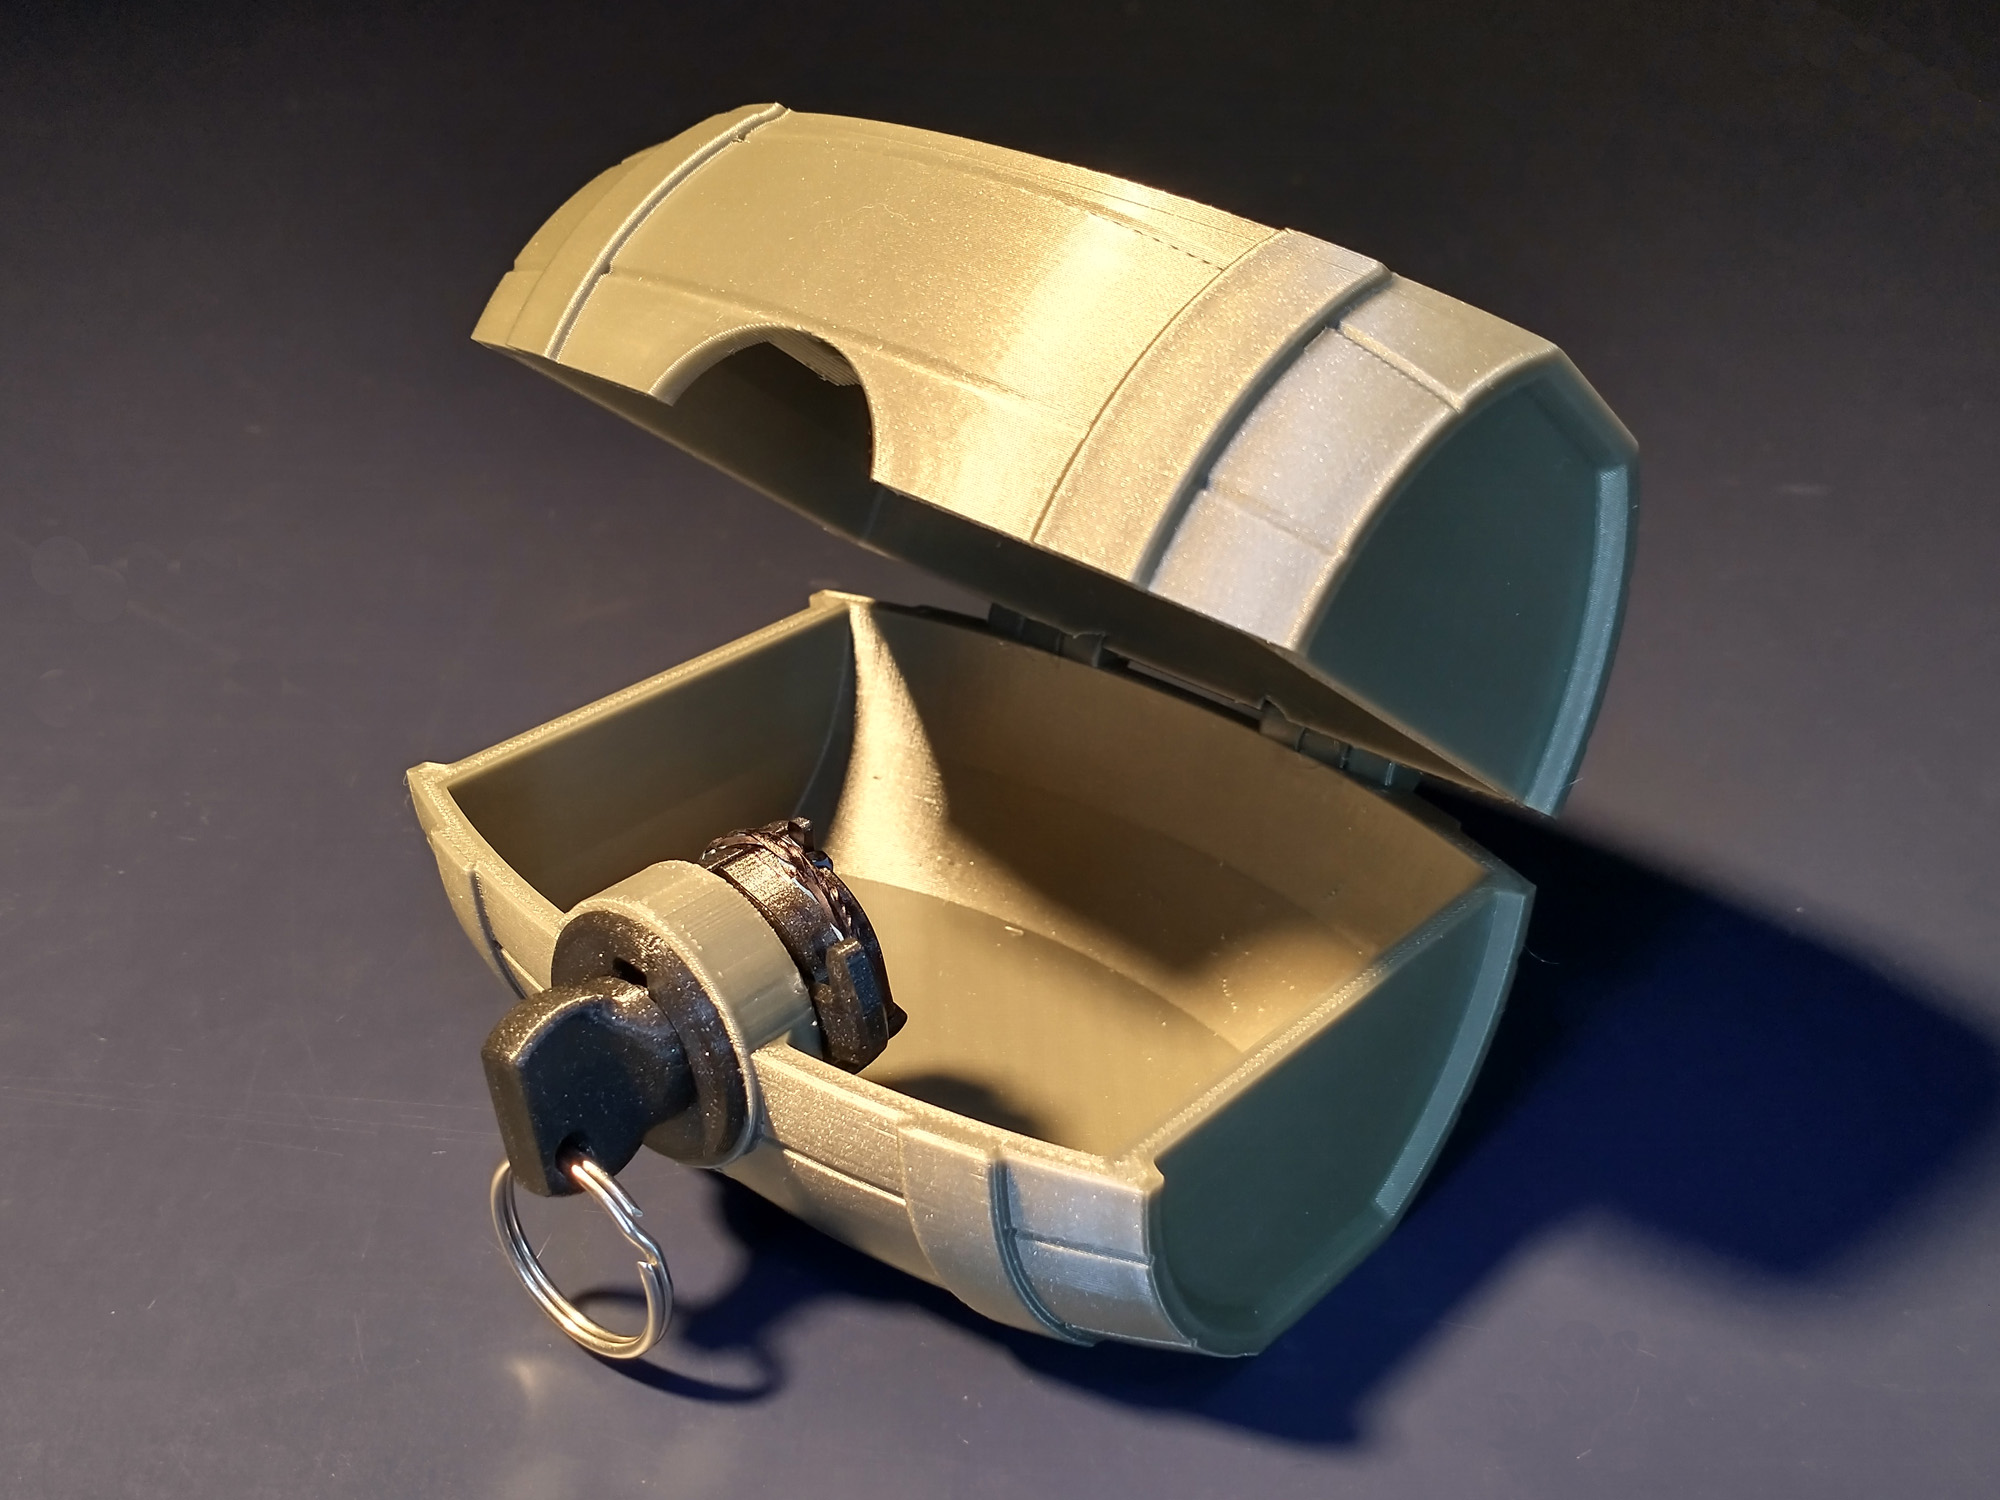
<p>This barrel-shaped chest seemed like the perfect application for my re-keyable cylinder lock. The chest itself prints-in-place as a single piece and is sized to just fit on Prusa Mini+. It has one built-in break-away support in the place where the lock inserts. I printed it in PLA with 0.2mm layer thickness. Also set the perimeter line width to 0.43mm to make sure the thin-walled built-in support prints completely. After printing, flex the hinge to break it loose, and then pop out the built-in support where the lock goes. Sand of any raggedy bits inside the lock hole.</p><p>The lock itself is a nice demonstration of how pin tumbler locks work, but it does take a little patience and a steady hand to assemble. The lock uses 4 sets of tumbler pins, which come in 4 different lengths, to give you 256 different lock/key combinations. Print one piece each of the lock-bezel, lock-cylinder, lock-back, key and key pins. Print two each of the other pins (pin250, pin300, etc.). I used a 0.15mm layer thickness for better detail. The lock also needs one very thin rubber band to use as a spring for all the tumbler pins.</p><p><strong>Assembly </strong><i>(instructions after photos)</i></p><figure class="table"><table><tbody><tr><td><figure class="image image-style-align-center image_resized" style="width:100%;"><img src="https://media.printables.com/media/prints/259759/rich_content/3908e6a5-b436-4aed-ba79-931c05627d38/lockpins.jpg#%7B%22uuid%22%3A%22b3bff6b3-b67f-4e3a-91a4-d577410b2d41%22%2C%22w%22%3A2000%2C%22h%22%3A1500%7D"></figure></td><td><figure class="image"><img src="https://media.printables.com/media/prints/259759/rich_content/b9e9bfb5-772b-4006-ab65-2bc65c41dbf3/step1.jpg#%7B%22uuid%22%3A%222da8f9fc-3354-4572-b6a9-b46784181b3d%22%2C%22w%22%3A2000%2C%22h%22%3A1500%7D"></figure></td></tr><tr><td><figure class="image"><img src="https://media.printables.com/media/prints/259759/rich_content/00420303-229b-45e4-9154-3046becf1a85/step2.jpg#%7B%22uuid%22%3A%22004d0138-5b52-4102-b266-f26f295fac70%22%2C%22w%22%3A2000%2C%22h%22%3A1500%7D"></figure></td><td><figure class="image"><img src="https://media.printables.com/media/prints/259759/rich_content/7095047f-32ab-466b-937f-34b4b33042bb/step3.jpg#%7B%22uuid%22%3A%2296b3891f-3df4-4d30-a8db-01ebd5c009f4%22%2C%22w%22%3A2000%2C%22h%22%3A1500%7D"></figure></td></tr><tr><td><figure class="image"><img src="https://media.printables.com/media/prints/259759/rich_content/d2797fa0-dad6-4287-b381-71f209822d41/step4.jpg#%7B%22uuid%22%3A%22119cfad7-a419-42fb-8fbb-aa444d8dea95%22%2C%22w%22%3A2000%2C%22h%22%3A1500%7D"></figure></td><td><figure class="image"><img src="https://media.printables.com/media/prints/259759/rich_content/c08b5010-c637-4471-b193-54ee06da88ed/step5.jpg#%7B%22uuid%22%3A%22f35aafad-2de2-4bd9-bb16-8099718dd39e%22%2C%22w%22%3A2000%2C%22h%22%3A1500%7D"></figure></td></tr><tr><td><figure class="image"><img src="https://media.printables.com/media/prints/259759/rich_content/b784de30-a10d-4a68-a42b-febf6df8c0d1/step6.jpg#%7B%22uuid%22%3A%22d2a6f64b-dd62-447d-968b-67eea747904c%22%2C%22w%22%3A2000%2C%22h%22%3A1500%7D"></figure></td><td><figure class="image"><img src="https://media.printables.com/media/prints/259759/rich_content/b4205fa7-e81b-45bb-bb20-4ef9589d9af9/step7.jpg#%7B%22uuid%22%3A%22924ee02a-6e97-4376-be57-c80de37e549c%22%2C%22w%22%3A2000%2C%22h%22%3A1500%7D"></figure></td></tr></tbody></table></figure><p>The lock has 5 radial slots – one for the key alignment rib, and 4 that hold pairs of tumbler pins that are set in a unique combination for each lock. The key also has 4 slots for holding separate key pins. The trick to making the lock & key work together is to make sure that the proper key pin mates up with the corresponding tumbler pins when the key is inserted into the lock.</p><ol><li>The 1st photo shows the sets of pins that are used to “key” the lock. Each row shows the matching combination of key pin - first tumbler pin - second tumbler pin. Notice that the combined length of the first & second tumbler pins is always the same (0.650"). You can use any row of pins in any slot, as long as you keep everything from the same row together.</li><li>As shown in the 2nd photo, insert the lock-bezel into the hole in the chest. Note that the bezel is <i>not </i>symmetrical, so it is possible to insert the bezel off by 180 deg. Make sure the side with the notch for the hook is to the upper right as shown in the photo.</li><li>Insert the lock-cylinder into the bezel as shown in the 3rd photo. The hook needs to stay in the vertical position during the rest of the assembly, so you might want to use a rubber band or piece of tape to hold it in position.</li><li>For each of the 4 slots, select which row of pins you want to use (from photo 1). You can use the same row combination in multiple slots if you like. Just make a note of which row you are using for which slot to keep from getting the pins mixed up. For each slot in the cylinder, insert the first lock pin. Before inserting the second lock pins, put a little dab of grease or vaseline in the end of the pin to help it hold in place. (This will also lubricate the lock.) When second set of pins are inserted , as shown in the 4th photo, they should all stack up to the same height.</li><li>Take your very thin rubber band (I used ones from a bunch of scallions) and lay it in the grooves in the front end of the lock-back, as shown in the 5th photo. Poke the remainder of the rubber band through the 5th slot (the one that aligns with the little nub on the opposite side).</li><li>Insert the lock-back between the fingers of the lock-bezel and push until it clicks into place, as shown in the 6th photo. Don't flex the fingers too much or they will break. As you push the back into place, the rubber band sections press against the top of each stack of pins to push them all towards the front of the lock.</li><li>Loop the remainder of the rubber band around the body of the lock as shown in the 7th photo. Note that if the lock-back doesn't seem to be held that firmly in place, you may have over-flexed the little fingers. If this is the case, loop another rubber band several times around the body of the lock to press the fingers together.</li><li>Lastly, insert the key pins into place in the slots in the key, keeping track to make sure the proper length key pin will correspond to the proper set of tumbler pins. Make each key pin is seated firmly against the bottom of each slot. If the key pins don't stay in place, add a tiny drop of superglue to each pin, after, of course, you've verified that the lock & key work together.</li><li>To use the lock, orient the alignment rib on the key with the open slot on the lock. Press the key in and turn. You may need to exert a small amount of inward pressure on the key as you turn it. When the lock is in the open position, the key is trapped in the lock. When you lock the lock, the key will automatically be ejected by the tumbler pins.</li></ol><figure class="media"><oembed url="https://youtu.be/_KWOM-amORk"></oembed></figure>
With this file you will be able to print Barrel Chest with Re-Keyable Lock with your 3D printer. Click on the button and save the file on your computer to work, edit or customize your design. You can also find more 3D designs for printers on Barrel Chest with Re-Keyable Lock.