Basic LED Lit Badge / Keychain
thingiverse
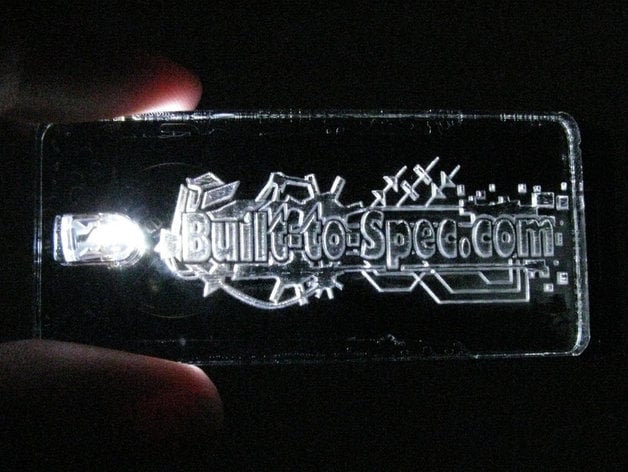
A member of CCCKC requested special promotional badges for Defcon about a month ago. They wanted LED badges resembling these (http://inventgeek.com/Projects/Laser-Fab-LED-Necklace/overview.aspx), but in luggage tag size. The first prototype of the LED badges is shared here. These badges are glued together, and the battery can be easily replaced, although changing the LED is a bit harder. A key ring or badge clip can keep the battery door in place. Use 3mm LED templates for thinner badges, but beware of warping if etched too deep. The back and middle sections are cut from black acrylic, while you can make the entire badge out of clear acrylic. Instructions to create this badge include gluing the pieces together, placing the LED carefully, and ensuring polarity is correct. Pressure should be applied lightly when gluing the top piece to avoid seepage. After drying, slide in the battery and enjoy the lit-up badge.
With this file you will be able to print Basic LED Lit Badge / Keychain with your 3D printer. Click on the button and save the file on your computer to work, edit or customize your design. You can also find more 3D designs for printers on Basic LED Lit Badge / Keychain.