Bass Clarinet Ligature
thingiverse
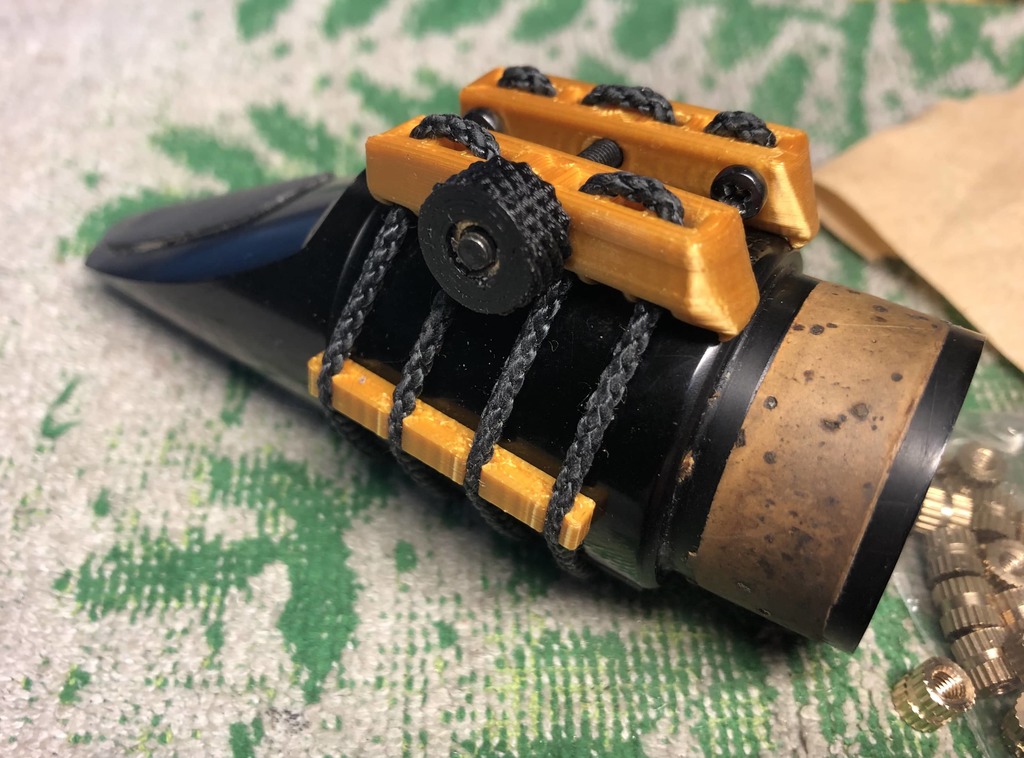
DIY string ligature design. I added overhangs in the rear to grip the back of the mouthpiece body to keep it from slipping due to the body taper. The side pieces are decorative but they do help the ligature hold its shape when you put it on/off. I like to put it on very tight so it does not slip when you adjust the mouthpiece angle. Hardware needed: (1) M3 x 30 screw (black Phillips pan) (2) M2.5 x 5 screws (black Phillips pan) (1) M3x5x5 brass threaded insert for nut or M3 thumb nut of your choice (1) 2mm dia Kevlar cord. I use 9KM DWLIFE Black Braided Kevlar String 700# Wrap 4.5-4.75 loops of cord around the body for needed length. I wrap clear tape around the cord before cutting it to keep it from fraying. This makes it easier to thread through holes. I use a dab of rubber cement on the ends to keep the aglets on. M2.5 screws may strip holes after several adjustments. I tried M2.5 set screws but they need a somewhat special M1.3 tool which can strip the thin set screw metal easily.
With this file you will be able to print Bass Clarinet Ligature with your 3D printer. Click on the button and save the file on your computer to work, edit or customize your design. You can also find more 3D designs for printers on Bass Clarinet Ligature.