Bath boat
thingiverse
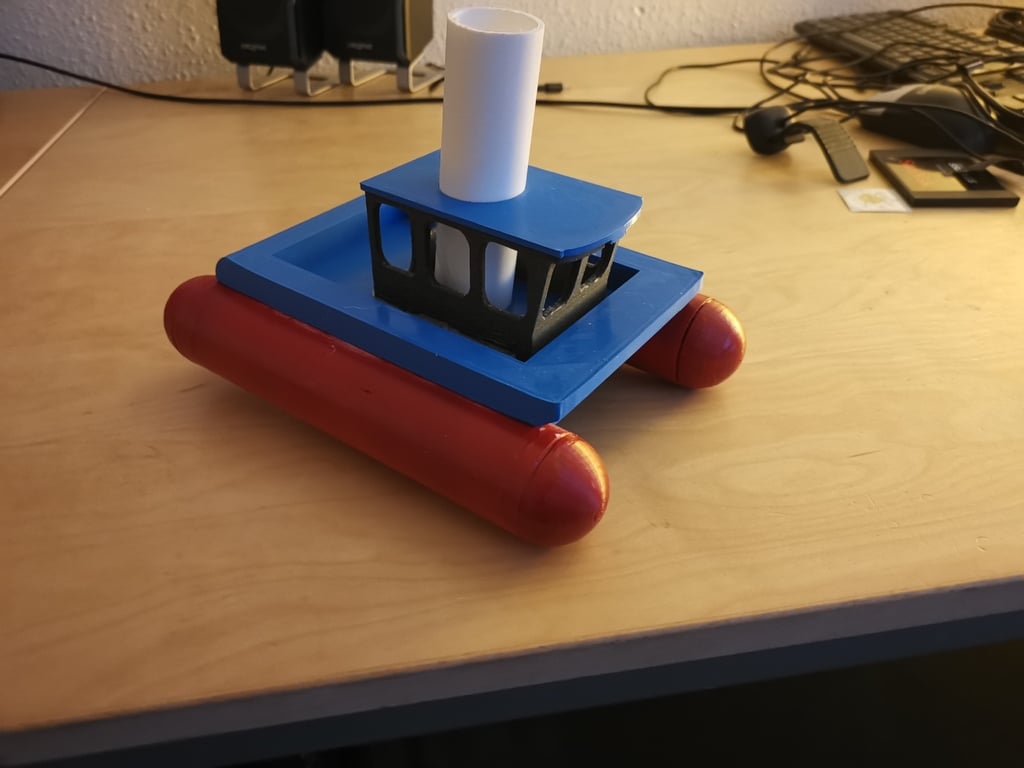
Making toys for the children of friends I remembered an old bath toy from when I was little - the Glug Glug Tug. A simple toy in which water poured into the 'funnel' would come out of a small jet below the water line and propel it along for a few seconds. Great fun for small kids at bathtime! Impossible to find now and anyway they look rubbish by todays standards, so I made something a bit more visually pleasing. To make more robust and save print time, I used a length of 32mm ID plastic basin drain pipe for the reservoir/funnel, and 2 more lengths (20cm each) of 40mm ID bath drain pipe for the pontoons, with printed end-caps epoxied into place and the entire assembly sprayed with 3 coats of a nice bright enamel paint to make the whole thing water tight. The pontoons are hot-glued onto the hull as central and symetrically as possible - I scuffed back the paint on the surface to be glued to help get a decent bond. I also - for now - hot-glued the cabin and funnel in place making sure to use loads to seal the funnel to the hull. Later, assuming the toy survives, these parts will be epoxied down. The cabin was located _after_ the funnel was in as it and the roof are held in the right place by that tube during gluing. The cabin roof is meant to be removable so you can pop minifigs in to be the crew. The nozzle was glued on last as it protrudes under the floats. I made mine from CPE but in hindsight, PLA would have been fine as any bath hot enough to harm PLA would be way too hot for kids to sit in! Quick slicing notes - 0.2mm is fine for everything except the nozzle (that really needs 0.15 or smaller). I used Cura's adaptive layers though, which work great for smooth curves like the end caps. The cabin walls and the roof are too thin to want anything less than 40% infill, and the nozzle is best done with 100% infill laid down concentric, but the float ends and the hull can be 10-15%. I used 4 top & bottom layers and 3 walls on those parts to make sure they were up to staying water tight even with vigorous handling. Assembly tip - the end caps will want to push out of the tubes before the epoxy sets. Try to heat the air in the tube to 40-odd °C first then allow the glue to set in a cool place. The reduced pressure inside will help seal the caps in tight. Incidentally, as this was always going to be a very primitive-based design I used Tinkercad to sculpt it so if you want to try modifying to suit your needs, it's at: https://www.tinkercad.com/things/cMfKbmiDULq
With this file you will be able to print Bath boat with your 3D printer. Click on the button and save the file on your computer to work, edit or customize your design. You can also find more 3D designs for printers on Bath boat.