Battery-Powered Fume Extractor
myminifactory
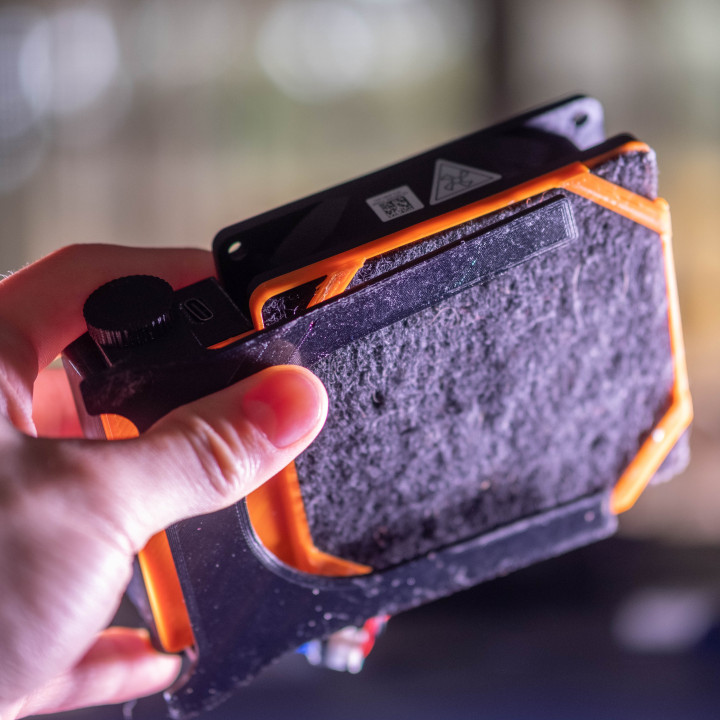
Flux fumes from soldering not only smell bad, but can cause allergies and headaches. I needed a fume extractor. Unfortunately, none of the extractors I could find on the market are compact, battery powered, and effective. This means that they’re inconvenient to take both out in the field and across the table—after all, power cables are only so long.My design addresses these issues. The feet fold up for easy transport, and an 18650 battery allows the 92mm fan to run for up to 3 hours. A USB-C port lets me charge or power the fan with the same charger I use for my phone, and the folded extractor is only 35mm (1.4”) thick. Stuff you’ll need: Tools: - Soldering Iron - Multimeter - 3D Printer Bill Of Materials: - 18650 Battery- TP4056 charging module (USB C or MicroUSB) (Note: The USB-C version appears to only work with 5V sources, so laptop chargers are incompatible)- MT3608 Step-Up module - 1A diode- Resistor (any value)- PNP MOSFET- 2x short M3 screws (common in PCs)- 4x PC fan screws- 2-pin connector (DuPont, JST, etc.) or latching switch- 92mm fan (common in old desktops - try to salvage one!)- Activated Carbon Filter Assembly: Step 1: Wire the parts (minus battery and fan) together as shown in the “schematic.” Make sure to keep the parts compact—it’s gotta fit in the electronics compartment under the fan. Also, keep the location of the USB port in mind, since the compartment has a cutout for it. Step 2: Solder wires onto the 18650 battery, using a high temperature setting on your soldering iron and lots of flux. You want this process to be as quick as possible, since high temperatures can be damaging to Li-Ion cells. Step 3: Set the output of the boost converter to 12V. You might need to rotate the potentiometer several times in one direction to get the voltage adjustment to work properly. Measure the voltage with a multimeter while a resistor is attached to the load. Step 3: Put the battery into its section within the electronics compartment, and hot glue the battery and electronics in place. This is just so they don’t rattle around or come apart over time. Step 4: Solder (or crimp) a new connector/latching switch to the fan - this will connect to the output of the step-up module, and will be used to toggle the fan on and off. Step 5: Screw the fan into the filter holder using the 4 PC fan screws. Step 6: Cut out a 90mm x 90mm square of the carbon filter, and place it in the holder in front of the fan. Step 7: Screw the filter holder (with fan) to the electronics compartment using the short M3 screws. Step 8: Assembly the stand, and screw to your preferred tension. You're done. Happy soldering!
With this file you will be able to print Battery-Powered Fume Extractor with your 3D printer. Click on the button and save the file on your computer to work, edit or customize your design. You can also find more 3D designs for printers on Battery-Powered Fume Extractor.