Battle Tag Ubisoft
thingiverse
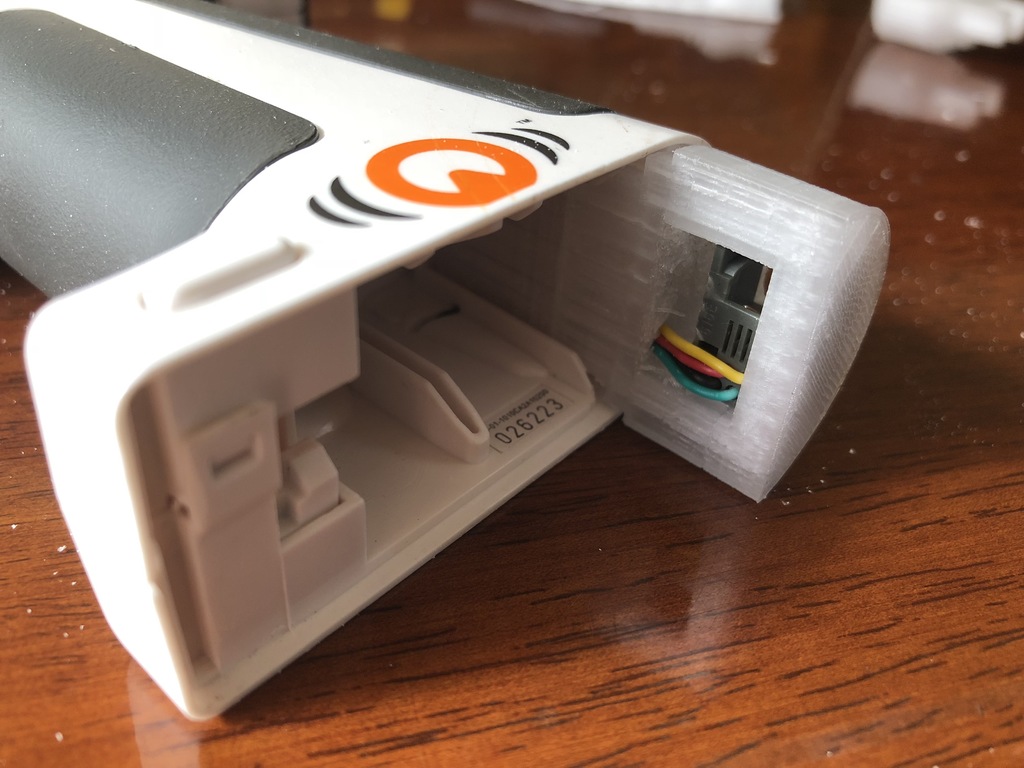
These parts allow for a replacement cable to be made for the Ubisoft Battle TAG gun to the vest. Required is the 2 printed parts (The vest can use either the side or bottom part). Plus the following parts: (Suggest eBay Search) 2 x 4 Wires Lead 616E 4P4C RJ9 Female Socket Telephone Connector Adapter 1 x RJ9 4P4C Plug Coiled Stretchy Telephone Handsets Cable Line Bla T3S6 or similar. Please see pictures for wiring examples, test prior to sewing to vest, and ensure that all of your upgrades follow the same pattern so they are interchangeable. VEST: Cut cord leaving about 10-15 cm dangling outside of the vest, mark and cut a small hole in the vest for the plug, feed the cable end back into the vest and out of the new hole, by making a loop outside of the vest, then pull through. Do not push back into the vest before it is out of the hole. If using the side plug style insert the plug then solder. The bottom type can be wired up, then inserted into part. TEST!!, then push back in and sew to vest. GUN: Disassemble gun, desolder the touch pad from the wires when the connector goes in. Insert the new socket into the new 3D part (push IN, then DOWN, then insert the wires through the hole provided). Solder to gun wires and place the part into one side of the gun (There is no push button, it needs to be done prior to reassembly. Part reassemble and check. Finish assembly, including hand grip covers. I recommend all connectors be soldered using heat shrink covers, in the case of the vest I used 2 layers, one per wire, and one larger tube to cover all. If you have any questions shoot... no pun intended :)
With this file you will be able to print Battle Tag Ubisoft with your 3D printer. Click on the button and save the file on your computer to work, edit or customize your design. You can also find more 3D designs for printers on Battle Tag Ubisoft.