BattleSTAR - The first and last 'GAMING' headset stand you'll ever need!
prusaprinters
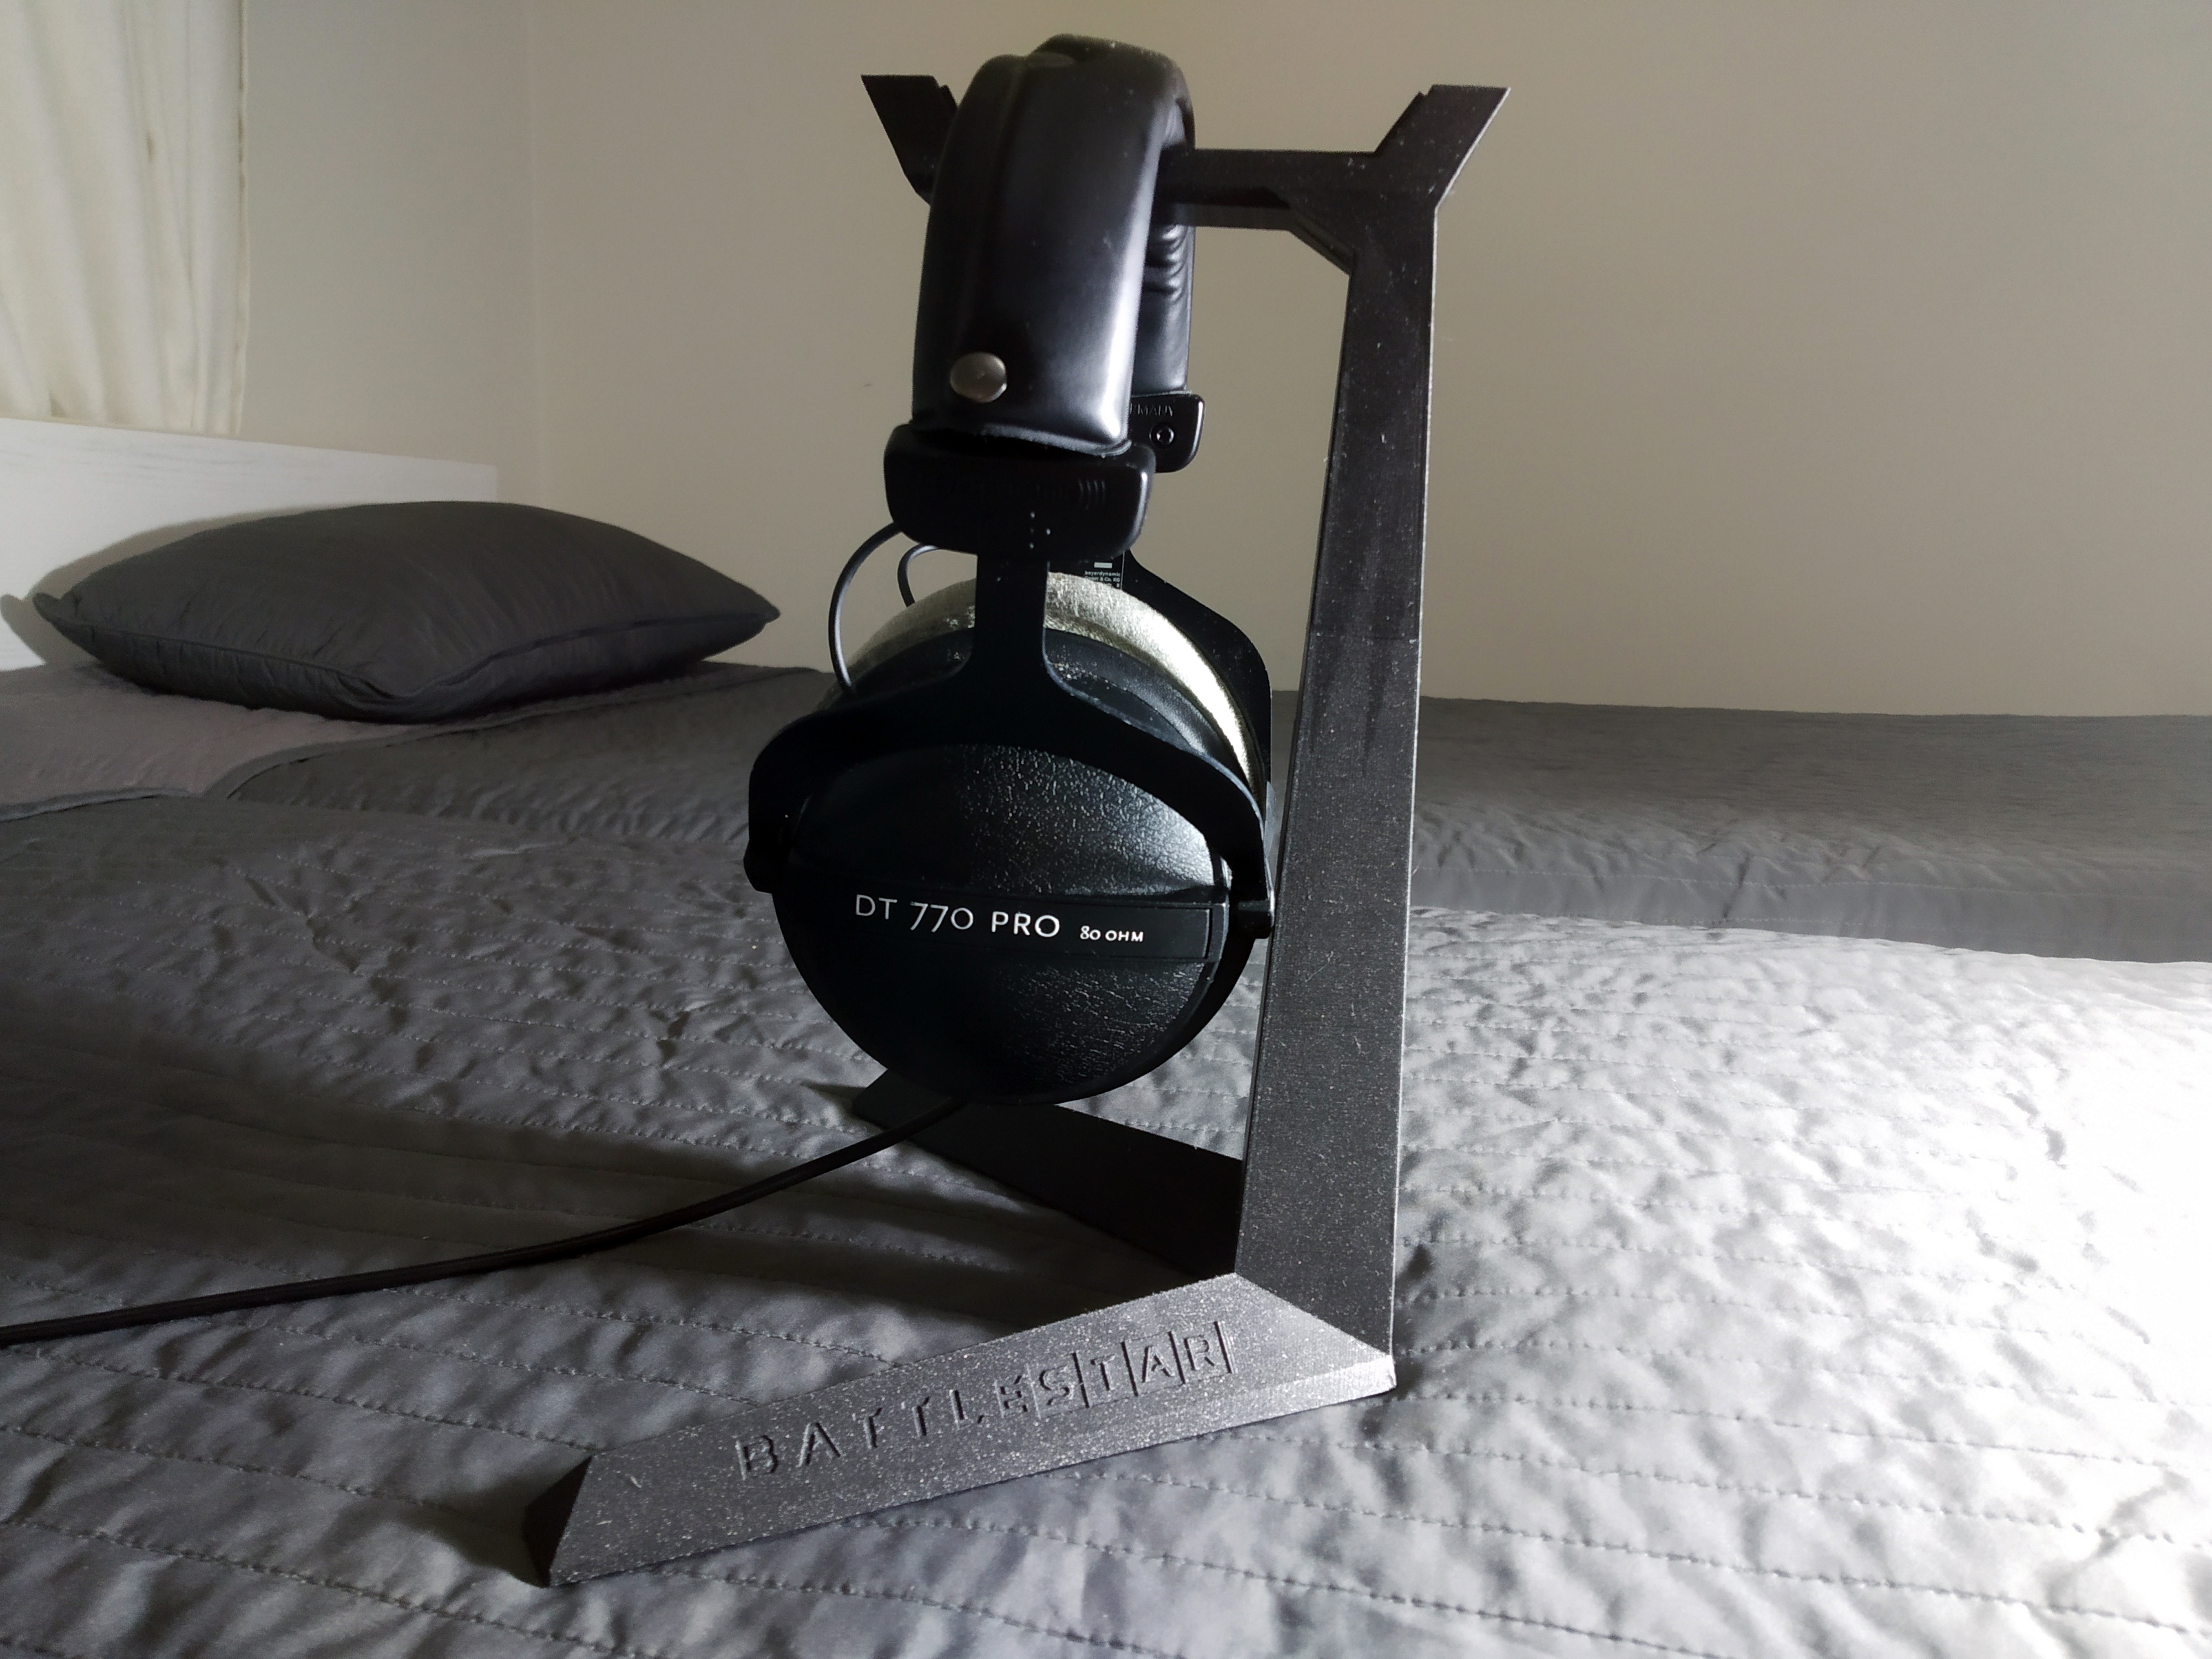
<p>< Beep bada beep AI is loading... ></p> <p>Is it a top secret stealth aircraft?<br/> Or is it a gate to another dimension?</p> <p>No! It's the next big thing since sliced bread!</p> <p>Inspired by hardcore gamers all around the world....<br/> With edges so edgy it will cut a katana in half...<br/> Dark and mysterious from another world..</p> <p>< BattleSTAR ></p> <p>Are you a gamer or a GAMER?<br/> Does your squad jump in a match without you?<br/> Is your headset cord tangled worse than the Gordian knot?</p> <p>Then this is for you! And you need it NOW!</p> <p>< Mobile 'gamers/noobs' PROHIBITED ></p> <ul> <li><p>Featuring an innovative hollow core and 3-piece construction like a DONUT, will fit any headset up to 224mm in height (unless you have ears as big as Dumbo!)</p> </li> <li><p>Additionally the hollow core can be filled with your choice of filling such as chocolate cream, epoxy or sand (except for Anakin, he hates sand) to give it more structural strength and/or weight (NOT essential for operation)</p> </li> <li><p>Top base has twin 'horns' that prevent the headset from falling accidentally (when you rage quit) and can also be used as cable holders</p> </li> <li><p>Anti-slip feet can be added to top and bottom base to prevent scratches and unintended movement (Rubber feet not included! Just buy rubber sheet online and use the provided template to cut them; LABOUR IS NOT CHEAP AROUND HERE!)</p> </li> </ul> <p>< Injuries such as cutting your fingers are not our responsibility! ></p> <p>It will only cost you 22 hours of your life and maybe a broken printer!</p> <p>< Just hope you didn't pre-order filament from PRUSA cause let's face it, it's gonna be delivered next year ></p> <ul> <li>"It's the future" - Elon MASK</li> <li>"10/10" - IGeN</li> <li>"..." - Doom guy</li> <li>"Looks like something ROG would design" - Paulos</li> <li>"Did you print my headset stand yet!?" - Costas</li> </ul> <p>What are you waiting for!?!<br/> Pre-download NOW!</p> <p>< Next year we'll release the RGB version and charge you DOUBLE! ></p> <p>< If you wish to do a REMIX please drop us a message in advance. Unless you are DJ T.S.TO></p> <p>——————————————————————————————————</p> <p>But before we start printing here's some background details (skip if you just want to print):</p> <p>From the time i got my Prusa MK3S my friends see me as Santa Claus.<br/> I don't know why, but it must be side effects from those Haribos they included.<br/> One of my friends wanted a stand for his headset. He was too cheap to buy one, and i wanted one as well since we use our headsets to communicate when we play games together (basically PUBG, only PUBG :p)<br/> However, i'm a really picky person. If something doesn't fit my requirements i will spend my time to create a better solution and learn along the way.<br/> This is was the same case.<br/> So i decided to create the *best 'gaming' headset stand the world have seen yet!<br/> One week later and after many revisions, BattleSTAR was born!</p> <p>Turns out, after i printed the bottom part, i ran out of filament roll! So much for my friend, he paid me another roll :p STONKS!</p> <p>Now regarding the design. Since the build volume on the Prusas is relatively limited i decided to maximize the footprint of the stand for stability.<br/> As for the height, the 2 piece construction while theoretically takes more time to print, there is no need for support for the whole height (which would be needed so you can build the top platform) and also reduces the risk of an in-print failure.<br/> The design as a shell also has printing and functionality advantages as mentioned in the features.</p> <p>I will upload some variations of the model so that people have more options as well as allow easier remixes.</p> <p>Please allow me some time to prepare them, and if you have any requests please contact me :)</p> <p>Don't forget to rate my print:) Hoping the judges like it:)</p> <h3>Print instructions</h3><p>< Printing in process.. ></p> <p>< Do NOT shut down! ></p> <p>Sooo...you decided to print this. Good...Let the filament flow through you!</p> <p>Step 1) If you own a Prusa MK3S and your bed plus Z-height is calibrated correctly AND have Prusament PETG (or compatible) filament just throw in my gcode above and move straight to step 2.</p> <p>Step 1a) If you own a different printer or want to print in a different filament and have it/them setup in PrusaSlicer you can just open the .3mf files and generate new gcode files.</p> <p>Step 1b) If none of the above applies to you, then you must be knowing what you are doing, but please take my TIPS:</p> <ul> <li>For Prusa build beds (250x210mm) you need to adjust skirt distance to 1mm otherwise you will get a warning/error</li> <li>In the bottom base the top pegs do not need any support so you can use a support blocker to prevent support material being generated</li> <li>If you wish to get good print resolution in the logos on the legs make sure to use variable layer height; down to 0.1mm is enough</li> <li>Contact Z distance for support works best at 0.2mm. 0.1mm gives slightly better geometry just above the support but it is a PITA to remove.</li> </ul> <p>Step 2) Remove your parts from the build bed and remove the supports.<br/> The top part slides in the pegs of the bottom part to become a single unit. Depending on your print quality/accuracy you might find out that you have a gap and cannot push it all the way in.<br/> For a good calibrated MK3S this will be around 3-4mm gap. Don't worry.<br/> Take a razor blade and slide it so that you scrub the 4 sides of the 2 pegs to essentially smooth the surface. Do 5-10 passes and re-check. Your goal is to get it to the point where there is only about 1mm gap.<br/> Then you can push it in with force (surprisingly strong and tough with PETG) to close it and get a press fit. No glue is needed.<br/> If you wish to fill the top part, now it's the time to do it!</p> <p>Step 3) Get some 4mm rubber sheet (more thicknesses will be added on request) Print out the template provided making sure to have "actual size" selected.<br/> Here's the pdf since PRUSA won't let me upload it here:</p> <p><a href="https://www.dropbox.com/s/jsfxahgwudbcwcu/rubber_cut_template.pdf?dl=0">https://www.dropbox.com/s/jsfxahgwudbcwcu/rubber_cut_template.pdf?dl=0</a></p> <p>Cut the template with scissors on the lines. Get a glue stick and glue them on the rubber sheet (best to do one by one). Get a sharp razor blade and cut by doing 3 passes; one to get the cut started, then a deeper one, and then a final one all the way deep.<br/> Draw the razor blade towards you and try to make straight pulls. It's surprisingly easy.<br/> The smallest piece is a profile cut of the top middle piece. You just glue it on and cut straight in the profile to make 2 chamfers. Best to leave this piece last as you can have the 2 triangle ones inserted so that you can check to make small adjustments.<br/> If done correctly all pieces will fit easily and snag exactly without any need for glue.</p> <p>Step 4) Enjoy and make sure to brag to your friends how much more kills this unique one-off legendary art piece will give you!</p> <p>Don't forget to leave us 5/5 stars, a thank you comment, and a photo of your print :)</p>
With this file you will be able to print BattleSTAR - The first and last 'GAMING' headset stand you'll ever need! with your 3D printer. Click on the button and save the file on your computer to work, edit or customize your design. You can also find more 3D designs for printers on BattleSTAR - The first and last 'GAMING' headset stand you'll ever need!.