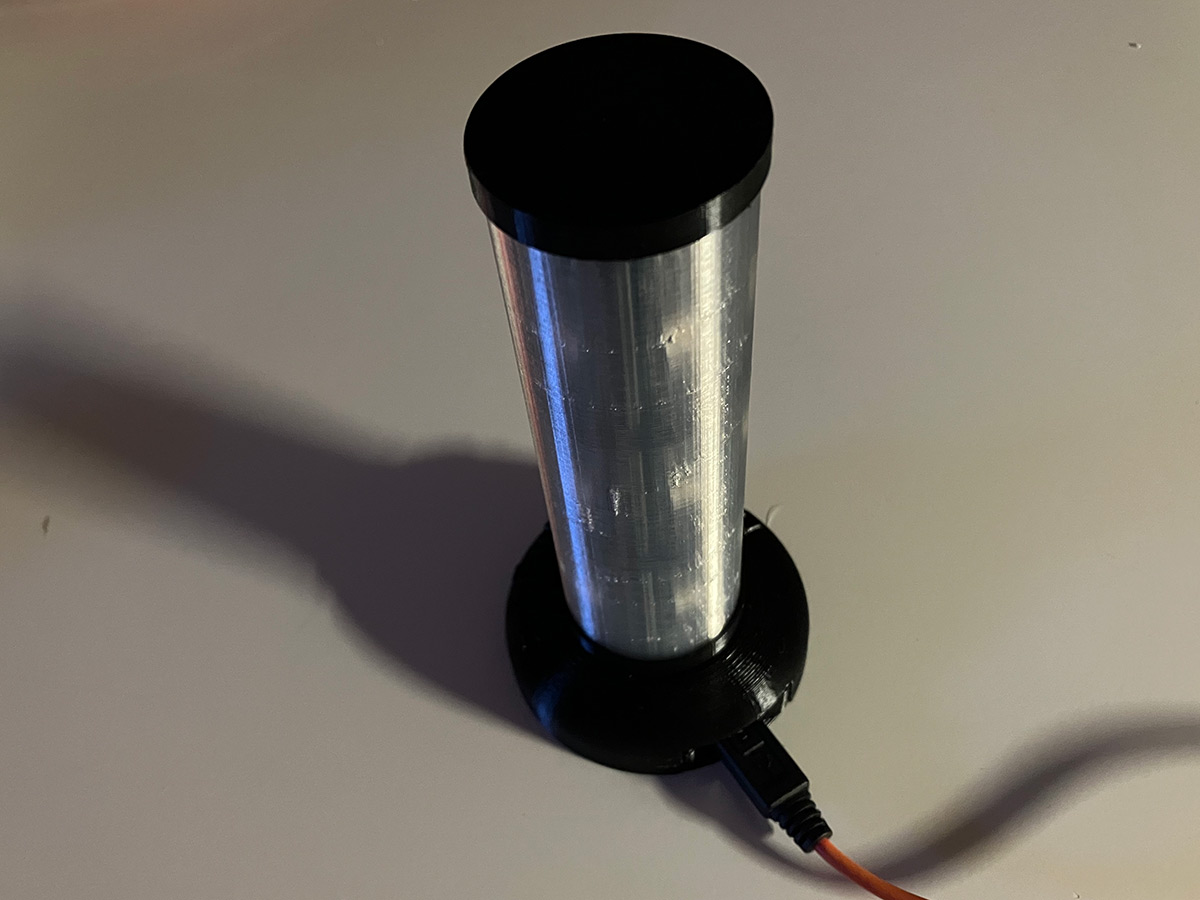
BCI BusyLight v4 with stand (Standfuß)
prusaprinters
<p>I have created housing variations for the BCI BusyLight that I would like to share with my colleagues here.</p><p>This variant is intended for placing the BusyLight on the table.<br>The stand is permanently connected to the lamp and is not removable.</p><p>Support structures are only required for printing with F2. All other parts can be printed without supports. Two variants are available for F2: One with and one without the "BCI BusyLight" lettering.</p><p><br>What files need to be printed?<br>There are 2 ways to create the white transparent "glass plate" in 3D printing:</p><p>- "NORMAL" means that the STL file is printed layer by layer (as usual). In the process, the print head settles again and again. The result is about 2 mm thick and contains visible seams.</p><p>- "SPIRALVASE" is a feature of Prusa Slicer where the print head prints the vase spirally in a single print without settling. The "glass slice" is then only 0.4 mm thick and has no seams or other "spots" and is very thin. Accordingly, the dimensions of E2 and E3 must be chosen wider, so that the disk rests on the curves.</p><p>The STL file (A1) is identical for both types of printing.<br>The GCODE files differ depending on what you choose. <br>Files (A1, E2 and E3) labeled "SPIRALVASE" are required if this function was used. Accordingly, the files (A1, E2 and E3) labeled “NORMAL” are not required.</p><p>If you want to print the slice normally, only the files (A1, E2 and E3) marked with "NORMAL" are required. Files (A1, E2 and E3) marked with "SPRIALVASE" do not have to be printed in this case.</p><p>Files that are marked neither with "NORMAL" nor with "SPIRALVASE" must be printed in any case.</p><p>The stand consists of two parts:<br>The so-called “Glocke” (F2) and the "Boden" (F1).<br>F1 contains the holder for the PCB and is clicked into F2. <br>With F2 you can decide whether the lettering "BCI BusyLight" should be printed or not. Accordingly, only one of the two F2-files is to be used.<br> </p><p><br>Assembling the printed parts:</p><p>First, F2 and E1 are plugged together.<br>Then E2 is plugged onto E1, and later E3 onto E2.<br>Then the technology is installed (see below for instructions). The remaining components are then plugged together:<br>F1 is plugged together with F2.<br>Then A1 is pushed over E1, E2 and E3.<br>Finally everything is completed by pushing E4 onto E3 and at the same time onto A1.</p><p><br>Technical assembly:</p><p>The 50cm long LED strip is cut into 5 individual strips with 3 LEDs each.<br>The double-sided adhesive tape on the back can be removed completely.<br>Some solder is applied to the contacts so that cables can be soldered on.<br>Then the LED strips are connected with cables (see photos). With exactly 14 cm cable length the strips fit perfectly into the case, but you have to work accurately and bend the cables perfectly around the corners.<br>The LED's connected in this way to a total strip are then led through the housing and back through the middle. This process is repeated 5 times until all LED's are in their intended positions.<br>I recommend to fix the end of the last LED strip with double-sided tape.</p><p>Links to other variants:<br>- (v1) <a href="https://www.printables.com/de/model/282112-bci-busylight-v1">https://www.printables.com/de/model/282112-bci-busylight-v1</a><br>- (v2) <a href="https://www.printables.com/de/model/282117-bci-busylight-v2">https://www.printables.com/de/model/282117-bci-busylight-v2</a><br>- (v3) <a href="https://www.printables.com/de/model/282165-bci-busylight-v3">https://www.printables.com/de/model/282165-bci-busylight-v3</a></p>
With this file you will be able to print BCI BusyLight v4 with stand (Standfuß) with your 3D printer. Click on the button and save the file on your computer to work, edit or customize your design. You can also find more 3D designs for printers on BCI BusyLight v4 with stand (Standfuß).
