Bear Extruder 35mm Fan Remix
thingiverse
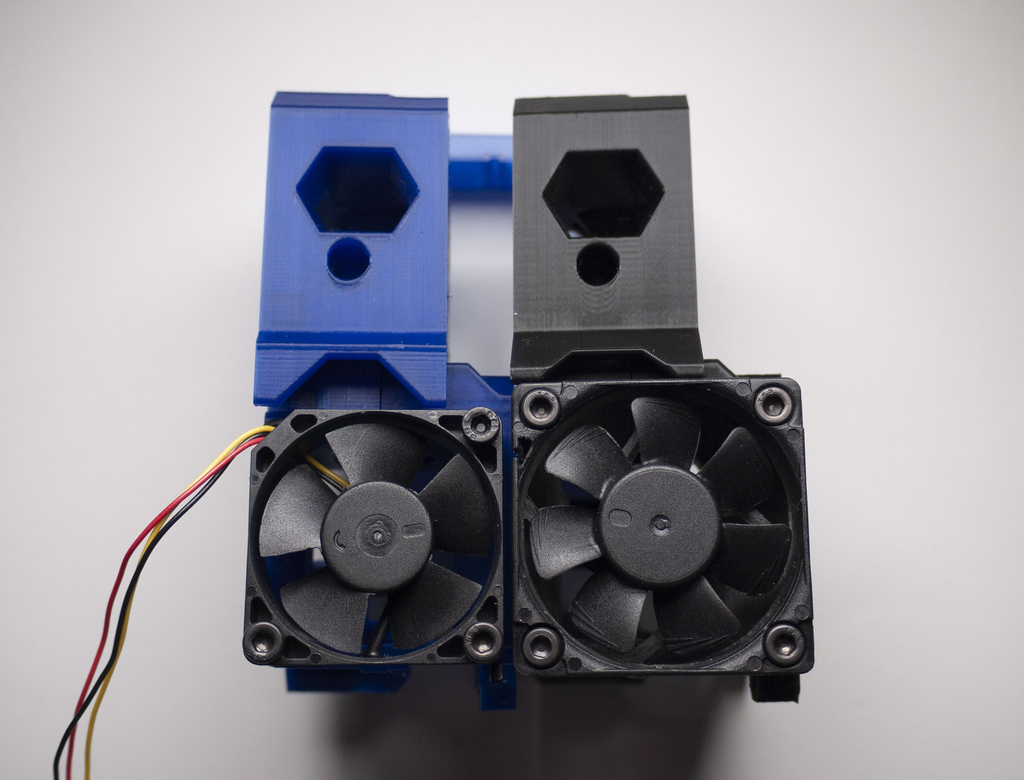
This is a remix of pekcitron's great bear extruder (thanks for providing the fusion360 files, which taught me a lot). I have changed the fan mount to hold a 35mm fan instead of the usually used 40mm Noctua or Sunon fans which seemed oversized for the size of the E3D hotend and in the case of the Noctua just not strong enough. E3D's stock setup comes with a 30mm fan that is directly mounted to the heatsink. Changes: 1. 35mm fan instead of 40mm (https://www.tme.eu/en/details/mf35100v1-g99-a/dc5v-fans/sunon/mf35100v1-1000u-g99/) 2. Fan 4.5mm closer to the hotend 3. Extruder cover 3mm thinner (adapters printable for print fan and shroud) 4. 1x M3x14 and 2x M3x12 screws to mount the fan The goal was to use a smaller fan with the same static pressure as the Sunon MF40100V1-1000U-G99 that is located closer to the hotend, to achieve a lower temperature at the bottom of the heatbreak, right before the filament enters the melting area. A lot of people experienced issues with the stock MK3 setup because the Noctua fan was to weak, which led to clogs. The Sunon 40mm drop-in replacement fixed that and I wanted to test, how much better it can get. Static pressure comparison: Noctua MK3 stock fan - 1.78 [mm H2O] Sunon 40mm MF40100V1-1000U-G99 - 4.83 [mm H2O] Sunon 35mm MF35100V1-1000U-G99 - 5.59 [mm H2O] Test: A 100K NTC 3950 thermistor was inserted in a 50mm piece of 4mm OD and 2mm ID PTFE tube until about 2/3 of the thermistor’s main body did stick out of the end. The tube was drilled out to 3mm for about 2/3 of its total length to accommodate the thermistor. The tube then was inserted in the hotend. The thermistor then was attached to the third sensor port on the Einsy. The extruder was put together according to the usual instructions and the Einsy flashed with modified Prusa firmware that shows the sensor reading in Celcius with the M105 response. This made it possible to measure the temperature at the critical zone at the bottom of the heatsink and display it in octoprint. Thanks to motocoder for developing that testing method, providing instructions and the modified firmware! I ran this setup for the Bear extruder with the stock covers v0.6.0, v0.7.0 (still in dev), v0.7.0 with two different bear booster versions and the 35mm remix I made. The extruder was heated up to 260C, the bed to 80C and it was placed in the center of the bed with Z height at 10mm. After 5 minutes waiting time to let the temperature settle, a minimum of 45 readings have been taken to define the average showing in the picture above. The results with my setup show that the Sunon 40mm fan with the 0.7.0 dev version performed best out of all the 40mm fan combinations. The 35mm fan managed to get this temperature down even further by a little over 1 degree Celsius. This was the first initial test with this remix and just the second run with this testing method. We are working on improving and simplifying the testing procedure. Results have to be confirmed and are specific to my setup and environment. I included some adapters that will help compensating for the thinner cover when attaching all the common print fans and shrouds. This is my first proper try at a design and the air path probably still can be improved. https://a360.co/2DHCh1B https://a360.co/2SRUlzI
With this file you will be able to print Bear Extruder 35mm Fan Remix with your 3D printer. Click on the button and save the file on your computer to work, edit or customize your design. You can also find more 3D designs for printers on Bear Extruder 35mm Fan Remix.