Bed Level Calibration Test - 300x300 - ASWX1
thingiverse
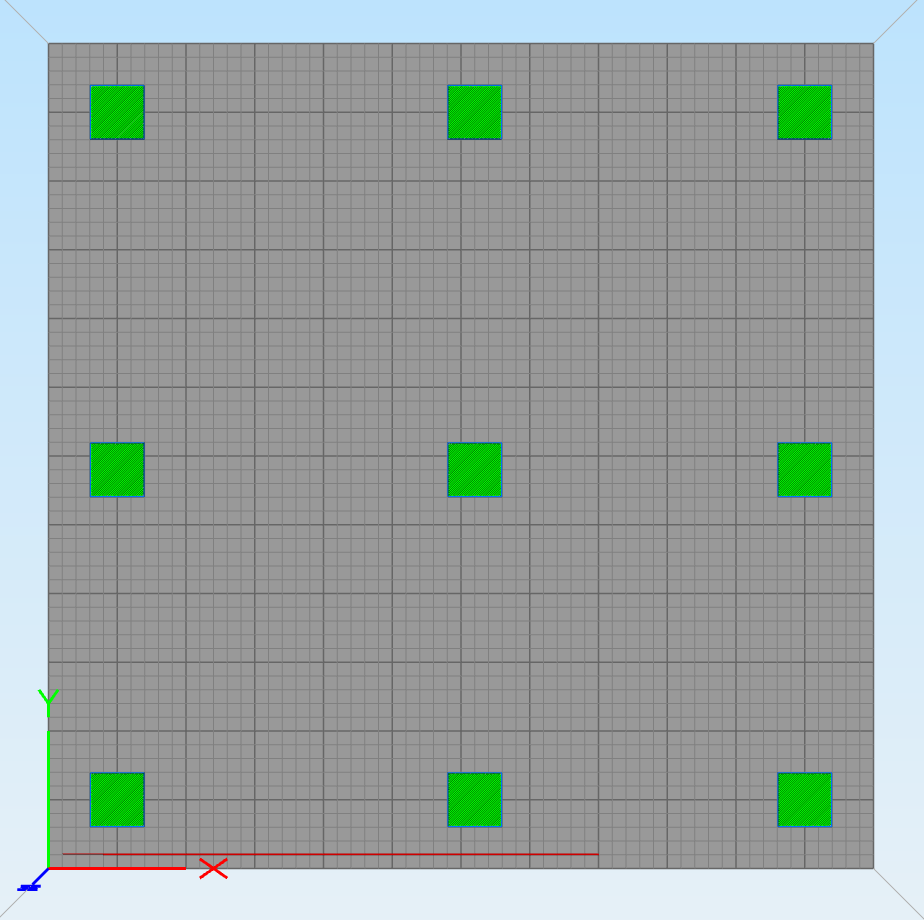
This is a simple calibration test for a 300x300 bed size. There are 3 `.stil` files, each with a different layer height. I also added my `.gcode` file that you can print. `bed-calibration-test-300x300.stl` - squares are set to 0.15mm height `bed-calibration-test-300x300-10.stl` - squares are set to 0.10mm height `bed-calibration-test-300x300-20.stl` - squares are set to 0.20mm height _Most slicers have a setting for "First layer height", I usually use 150% for my first layer to aid in bed adhesion. When doing this test you should try to set it to 100%._ Basically I went through the manual bed leveling guide on the Artillery Sidewinder X1 and I was still getting inconsisent bed adhesion, the fact that the bed is bowed doesn't help either. How to level the Artillery Sidewinder X1: 1. Manually adjust the bed leveling using a piece of printer paper (if you're using BuildTak, use a business card) 2. Print this calibration test, make adjustments if needed. If your bed is level, all the squares should look the same, they should all have the same bed adhesion, etc. On my printer, the front side of the bed needed to be adjusted higher than the rest of the bed in terms of how "tight" the paper felt between the nozzle and the bed.
With this file you will be able to print Bed Level Calibration Test - 300x300 - ASWX1 with your 3D printer. Click on the button and save the file on your computer to work, edit or customize your design. You can also find more 3D designs for printers on Bed Level Calibration Test - 300x300 - ASWX1.