bed Linear Rail conversion (complete setup of all printed parts)
thingiverse
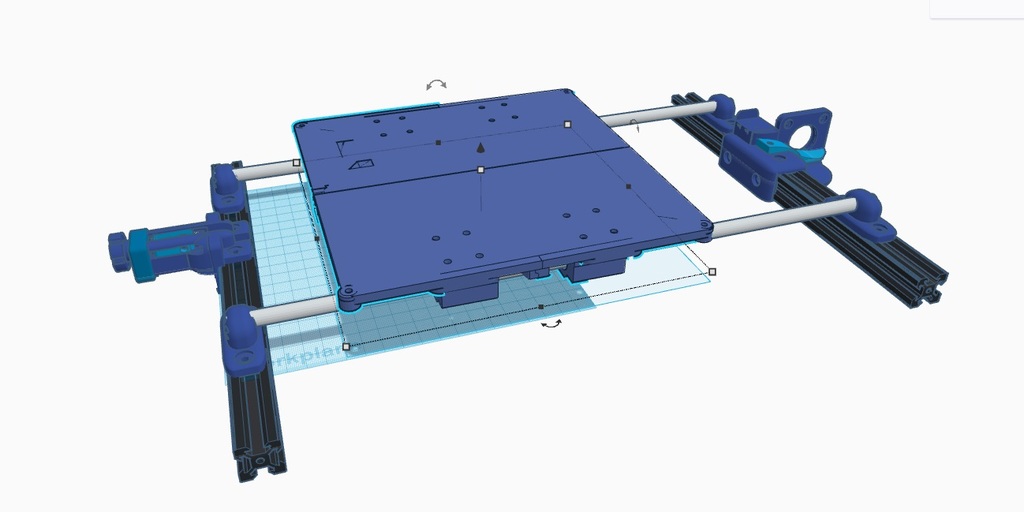
This design leverages the factory Tronxy X3 heated bed (240 x 240) paired with a bolt pattern of 211 x 208, and I anticipate it would function similarly for any 240 x 240 heated bed featuring a 2020 frame. Some images display an older iteration, which I will update shortly. I decided to upgrade my Tronxy X3 to linear rails and utilize SC8UU bearings, necessitating the retention of the acrylic piece attached to the heated bed. I dislike acrylic on my printer due to its propensity for warping. Thus, I designed this setup to be utilized... You must remove the factory 2020 rail to proceed. The files now include all necessary parts for installing linear rails; you will need only the 8mm rails and 4 SC8UU bearings. Next, move the factory belt pulley over to this setup using an M5 bolt and nut. This setup employs 15 T nuts and bolts. Factory motor bolts might suffice (though I'm uncertain), as well as the factory limit switch and its screws and nuts. Then, utilize the motor mount included in the files, accompanied by an M2 bolt to secure the motor mount slide in place or consider gluing it. The motor mount would be better printed with supports for optimal results. This setup incorporates a designated spot for the end stop switch if you opt for the Y motor mount linked above. To assemble this design, print 2 of each part: front and rear rail mounts, bed mount side 1, and bed mount side 2. You will only need one of each remaining part... The belt tensioner setup can be a bit tricky to print, so I recommend printing it with supports and at a slower pace. This design accommodates (2) 8mm rails and (4) SC8UU bearings. It utilizes * M2 bolts for assembly; however, I suggest gluing the parts together first before securing them with bolts until the glue dries. UPDATE: On September 22, 2017, I printed this setup and discovered flex in the top plate piece, prompting me to increase its thickness and add a reinforcing brace across the weak spot. UPDATE: On September 23, 2017, I designed and added my own version of a motor mount with a limit switch mount. Additionally, I created the belt tensioner for this setup. UPDATE: On September 25, 2017, I encountered issues with the Y belt tension setup, prompting me to redesign it. The new design is complete, uploaded, and printing. UPDATE: On September 26, 2017, I decided to create a full 3D model of the Tronxy X3 and its components, which revealed that longer thumb screws would be necessary for optimal results. Consequently, I designed some up and made them available as well; I recommend printing four to ensure each corner has one. UPDATE: On September 28, 2017, I finally installed these parts only to discover I didn't require the slide on the Y motor mount and a few minor adjustments were necessary for optimal performance. Furthermore, I found that the hot bed mount holes were misaligned, so I corrected them... Still working on fine-tuning the Y motor mount. The updated files are now available. UPDATE: On September 29, 2017, I removed the second extruder motor mount from this file to keep the file size manageable and will upload it separately.
With this file you will be able to print bed Linear Rail conversion (complete setup of all printed parts) with your 3D printer. Click on the button and save the file on your computer to work, edit or customize your design. You can also find more 3D designs for printers on bed Linear Rail conversion (complete setup of all printed parts).