Belt driven and feeding extruder
thingiverse
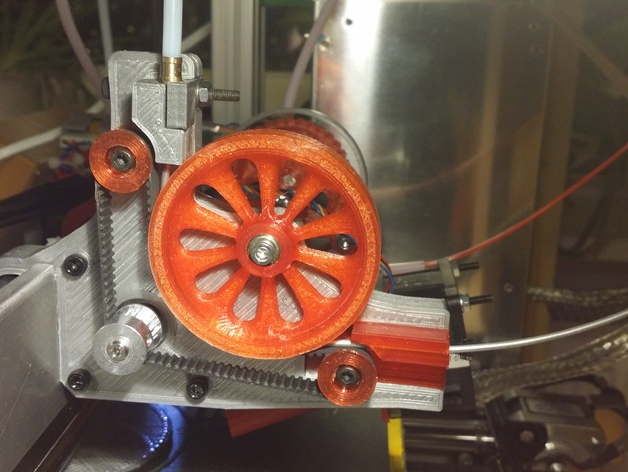
A belt driven feeding extruder for the reprap Ormerod. The grip with the belt is more than enough the torque provided by the stepper is on the low side. I use it with 1200 mAh and the original NEMA 17 stepper. UPDATE: Added a longer frame (Frame_Long.stl) to be used with longer belts. It should work with belts up to about ~245 mm. Note that a longer bolt may be needed. END OF UPDATE 7 printed parts 4 M3 35 mm bolts with washers and nuts 1 M3 40 mm partially threaded with washers and nut 3 M3 12 mm for mounting stepper motor 4 ball bearings (salvaged from PC cooling fans) Outer diam 8mm, inner 3 mm, 4 mm wide. 1 224 mm GT2 belt, 6 mm wide 1 16 teeth GT2 pulley Print Settings Printer Brand: RepRap Printer: Ormerod 2 Rafts: No Supports: No Resolution: .3 and .15 Infill: 20% Notes: The frame was printed with 3 perimeters and 20% infill to make it sturdy. 0.3 mm layer height. The rollers were printed at 0.15 mm layer height. They have an inner diameter of 8.3 mm which produces a snug fit for a 8 mm bearing on my printer. Scale + trial and error for the rollers to get a snug fit on your printer. I advice to test with the small roller since the big roller takes some time to print. All rollers need slow print speed and efficient cooling to print well. The parts probably needs to be rotated in your slicer software. The Bowden holder should be printed with the side facing towards he camera in the photo/video on the table. The tensioner should be printed standing up with the nut pocket upwards. Post-Printing Assembly Drill out all 3mm holes, drill the holes for the rollers carefulley or backwards to keep them as tight as possible. Preferably use a partly threaded bolt for the big roller to keep the play at a minimum. Press bearings into all rollers, on the big roller one bearing from each side. Note that the small rollers should be mounted with the print bed side towards the main frame. Otherwise they may roll of the bearings when the belt is under tension. Mount Stepper motor. Align and mount the rollers and pulley with the holes in the tensioner and bowden tube clamp using washers towards the frame. Mount the belt and add some tension. Insert the bowden tube holder from the roller side, put the bowen tube in place and clamp in place. Tension the belt until the tensioner piece aligns with the frame. Feed some filament ! (if the end of the filament has a sharp edge it ma catch on the bowden holder. Round the edges a little.with heat/file/knife.
With this file you will be able to print Belt driven and feeding extruder with your 3D printer. Click on the button and save the file on your computer to work, edit or customize your design. You can also find more 3D designs for printers on Belt driven and feeding extruder.