Bender Bending Rodríguez - Bendable!
prusaprinters
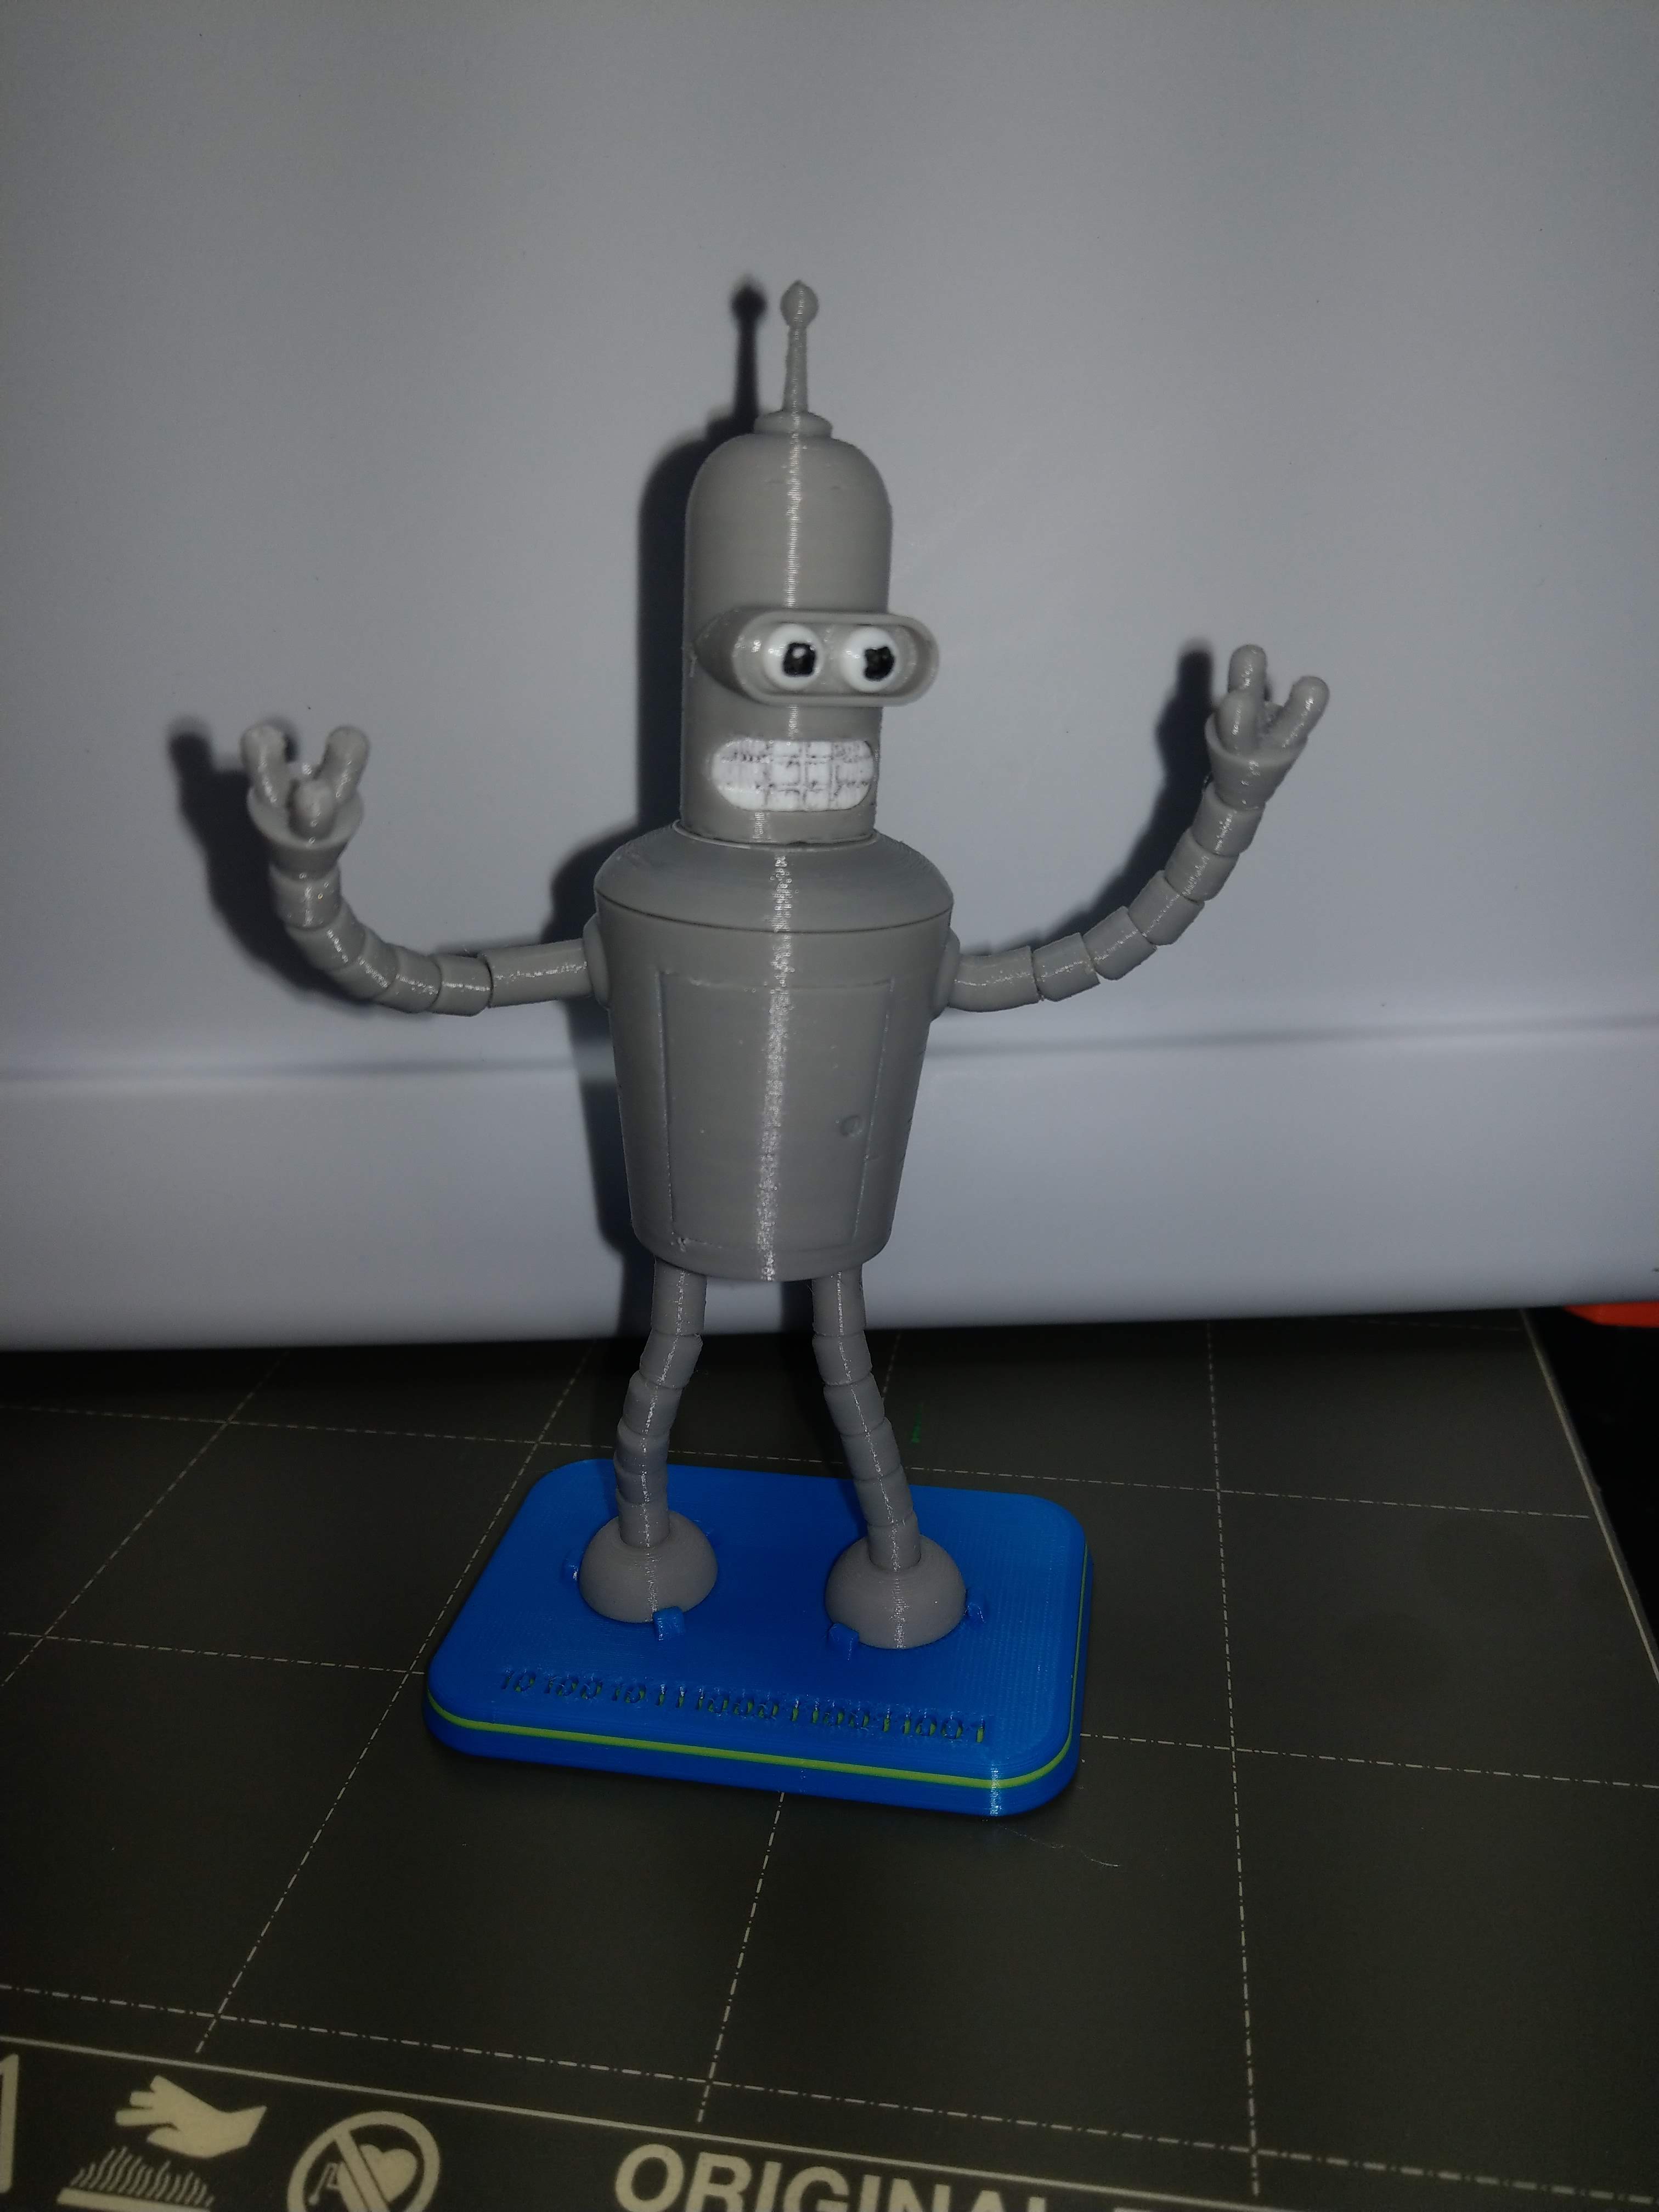
<p>Yes! It's yet another Bender from Futurama. This has been done numerous times before, but none of them were to my liking, so I created a completely new model. Bonus "blueprint" included!</p> <p>I also included a stand for the model. The model <em>will</em> stand on it's own, but it's rather top heavy so the stand clamps it in place for stable display. Features include:</p> <ul> <li>bendable arms and legs</li> <li>body door opens and closes</li> <li>head rotates</li> <li>classic Groening overbite</li> <li>extras! (stand and blueprint)</li> </ul> <p>This model has a lot of parts (16 types, 38 total) - they should all fit together with no glue required (but see special instructions for the arms and legs). Here are the parts (top down):</p> <ul> <li>Antenna</li> <li>Head</li> <li>Visor</li> <li>Eyes (2)</li> <li>Teeth</li> <li>Body, upper</li> <li>Body, lower</li> <li>Door</li> <li>Arm segment, shoulder (2)</li> <li>Arm segment, short (10)*</li> <li>Hand (2)</li> <li>Leg segment, hip (2)</li> <li>Leg segment, short (8)*</li> <li>Leg segment, ankle (2)</li> <li>Foot (2)</li> <li>Stand</li> <li><p>Also required : 22 gauge (0.6mm) brass wire</p> </li> <li><p>Short segments are identical, so 18 total required.</p> </li> </ul> <p>The OnShape 3D CAD files for this are available here:</p> <p><a href="https://cad.onshape.com/documents/c4be446ddef5aa9ade0accd4/w/ddf38391de5b789281e508af/e/a3a25bc03d62970508fef23d">https://cad.onshape.com/documents/c4be446ddef5aa9ade0accd4/w/ddf38391de5b789281e508af/e/a3a25bc03d62970508fef23d</a></p> <h3>Assembly</h3> <ol> <li><p>ARMS : (see photos) Take a piece of brass wire about 3 inches (75mm) long. Holding the wire with pliers, heat one end to red heat (I use a small butane torch), and insert the hot wire part way into the center of the back of the hand. Let the wire cool to lock it in place. String five of the shorter arm segments onto the wire - note that one end of the segment is rounded and one is concave; make sure the concave end mates with the hand. Next add the shoulder segment, again making sure to mate the concave end properly. Pull the brass wire tight, and cut it off with about 1/4" (7mm) protruding. Holding the end of the wire with needle nose pliers, and while pulling the segments tight and straight on the wire bend the wire around until the cut end meets the top of the last segment; this will hold the segments in place but still allow for some bending (see photo). Complete the second arm the same way.</p> </li> <li><p>LEGS : Assemble the leg segments in the same way as the arms, with these differences: Bend one end of the brass wire double for a length of about 1/8" (3mm). Heat this doubled end and insert it into the ankle segment (NOT the foot), and then add the remaining segments as with the arms. Complete the leg by inserting the ankle segment into the foot.</p> </li> <li><p>INSERT LEGS into lower body. Note that the "hip" segments have a slight bend - the bend should point forward. The ankle also has a very slight bend which should also bend towards the front. These two bends create a "knee bend" in the leg.</p> </li> <li><p>INSERT ARMS into the lower body. Note that the "shoulder" segments have a bend. You can rotate the shoulder segment to whatever position you like.</p> </li> <li><p>DOOR : Insert the door into the lower body opening sideways (see photos). Holding the door at an angle, insert the lower hinge pin into the hole, and then snap the door forward into place by pulling the upper hinge pin into its hole. The door should open and close when properly assembled.</p> </li> <li><p>HEAD/BODY : Do NOT yet add any of the head pieces. Insert the main head piece into the upper body first - it will be a tight fit but if you push and twist it should snap into place. Once in place it should rotate.</p> </li> <li><p>HEAD final assembly : Insert the teeth (you may want to color black lines first - once inserted it will not come out!). Insert the two eyes into the visor (you may want to paint the eye pupils black first). Insert the visor into the head - note the visor has up and down sides - just make sure they match the head contours. Insert the antenna.</p> </li> </ol> <p>Done!</p> <p>If you want to use the stand, the feet will snap tightly into the prongs on the top of the stand. I recommend using the stand for display. The holes in the stand allow for easy removal by pushing from the back with a pen or similar.</p> <h3>Print instructions</h3><p>I recommend printing all of the parts except the eyes and teeth in gray or silver PLA; print the eyes and teeth in white PLA. Choose any color(s) you like for the stand (can print single color or two color).</p> <p>Use the provided 3mf files. Otherwise, some suggestions:</p> <p>Antenna - print concentric with brim</p> <p>Head - print concentric with supports</p> <p>Visor - print concentric, face up, with brim</p> <p>Eyes (2) and Teeth - print together ("complete individual objects")</p> <p>Body, upper - print bottom down, concentric, with supports</p> <p>Body, lower - print top down, concentric, with brim</p> <p>Door - print top down with raft and brim</p> <ul> <li>Arm segment, shoulder (2)</li> <li>Arm segment, short (10)*</li> <li>Hand (2)</li> <li>Leg segment, hip (2)</li> <li>Leg segment, short (8)*</li> <li><p>Leg segment, ankle (2)</p> <p>All of the segments can be printed</p> <pre><code> - concentric - flat side down - no brim required - multiples with "complete individual objects" </code></pre> </li> </ul> <p>Foot (2) - print together, concentric ("complete individual objects")</p> <p>Stand - print single color, or print two color with filament switching</p>
With this file you will be able to print Bender Bending Rodríguez - Bendable! with your 3D printer. Click on the button and save the file on your computer to work, edit or customize your design. You can also find more 3D designs for printers on Bender Bending Rodríguez - Bendable!.