Best tektronix knob (probably) /ruedas tektronix
thingiverse
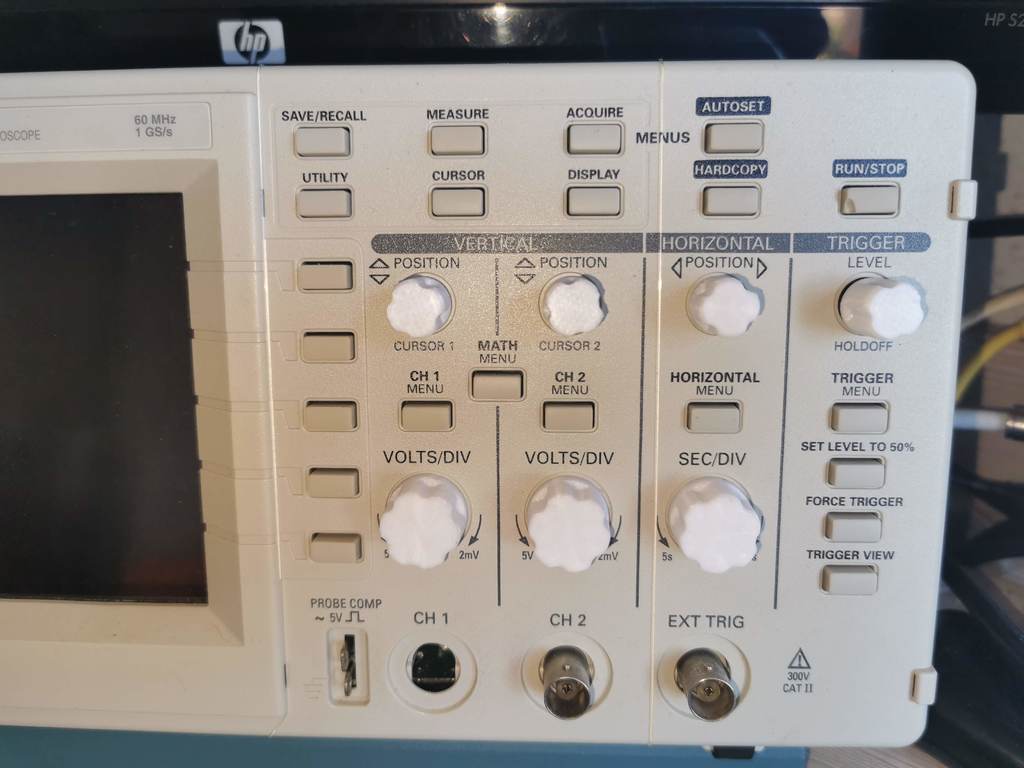
Probably the best knobs for tektronix oscilloscopes. IN this case, mine is the tds 210, but there are many compatible ones. There are already many models, but I didn't like any of them. They all had a big defect, they don't fit together. They stay loose, they fall off easily... Well, that's it. These fit snug, stay on well, don't fall out. Also, they leave no gap between the knob and the oscilloscope housing. Although in the photos you can see that the small ones are, it is already fixed in the model, only that I have not printed it again. In addition, I have also made the power button. This one also stays hooked, it doesn't fall off. In addition, to avoid incidents, I have put a little edge on it so that in case of handling it it does not fall inside. It already happened to me with one that I downloaded and printed, which didn't go right in and came out. Then, moving the oscilloscope, it came out and fell inside. With this, it is impossible for this to happen. I have printed it upside down are supports or anything. The knobs are also printed upside down, with the hole facing up, so we avoid having to put supports. It's funny how I got it. I am a student at a university where we use equals. Well, during an IEEE event, I went to another. In it, they had some of these. A teacher commented something about that with a surge in a device he had burned one. Before we left, I asked him about the burned one. We went to the technicians and found this half disassembled. It looked like junk, everything was horrible, the threads of the screws were broken, the front on one side, the handle on the other, the pcb for the buttons on the other... When I got home, with the idea that I wasn't going, I started to inspect it. The truth is that in the absence of an smd resistor (which I had because it was half loose and I kept it) everything seemed fine. Total, I connected everything and plugged it in. To my surprise it went perfectly, the only thing wrong with it was that the channel 1 bnc was missing (it seems to have broken, a common problem in this model) and they didn't know how to remove it to fix it. This is that the main board did not come out because they had not removed the expansion module. Now I'm waiting for the new aliexpress connector to arrive so I can put it on. To all this, the expansion module is cm, the one with the 3 different ports (serial, parallel and gpib) to connect a printer and take a screenshot. There is one, the mm that, in addition to this, does the fft and adds measurements. Well, it seems that it can be easily converted, you just have to change a ram chip for a bigger one and reprogram the eeprom of the module. I'm quite surprised that it's so easy, type you don't need any fpga or anything additional to do it, but it seems that if it is true that it works, so I will try it. To all this, when they gave it to me it did not have any knob or power button, so I had to do what I think are the best knobs and the best power button that there is to date to print. As always, I leave the fusion360 files so that anyone can easily modify them and be able to make a remix. Because if you only put the stl you will tell me how you are going to work it well to be able to make a remix, people who only put the stl make me very angry, that's why I put everything, so if you want to modify something, you can do it easily. Probablemente las mejores perillas para los osciloscopios tektronix. EN este caso, el mío concreto es el tds 210, pero hay muchos compatibles. Ya hay muchos modelos, pero ninguno me gustaba. Todos tenían un gran defecto, no encajan justas. Se quedan sueltas, se caen con facilidad… Pues se acabó. Estas encajan justas, se quedan bien enganchadas, no se caen. Además, no dejan espacio entre la perilla y la carcasa del osciloscopio. Aunque en las fotos se ve que las pequeñas si, ya está arreglado en el modelo, solo que no lo he vuelto a imprimir. Además, también he hecho el botón de encendido. Este también se queda enganchado, no se cae. Además, para evitar incidentes, le he puesto un bordecito para en caso de manipularlo no se caiga a dentro. Ya me pasó con uno que descargué e imprimí, que no entraba justo y se salía. Entonces, moviendo el osciloscopio, se salió y cayó dentro. Con este, es imposible que esto pase. Lo he impreso boca abajo son soportes ni nada. Las perillas también se imprimen boca abajo, con el agujero hacia arriba, así evitamos tener que poner soportes. Es curioso como lo conseguí. Soy estudiante de una universidad donde usamos unos iguales. Pues bien, durante un evento del IEEE, fui a otra. En ella, tenían algunos de estos. Un profesor comentó algo sobre que con una sobretensión en un aparato había quemado uno. Antes de irnos, yo le pregunté por el quemado. Fuimos a donde los técnicos y encontramos este medio desmontado. Estaba que parecía chatarra, todo fatal, las roscas de los tornillos rotas, el frontal por un lado, el asa por otra, la pcb de los botones por otro… Cuando llegué a casa, con la idea de que no iba, me puse a inspeccionarlo. La verdad es que a falta de una resistencia smd (la cual tenía porque estaba medio suelta y la guardé) todo parecía bien. Total, que lo conecté todo y lo enchufé. Para mi sorpresa iba perfectamente, lo único que tenia mal era que le faltaba el bnc del canal 1 (parece que se rompió, un problema habitual en este modelo) y no supieron como desmontarlo para poder arreglarlo. Esto es que la placa principal no salía porque no habían quitado el modulo de expansión. Ahora estoy esperando que me llegue el nuevo conector de aliexpress para ponerlo. A todo esto, el modulo de expansión es cm, el que tiene los 3 puertos diferentes (serie, paralelo y gpib) para conectar una impresora y sacar una captura de pantalla. Hay uno, el mm que además de esto hace la fft y añade medidas. Pues bien, parece que se puede convertir fácilmente, solo hay que cambiar un chip de ram por uno más grande y reprogramar la eeprom del módulo. Me extraña bastante que sea tan fácil, tipo no necesita ninguna fpga ni nada adicional para hacerla, pero parece que si es verdad que va, así que lo intentaré. A todo esto, cuando me lo dieron no tenia ninguna perilla ni el botón de encendido, de hay que hiciera lo que yo creo que son las mejores perillas y el mejor botón de encendido que hay hasta la fecha para imprimir. Como siempre, dejo los archivos de fusion360 para que cualquiera los pueda modificar fácilmente y poder hacer un remix. Porque si solo pones el stl ya me dirás tu como lo vas a trabajar bien para poder hacer un remix, me da mucha rabia la gente que solo pone el stl, por eso yo lo pongo todo, así si quieres modificar algo, podrás hacerlo fácilmente.
With this file you will be able to print Best tektronix knob (probably) /ruedas tektronix with your 3D printer. Click on the button and save the file on your computer to work, edit or customize your design. You can also find more 3D designs for printers on Best tektronix knob (probably) /ruedas tektronix.