Better Bed Mounting - Folger Tech Kossel revB
thingiverse
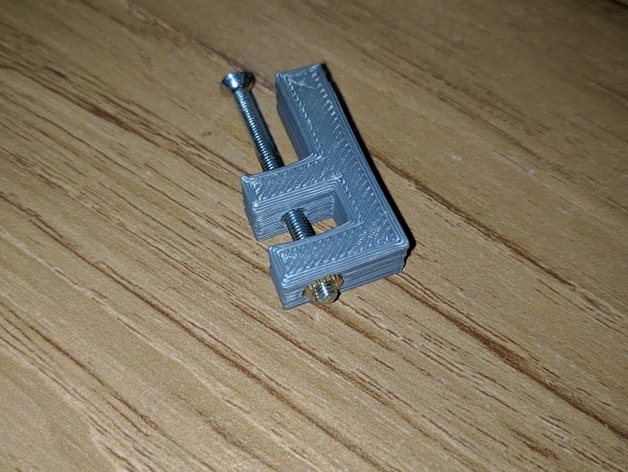
Edit 2016/08/07 - My new layer cooling has taught me the error of my ways. I've uploaded revised versions of the mount - one is 4.5mm and one is 6.5mm. That is height from below the heated bed, so the 4.5 is just about perfect for the bed and a thin cover (like a PEI sheet) and the 6.5 should be good for glass. I'm not making one for just the bed with no cover because first, you should just get some PEI because it's like printing onto a slurry of unicorn tears and pixie dust - that stuff is magical; and second, that extra 1 or 1.5mm is probably small enough to fit under whatever you have dangling off the side of your hotend. I had a problem where the heated bed would wiggle because the holes in the acrylic are cut too large for the M3 screws, and I couldn't use larger screws to better fit the mounting plates because the heated bed has only M3 holes. Additionally I hated trying to hold nuts under the bed, trying to keep them from falling if I needed to make an adjustment. My first versions had spacing to inset an M3 nylock nut, but then I found M3 brass knurled insert nuts, and I stopped improving the inset version. The ones I've uploaded here work great with nuts I got from Amazon (https://www.amazon.com/M3x5mm-Metric-Threaded-Insert-100pcs/dp/B00Y20YLKY/) and they completely fixed my problem of bed wiggle. One of the mounts I printed seems to have cracked at the top (2mm tab of plastic that fits over the acrylic), so I've created a new version with an integral spacer, which should help with structural integrity. Even with the crack (on one side of the screw hole) it still holds the bed entirely still, as two points and the upright arm are enough to keep it aligned - the top piece is just there to keep it in place when screwing it on (and extra alignment doesn't hurt). The part with the integral spacer doesn't need the acrylic disks to act as a standoff. Melt an M3 insert into the bottom (should be flush with the bottom), then the mount slides over the acrylic mounting plates. The notch is a little deeper for the acrylic than the bed because the acrylic sticks out a little farther. There is an upright piece to force alignment with the other points. This part is much taller than necessary in order to facilitate other bed surfaces, such as a glass pane, or un-taped PEI. If you print these solid, you can cut them down or leave them sticking up. Do not try making these from PLA - this part is in contact with the heated bed, and as such may have to deal with 110 degrees or more. ABS or better only - PETG would work. Nylon if you have replaced your hotend. The acrylic pieces slide between the two printed slats, with the flat side down. The bed (or bed and spacers) sit on top of the upper slat, with the upright section pressing against the edge of the bed. Depending on your printer (mine is printing a little bulky) you may need to do some filing to get the holes to line up. Tighter is better than loose though, as loose is the problem in the first place. After I'm happy with the melt in version I'll go back and work on the nylock nut version. Or sooner if there is interest. Leave me a comment if you really want the nylock version. Print Settings Printer: Folger Tech Kossel revB Rafts: Doesn't Matter Supports: No Resolution: 0.2mm Infill: 100% Notes: Doesn't necessarily need 100 percent, but it's such a small part, and you will be so sad if it breaks and you can't use your printer. You will need at least 3 of these (one for each mount point), and you should probably print a few extra just in case to keep in your emergency bits bin. It prints fine with no supports (the screw holes might get a little sloppy, but no so much that it's a problem), and the back piece is thick enough that even moderate warping won't keep these from working properly - so long as it curls from the bed in the first 10-15 layers, there is enough time for it to start printing flat again before it gets to the parts that need to be flat. I've been printing them on their back, but printing them on their side would probably improve the strength of the part at the expense of needing to be flat and warp free. Or do both. It's a nickel's worth of filament if you're using something like Hatchbox. Half that if you are using the surprisingly good Folger Tech ABS filament. Post-Printing Fine Tuning These are a tight fit for me. My printer is also not super dimensionally accurate (50mm comes out as 52ish). I needed to smooth the top inside of the part (where the mount touches the bottom of the acrylic) after inserting the knurled nut because it melt-squished the plastic up a little. I also needed to remove a little from the back in the acrylic space to get the holes to line up perfectly. I designed the part to center, and it seems like the bed aligns more toward the inside of the supports rather than the center. Nothing a minute with a file doesn't fix. And better to remove a little plastic than need to add a little, right?
With this file you will be able to print Better Bed Mounting - Folger Tech Kossel revB with your 3D printer. Click on the button and save the file on your computer to work, edit or customize your design. You can also find more 3D designs for printers on Better Bed Mounting - Folger Tech Kossel revB.