Beyblade Dual launcher Left and right spin.
thingiverse
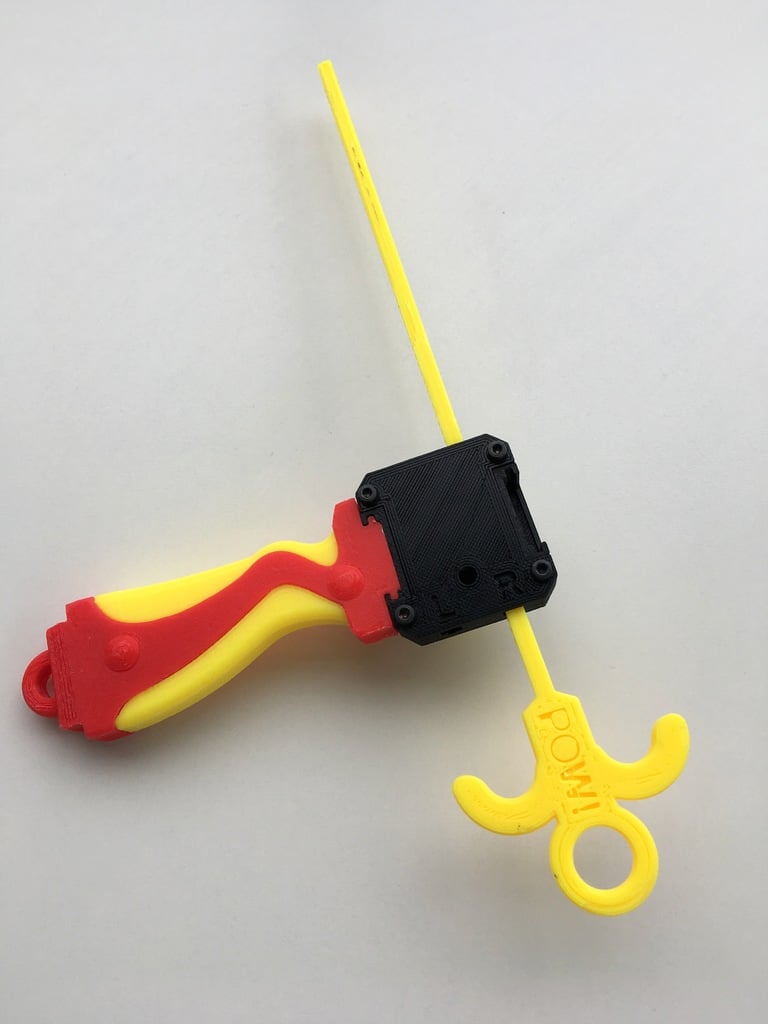
This thing came about as my kids kept on breaking the Beyblade rippers. Also the launchers (while strong) eventually failed. So I decided to have a go at making a viable fully 3D printed Beyblade launcher. The following is a result of my work. This is a dual launcher, you can Left and right spin your beyblade. The Beyblade contains a PLA spring that interacts with the main gear, this stops the spindle once the ripper has been pulled helping the Beyblade detach from the spindle. This launcher works with Hasbro Beyblade burst and Takara Tomy Burst Beys The ripper is a sword type design and it will NOT fit in any other Beyblade launcher. I have made mine in PLA and it has never broken, in-fact this exact launcher has been used over and over again (pulled at speed). DISCLAIMER: It's not indestructible! this is not injection molding. There will be wear and tear. What I call the flapper will wear down and become useless due to friction and the heat. however you can easily get at it and replace that part. I printed mine in ABS and that helps quite a lot. You may find some light grease may help prolong its life. However mine is standard with no lubrication. With KID testing a slight issue was found. You know the kids like to wind the Bey on the launcher making it click click click... well if you know what i mean then you will understand that there is a possibility that they could break the shaft off the spindle. I printed the top and bottom parts of the launcher in ABS this is to reduce the heat caused by friction. If you choose to make the entire launcher in PLA then use grease on moving parts or it will eventually weld together. The spindle, gear and spring I printed in PLA The Flapper was printed in ABS, this is to reduce the wear caused by the rippers friction. When I used PLA the ripper cut a groove in the flapper rather quickly. Other hardware: I used 4 x 3mm x 15 hex screws to join the top and bottom of the beyblade launcher. The holes should self tap but do NOT tighten too much or they will strip easy. Orientation: Bot.stl - Print as is with supports touching build plate only. (ABS) Top.stl - Flip it so the flat part is touching the build plate. No supports. (ABS) Flapper.stl - Print as is with supports touching build plate only. (ABS) Gear.stl - Print as is. I used supports touching build plate but you may get away with none. (PLA) Spring V2.stl - IMPORTANT You need to rotate this 90 deg so the two spikes (pillars) are facing upward. (PLA) Bearing.stl - Print as is. No supports (PLA) Spinner type A.stl - Print as is with supports touching build plate only. Maybe infill 98% (PLA) Spinner type B.stl - Is for metal fusion and is not tested. print as is with supports touching build plate only. (PLA) Ripper.stl - Print as is no supports. (PLA) Handle: Bung.stl - You will need 4 of these. - Print as is with supports touching build plate only. (PLA) Handle Top.stl - Print as is with supports touching build plate only. (PLA) Handle Bot.stl - Print as is with supports touching build plate only. (PLA) Handle (insert) - Print vertically with the two round parts facing upward. No supports. (PLA) Here is a quick video showing the launcher in action. https://youtu.be/dh5kGrni3n0 Put it together: Start with the bottom part of the launcher. Push the Spinner shaft through the hole from the bottom. Place the bearing over the shaft. Place the gear on top (look at photos to check the orientation) Push the PLA spring into the two holes (look at photos to check the orientation) The Spring should bow upwards not downwards. Then Insert the flapper. The pointy bit should be facing down. (Smooth side up) (look at photos to check the orientation) The pointy bit needs to slide under the gear! Place the top part of the launcher on top making sure the flapper stays in place. Now You may need to push the spinner in further (most likely). Place the launcher on a flat surface and press down on the inside of the spinner (do not put pressure on the parts that clip into the Beyblade or they may snap off). I found that the handle of a small screwdriver fits inside and then you can GENTLY tap the other end of the screwdriver to press that gear into place. I hope that helps.
With this file you will be able to print Beyblade Dual launcher Left and right spin. with your 3D printer. Click on the button and save the file on your computer to work, edit or customize your design. You can also find more 3D designs for printers on Beyblade Dual launcher Left and right spin..