BIBO Touch 2 3D Printer Flexion Bracket
thingiverse
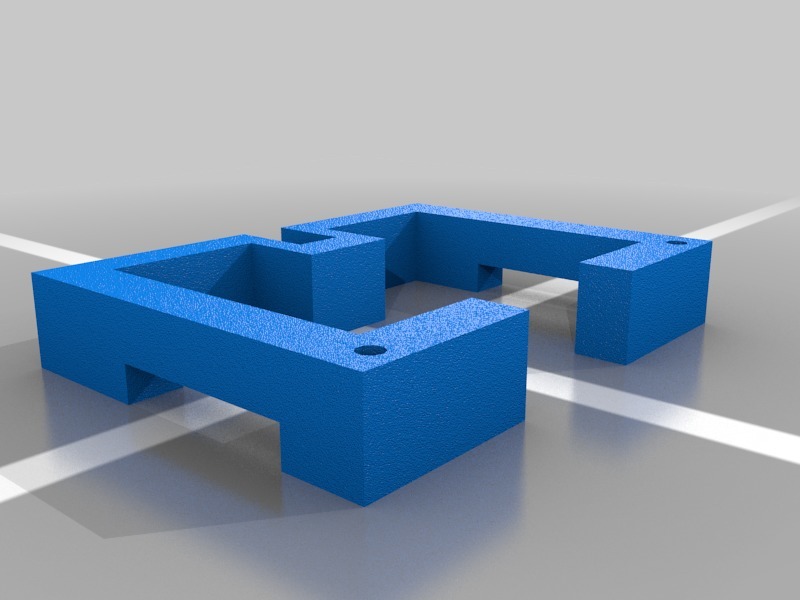
Installing a Flexion Extruder on the BIBO Touch 2 Dual Extruder 3D Printer requires some extra work but is not overly complicated. The materials needed for this modification come from the printer itself, except for electrical tape. - A 3D printed bracket - Two screws from the bottom electrical plate - Two white plastic spacers found on the screws above - Electrical tape It is essential to follow the instructions and use the electrical tape in the specified areas. I am not responsible for any damage caused by improper installation. If you carefully follow these steps, everything should work seamlessly. 1. The Flexion Extruder sits higher than the top of the extruder motor, so a spacer is needed between the motors and the top mount. Print the bracket with holes facing down to avoid supports. I used a 60% infill, three walls, and a 0.1200 layer height. 2. Unscrew the four screws on the top mount currently acting as spacers before installing the Flexion Extruder. 3. Follow the instructions provided by Flexion for installing the extruder with one adjustment. The hotend comes with a shorter PTFE tube inserted, causing the nozzle to sit too high and not reach the print bed. Remove this tube and use the longer one supplied in the kit (meant for the top). Push the hotend against the cooling block for a proper fit. Note where the end of the PTFE tube meets the extruder gear. Now push the hotend with the longer PTFE tube so that it is tight against the gears, and tighten the screw on the cooling block. 4. The BIBO 3D Printer hotends are not compatible with the Flexion cooling block. You will need to purchase a dual Flexion kit or a true mk10 hotend for the second extruder. 5. Once you have finished with Flexion’s instructions, place the bracket between the motors and top mount with screw holes facing up and to the front of the extruder. Screw the front screws directly into the new bracket. The original two screws that hold the top mount to the extruder assembly are not long enough. Use two of the four screws from the bottom plate under the 3D printer instead. Place one white spacer first for each screw (they are already on the two screws) and then thread the screws through the top mount and tighten them down. 6. Finally, the bed will not lower enough for the new nozzle height. Remove one spring and washer from each of the three leveling screws on the bed. Put electrical tape on the black bracket under the solder points of the wires for the heated bed so that they cannot come in contact with it. 7. You are now done.
With this file you will be able to print BIBO Touch 2 3D Printer Flexion Bracket with your 3D printer. Click on the button and save the file on your computer to work, edit or customize your design. You can also find more 3D designs for printers on BIBO Touch 2 3D Printer Flexion Bracket.