Bicycle Handlebar Lights
thingiverse
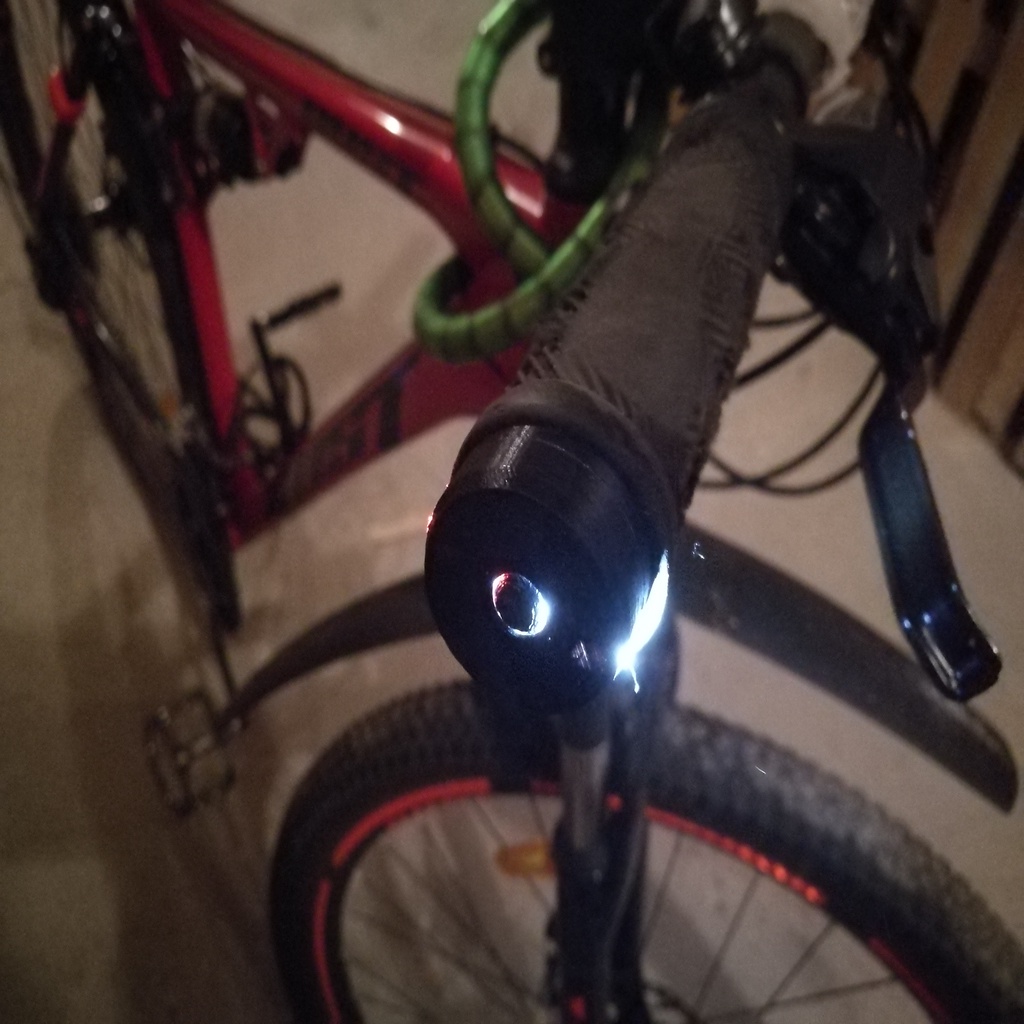
LED End Caps for Bicycle ==================== Get my Fusion 360 file for this model [here](https://a360.co/34zpLgy "Autodesk link"). I'm glad to see your makes! IDEA ---- ### Riding at Night Inspired a Bright Idea While riding my bicycle one night, I encountered some pedestrians in front of me. I sounded my bell to alert them, but unfortunately, someone still got hurt because he didn't notice my handlebar. This close call sparked an idea: why not add lights to the end of my handlebar so others can see me better? INSTRUCTIONS -------------- ### Step 1: Gather All Necessary Parts Get all the required parts! Switch (10 pieces) - http://ali.onl/1tWm LEDs (5 colors x 20 pieces) - http://ali.onl/1tWA 68R resistors (100 pieces) - http://ali.onl/1tWS  ### Step 2: Shorten Switch Pins and Remove Housing Take the self-locking switch, shorten its pins, and cut off the housing's pins. Trim about half of the pin length.  ### Step 3: Insert Switch into LedCaseCover.stl Part Insert the switch into the LedCaseCover.stl part. If it doesn't fit, trim some small edges to prevent it from falling out.  ### Step 4: Solder Wires to LEDs Solder wires to the LEDs.  ### Step 5: Close Up LedCase and Test Batteries Close up the LedCase using 2.6mm diameter x 5mm length (thread) screws. Insert two 1.5v batteries and test if everything works properly.  ### Step 6: Solder Cable to Switch Solder the cable to the middle pin of the switch.  ### Step 7: Insert Cable into Tube for Batteries Insert the cable into the hole on the tube for batteries.  ### Step 8: Assemble Cylindrical Part and Slide it into Long Tube Apply glue to the cylindrical part around the switch, then slide it into the long tube. Match the holes for the cable to prevent breakage.  ### Step 9: Wrap Cable Around Spring and Solder Wrap the cable around a spring, then solder it.  ### Step 10: Insert Spring into Hole on Printed Cover Insert the spring into the hole on the printed cover.  ### Step 11: Wrap Cable with Isolation Tape and Enjoy Your Creation Wrap the cable in isolation tape, making sure not to wrap too many layers. This will prevent a large diameter of the insert.   #20. Enjoy Your Creation and Ride Safe!  ##Sorry if I have mistakes or typos in my text!
With this file you will be able to print Bicycle Handlebar Lights with your 3D printer. Click on the button and save the file on your computer to work, edit or customize your design. You can also find more 3D designs for printers on Bicycle Handlebar Lights.