bicycle model
pinshape
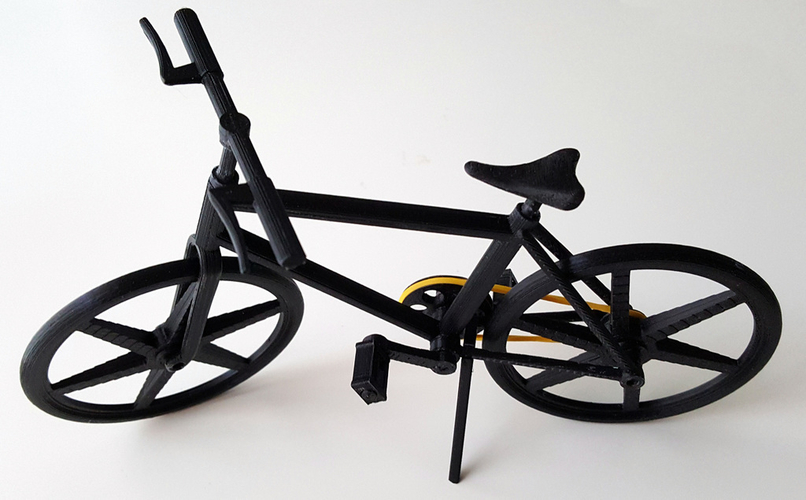
This small toy was my first attempt to design in FreeCAD a composed object that actually works as intended. You'll need to print (and clean and polish, sorry) 19 pieces that fit together perfectly when printed with your printer. Hopefully, yours will turn out better than mine did. With some sandpaper, assembly problems should be a thing of the past. Please note that I uploaded the "bike.stl" file to show you how the bike looks fully assembled, but it's not printable as is. In this version, I increased the gaps between parts to make them easier to assemble without post-processing work. Let me know if it's too much for you. Assembly is straightforward, and some exploded designs are uploaded to help explain the usage of small parts. I added a retention ring that needs to be glued onto the fork shaft (not shown in the pics but included in the files). Some good cyanoacrylate recommended - I used standard one only for wheel halves, but gel works better for the rest. The 20th piece is a small elastic band; see below for instructions. Print Settings Printer: Anycubic I3 Ultrabase Rafts: Yes Supports: Yes Resolution: 0.2mm Infill: 30% Notes: Important: some pieces need to be rotated before printing to make them lie flat on the printer bed - frame, fork, stand. Printed with Anycubic black PLA @205° bed @65° Platform adhesion type: brim (10 lines) needed for small parts and parts printed with support. Supports are necessary for frame, saddle, stem, crank arms. For supports, I used "lines," 15% fill amount, 0.7mm X/Y distance, 0.15mm Z distance, overhang 30° (maybe not the best but somehow working for me). Post-Printing A lot of post-printing work is needed, I'm afraid. Because of the supports, a lot of patience is required to clean up the pieces after printing. Also, sanding is necessary for parts that were designed to fit together but won't after being printed. A good set of small files or rasps is recommended. Some good drill bits (used by hand on PLA!) also help in rectifying holes. Last: the chain is an elastic band stolen from my wife's desk. Unfortunately, even if it's the right size, it can't be mounted as is because of the frame printed in one piece. Solution: cut diagonally the band, insert it into the frame, and glue with a good cyanoacrylate gel. Double-check the position before gluing! How I Designed This I used FreeCAD 0.16 and Cura - 15.04.6 to design this software.
With this file you will be able to print bicycle model with your 3D printer. Click on the button and save the file on your computer to work, edit or customize your design. You can also find more 3D designs for printers on bicycle model.