BIQU B1 Noctua hotend fan adapter
thingiverse
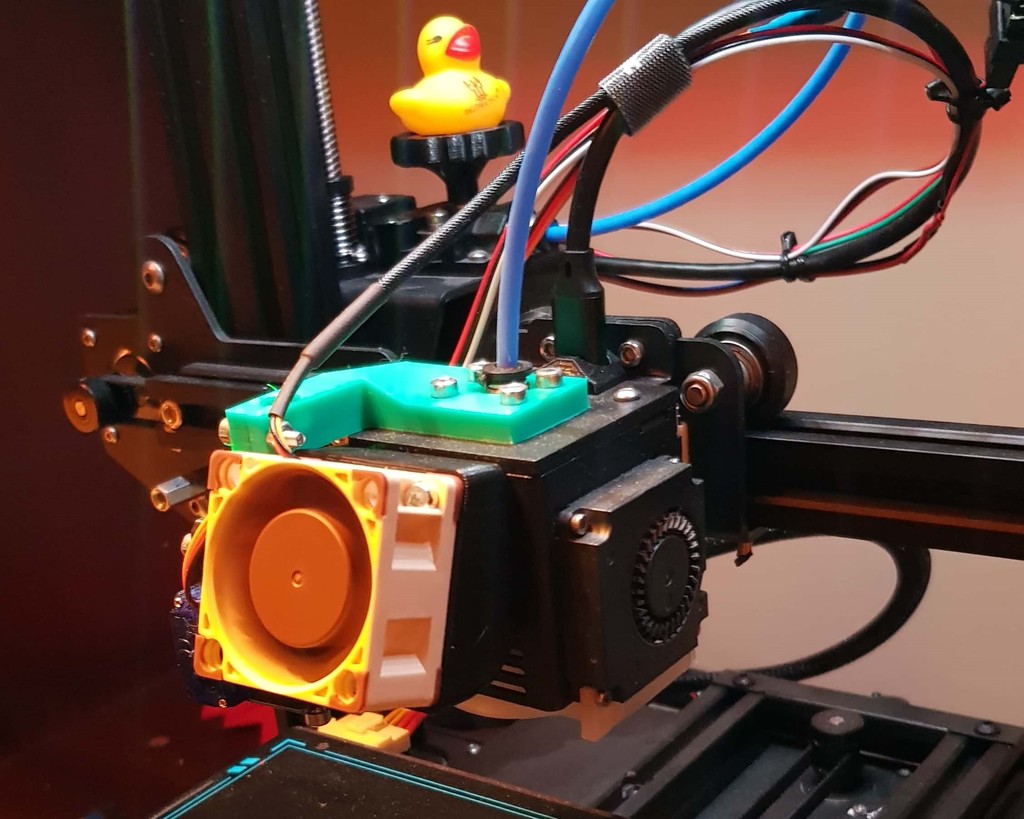
Noctua fan adapter made for BIQU B1. I was very annoyed because of the noisy hotend fan. I decided to replace a fan with a silent one. I've searched and downloaded many designs but none of them were having good air flow. So I decided to design my own and this is what I came up with. It's a bit bulky but it works, and I haven't had any clogs yet :) Needed items: Noctua fan 40mm (I used the A4x20 FLX version) Buck converter (LM2596 this one I used) Some extention wires 4x M3x20mm screw (DIN 912) 4x M3x8mm screw (DIN 912) I recommend this screws, but you could probably use other screws, just make sure they are the same length as mentioned above. 1. Print the Noctua fan adapter 2. Print one of the fan adapter part (10->10mm, 10_1->10.1mm in height) I Printed the 10.1mm because my printer was off by 0.1mm at the time.. 3. Turn off the printer and let it cool.. 4. Disassemble the prinhead and remove the hotend fan. You can follow the guide of dissasemble of whole printhead by BIQU 3D Printer: https://www.youtube.com/watch?v=P82tzuR1YjY 5. When assembling the printhead back together insert fan adapter part where the hotend fan was. 6. When printhead is assembled, place the Noctua fan adapter where the hole for the hotend fan is and secure it with 4x M3x20mm screws. 7. Place the noctua fan on the Noctua adapter fan and secure it with 4x M3x8mm screws. When screwing in the holes do it slowly and carefully so that you don't damage the holes. 8. Open up 3D printer and find + - on the power supply. 9. Connect Buck converter to the power supply + - (watch buck converter symbols) 10. Carefully turn on 3d printer and set buck converter to 12V: (video how setting buck converter works: https://www.youtube.com/watch?v=QPntXt8Ea3s 11. Turn OFF the printer and after that take a connector with 2 wires which can be soldered from the box that came with Noctua fan. (you can also just solder the wires directly to noctua fan) 12. Then put this connector with 2 soldered wires together with noctua connector and connect the other side to the buck converter. *watch for + -" 13. If everything was done correctly you should have a working Noctua hotend fan :) Hope I wrote everything clearly enough. Have fun and happy silent printing :)
With this file you will be able to print BIQU B1 Noctua hotend fan adapter with your 3D printer. Click on the button and save the file on your computer to work, edit or customize your design. You can also find more 3D designs for printers on BIQU B1 Noctua hotend fan adapter.