BIQU H2 Carriage
prusaprinters
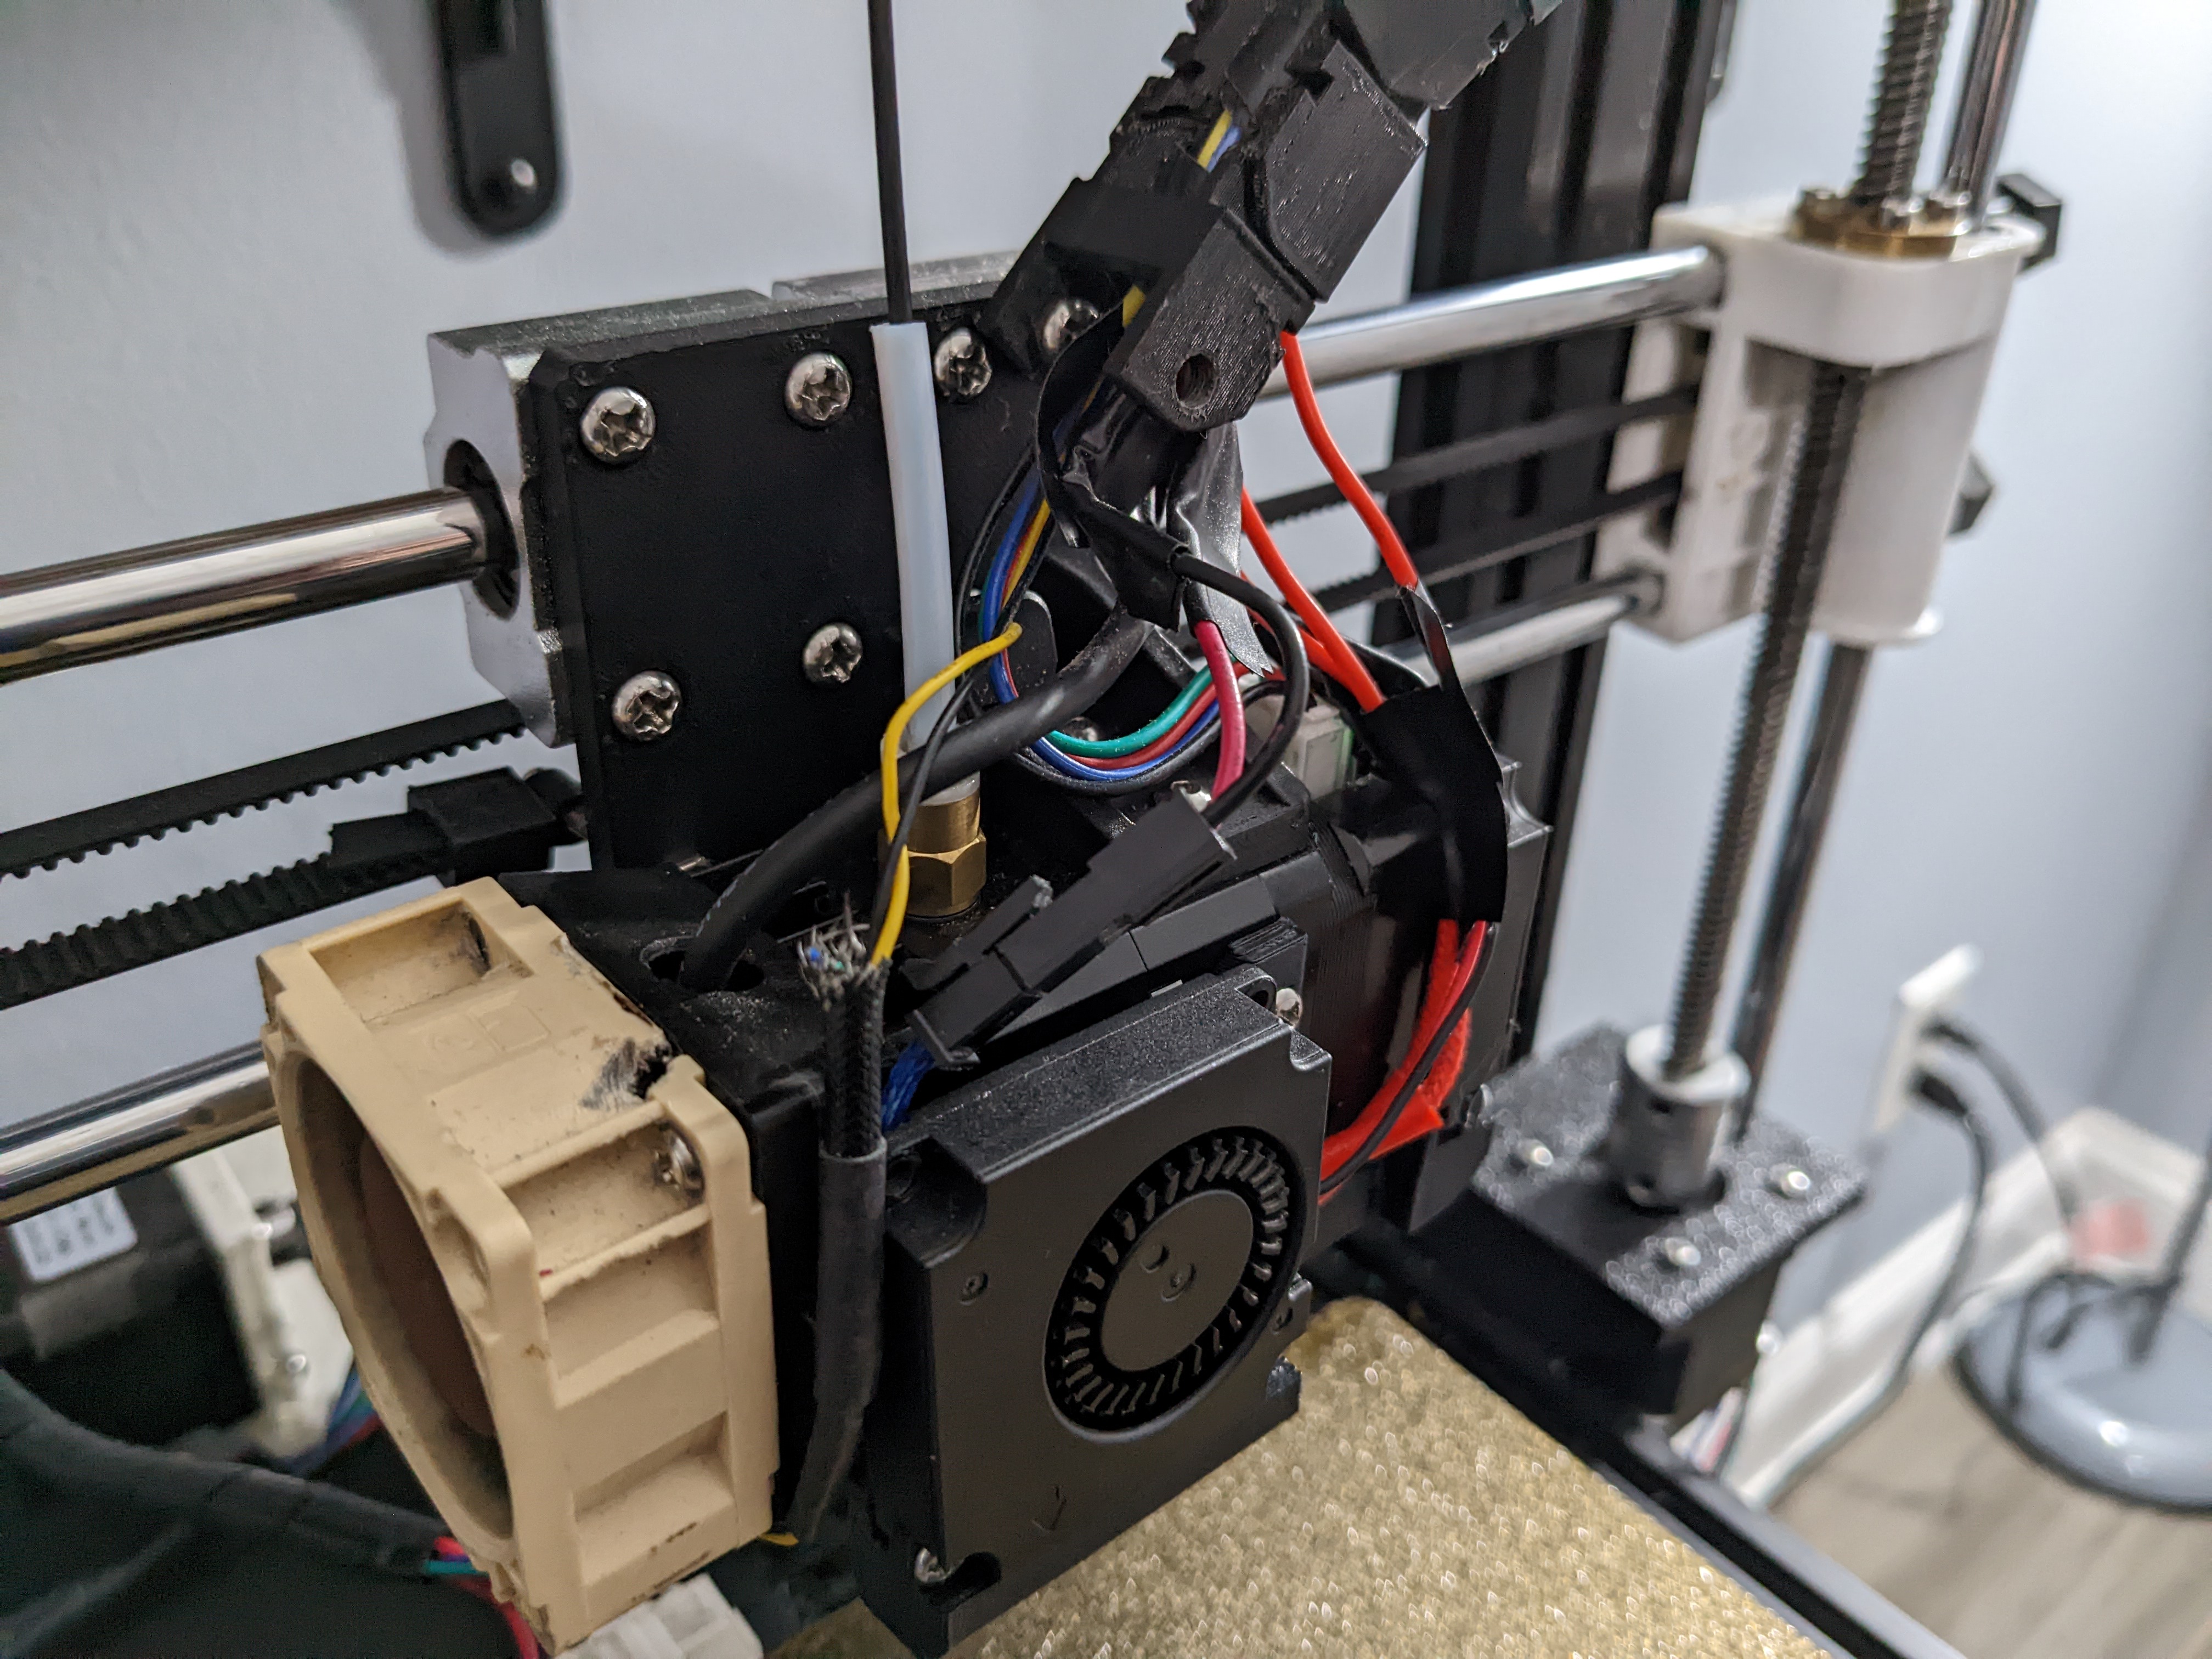
<p>This design is a major redesign of my original H2 carriage. I had remixed a design from @morganlowe, but assembly of it was too complex. So I searched around and found a one by @designsbydave. I downloaded it and added my own backplate I have designed, smoothing out the iffy details and adding some extra parts.</p><p>The goal for this carriage was to use a 4010 blower for part cooling, a SuperPINDA probe for ABL, and a 4020/10 fan for silent hotend cooling. Thankfully, I have accomplished each of these goals. Why all these components? In short, I have found them to be best out of all. I have gone through Ender 3 hotends, 2 E3D V6s, and now arrived at this H2 extruder, discovering the true value of a direct drive setup. The SuperPINDA has outperformed my BLTouch (BTW, now broken) on every occasion. Lastly, my 4010 blower fan has proven to be simply the best in terms of power. One 4010 is more quiet than my "silent" 5015s I used to use, and more powerful...</p><p> </p><p>EDIT (April 2022): some time ago, I got restless and decided to work on adding a second fan for this design. It took a little hard work and thinking, but I eventually custom designed my own duct to add to the right side. It doesn't cover any fans and doesn't interfere with travel limits (at least on my AM8 printer). New file has been added and new pictures of current setup to come very soon. As proof of quality, I can say without a doubt that this dual-duct design is much better; I've printed Benchy after Benchy, and this dual-duct system improved the overhang a lot...</p><p>EDIT (November 2022): it has recently become apparent to me that the main/front part fan may not be functioning to its highest capability with the design given initially. I have now made my own design for this fan duct, following after the secondary fan's design base. The new duct is practically the secondary fan, simply shortened to fit and with a different method for attaching to the extruder assembly. I've just finished the design and will test and upload within the month, along with pictures of the update to come later. In addition, I will also keep the previous duct on this site, just for anyone who wants to find out what their preference is. </p><p>EDIT (November 2022): the primary fan duct V2 design is being modified and new files will appear with corresponding version numbers as they are updated. I've now updated the file to V2.1; later updates will not make it onto the "EDIT" changelogs unless important enough to mention. </p><p> </p><p>NOTE: the two fan ducts included in this design now have their own design pages, allowing for users to find them easier if they don't want to use my carriage. <a href="https://www.printables.com/model/316867-biqu-h2-4010-fan-duct">Primary fan is here,</a> <a href="https://www.printables.com/model/316890-biqu-h2-4010-fan-duct-side-mount">secondary is here.</a></p><p> </p><p>For this, you will need:</p><ul><li>1x 4020/10 case fan</li><li>2x 4010 blower fan</li><li>An ample amount of filament</li><li>an H2 with 4 M3 screws for full mounting</li><li>12x M4 screws to attach to the bearing blocks</li><li>a SuperPINDA (or any 8mm inductive probe)</li></ul><p>Design Components:</p><ul><li>35mm - 40mm Fan Adapter.stl is the fan adapter and SuperPINDA mount. Prints in less than 1 hour, not majorly accuracy-dependant. Supports advised.</li><li>Carriage.stl is the backplate. Prints in less than 2 hours, relatively dependant on accuracy. Supports not required, bridging used a little.</li><li>Duct.stl is simply the duct for the 4010 blower (the front one). Prints in under 45 minutes, and relatively accuracy-dependant. If your printer tends to make models bulge a little, size down slightly. Note: print model as-is. Keep supports out of the inner-duct; bridging is highly depended on.</li><li>X Homing Bump.stl is for Anet A8 users who have sensorless homing via TMCs. This ensures that the 4020/10 fan does not hit the lead screw. Use only if you have: stock Anet A8 X axis, sensorless homing, and the 4020/10 fan and adapter installed. This is a quick 20-minute print; even a 0.25mm layer height would not hurt.<i>Make sure to change your home offset after installing!!</i></li><li>Second Fan.stl is the new fan duct for better cooling. Optional, but very helpful. Look down on the assembly instructions for info on how to put this on (it's a tad tricky). Prints in about 45 minutes at 0.2mm layer height. You'll need to align the bottom face of this to the plate in your slicer before printing, and there won't be any reason for supports. A good amount of bridging makes its way into this print, so you may need to tune up your settings.</li></ul><p>Extra Info:</p><ul><li>Probe offset is -21mm in X by my render, no offset in Y. Should work well.</li><li>You may need the extra homing bump for this design if you're running an Anet A8. I have attached it and explained in the above section.</li></ul><p>That should be it! Please feel free to comment or contact me with ANY questions; I love helping out a fellow 3D printing enthusiast when I can...</p><p>BTW, a big thanks goes to @designsbydave for supplying the mount essentials.</p><h3> </h3><h3>IMPORTANT Note: Assembly Order</h3><p>Make sure to tighten up the carriage base to the bearings first, then mount the H2 on it. To put in the SuperPINDA, take the fan adapter and twist the PINDA in, then just twist the adapter around it. The idea here is that you don't end up twisting your cables... You may then screw it in to the H2, followed by adding the 4020/10 fan. The rest you can figure out!</p><p>For the second fan duct, you'll have to cut specific length screws; I've designed this duct so that you screw it into the motor... take out the bottom two screws from the motor on the right, then grab some more M3 screws and cut them with about 2 more mm length than the ones that came out. The heads will sink just right so that they don't hit the fan (I made sure of that).</p><p> </p>
With this file you will be able to print BIQU H2 Carriage with your 3D printer. Click on the button and save the file on your computer to work, edit or customize your design. You can also find more 3D designs for printers on BIQU H2 Carriage.