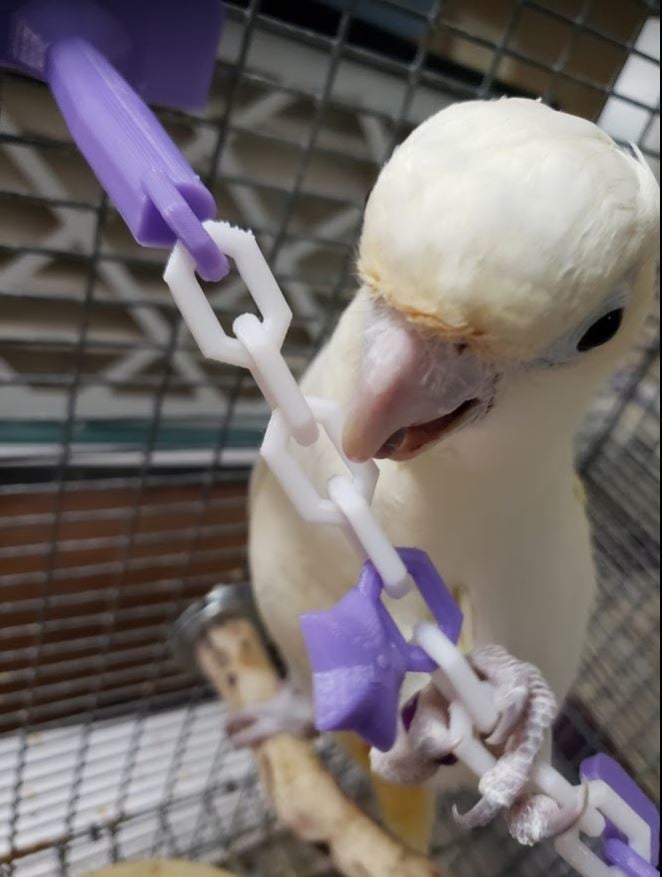
Bird toy: Chain, rattle, charms for 0.5, 1.0, and 2.0 in welded wire.
thingiverse
This model set has a short, and long (depends on your print bed size and bird size) rattle toy. To pop the rattle loose, stick a safety pin into the hole and sweep it sideways to pop the bead loose. There is a photo in the gallery of the rattle bead loose inside a translucent print. This model set is made to be printed solid, as there are built-in hollows on the toys, discussed later on. The base of each chain link is thin, so plan to print with some Elmer's purple glue stick and a brim. Some printers will create nubs when they make several walls around the chain link, consider having 2 wall layers to avoid creating a nubs that catches the printhead. If you cannot print the long chain, the short chain has a double side, non-symetrical chain base that may work for you. ! Prevent the mount clips from snapping off ! You need wall layers on the clips so they are made of long extrustions along the length of the clip. If you are not careful, you could make the clip out of zigzag fills that snap instead of bend. LOOK at the code preview and make sure there is substantial long layering along the length of the clips, or they will snap when you use them. To "break in" the plastic, pop the mounting plate on and off the perch a couple of times before putting it on the wire. ! There are hollows if you break apart for multi-color printing ! If you are printing multiple colors, there is a hollow built into the perch part. You will need to combine/align the hollow back into the perch if you break the model apaprt to assign colors to the different links, perch, and rattle. The tolerances are pretty tight, so use a medium or high detail setting for most FDM (like PLA or ABS material) printers. You may need to tweak the size % to get it to print right for you as it was exactly printed for my Raise3D E2's specs. Make sure to run a lighter along the underside of the perch when you are done, to adhere any long extruded dilaments that may not have completely joined. Long strings of filament can become foot tangle hazards or strangulation hazards. I washed the perches after printing them to remove any microdust plastic or glue left over from the printer. The 4/32 depth plates I've included will work for almost any 12 or 14 gauge welded wire mesh used for birdcage making, in inch sizes: 0.5 x 1.0; 1.0 x 1.0; 1.0 x 2; 1.0 x 3; 0.5 x 2; 0.5 x 3. I know this because I have tested it on about 10 different brands and sizes of wire. I have included a 5/32 depth plate as that can accommodate SOME lighter-duty 10 gauge wire meshes. If you have a very light duty wire, such a 16 gauge, you can shrink the perch and the mounting plate by a few percent to hug the wire. Don't only change the mounting plate, as the clips for the perch need to be shrunk to match! You can see that the plates are oriented for verticle or horizontal wire. The perch's pop-on and pop-off clip mechanism will work for any of the wire sizes I've listed above.
With this file you will be able to print Bird toy: Chain, rattle, charms for 0.5, 1.0, and 2.0 in welded wire. with your 3D printer. Click on the button and save the file on your computer to work, edit or customize your design. You can also find more 3D designs for printers on Bird toy: Chain, rattle, charms for 0.5, 1.0, and 2.0 in welded wire..