Black PSU lock for Prusa Printer Enclosure V2
prusaprinters
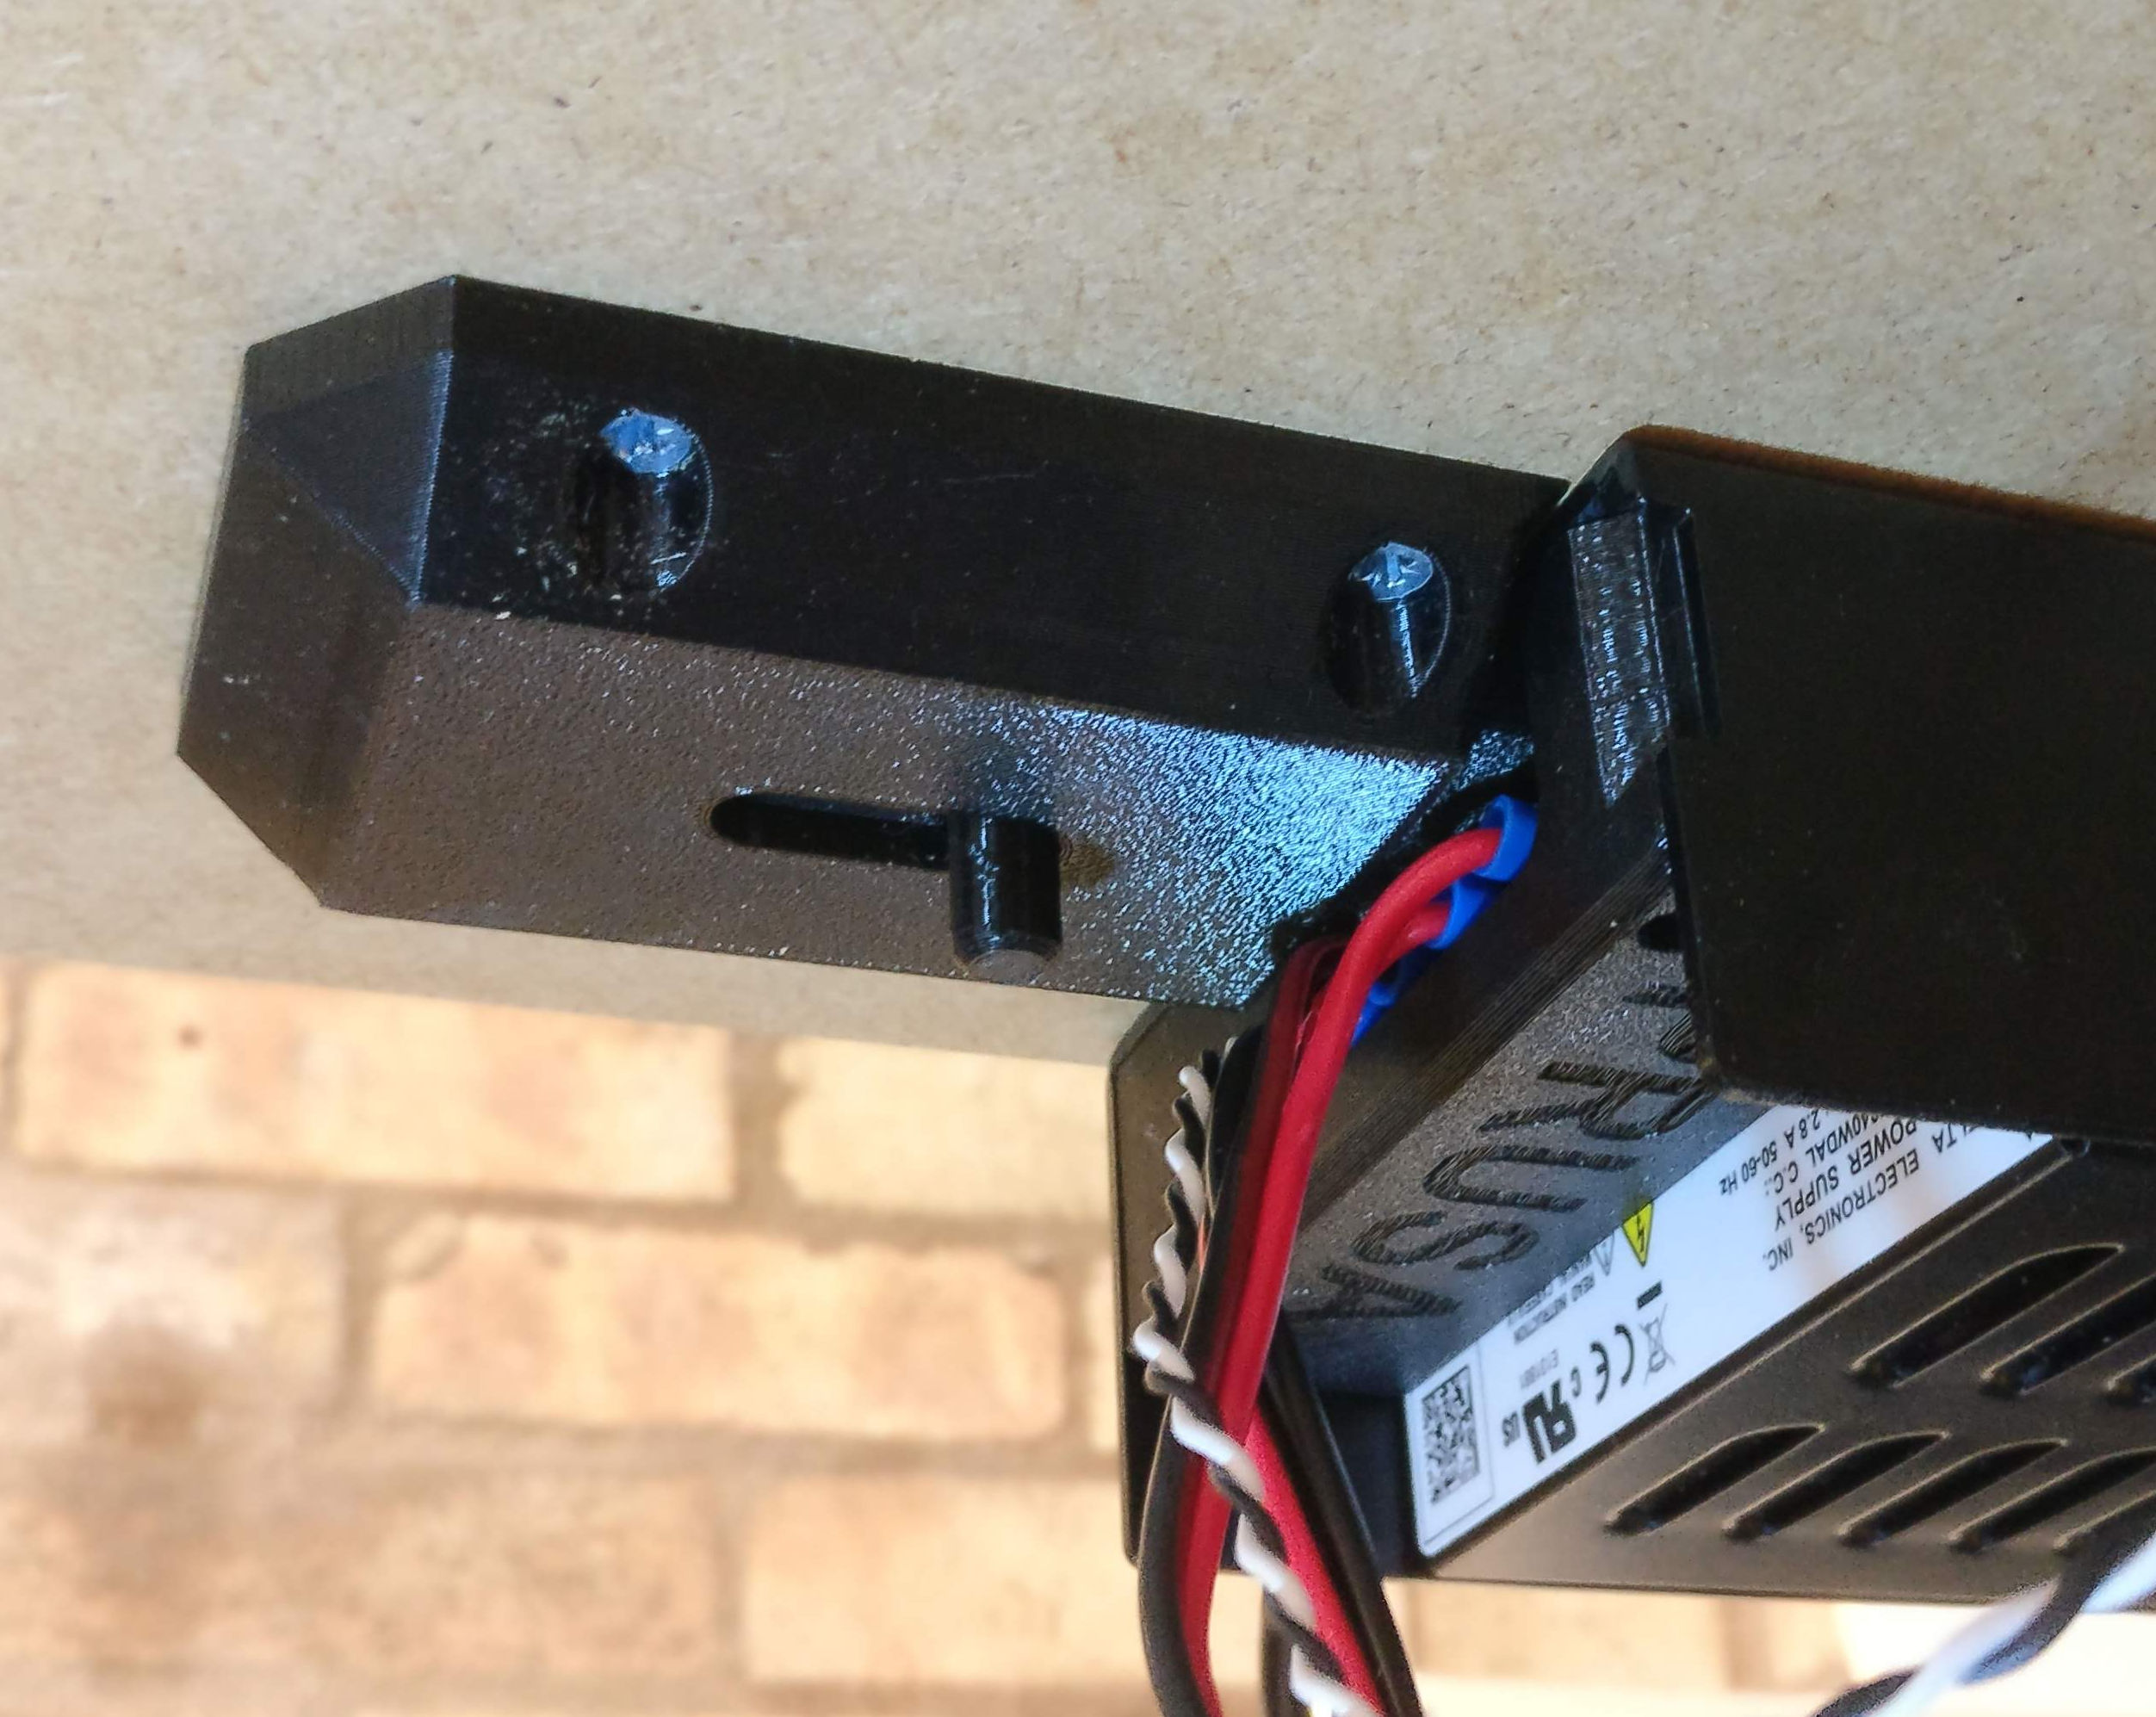
<p>This is a spring-loaded bolt that secures an externally-mounted Prusa i3 MK3S PSU (Black model) to the table and can be rapidly engaged and disengaged.</p> <p>It is intended as an add-on for the <a href="https://blog.prusaprinters.org/mmu2s-printer-enclosure/">Prusa Printer Enclosure V2</a> and replaces the single screw which takes time to remove and can damage the fibreboard with repeated operation.</p> <h3>Print instructions</h3><p><strong>Printing</strong></p> <p>Printed using Prusament PETG, 10% infill with supports enabled at enforcers only.</p> <p>After printing, carefully remove the support material from the lock body under the peg.</p> <p>In addition to the printed parts, you will need:</p> <p>4 x countersunk screws approximately 13mm (½") long by 7mm (¼") diameter<br/> 1 x spring approximately 5cm (2") length and between 5mm and 10mm diameter (⅕" to ⅖")</p> <p><strong>Assembly</strong></p> <p>Load the bolt into its slot in the lock body, ensuring the spring is in the bolt's hexagonal hole and over the peg on the lock body. The spring should naturally push the bolt out a bit beyond where the circular hole would line up with the slot in the lock body.</p> <p>Compress the bolt into the body until the circular hole through the bolt is in line with the slot in the body and you can see through the whole assembly.</p> <p>Insert the thin end of the handle into the bolt until the thick end is flush with the surface of the bolt, and the thin end fully protrudes out of the lock body.</p> <p>The spring should be strong enough to securely push the handle to the far extremity of the slot, while weak enough to be easily retractible to the other extremity of the slot by sliding the handle back.</p> <p><em>This step is made considerably easier with the printer disconnected and removed, and the table upside-down.</em> With the PSU located in the desired position against the PSU bracket on the enclosure, place the lock into position with the bolt's keying located in front of the electrical terminals. The bolt will fit through the hole in the PSU cover with the "PRUSA" logo on it and leave enough clearance below it for the electrical wiring.</p> <p>The two protruding prongs on the lock body should be close to the PSU without touching it; they ensure the PSU has enough clearance to swing down past the lock body when the bolt is retracted, but if the prongs are touching the PSU before you screw it down, they can nip the PSU tight when it is screwed down which makes the PSU difficult to remove and replace.</p> <p>Screw the lock into position. The PSU should be supported by hand before disengaging the lock as once disengaged the PSU should be free enough to fall out by itself.</p>
With this file you will be able to print Black PSU lock for Prusa Printer Enclosure V2 with your 3D printer. Click on the button and save the file on your computer to work, edit or customize your design. You can also find more 3D designs for printers on Black PSU lock for Prusa Printer Enclosure V2.