Bladeless fan (With Yaw)
thingiverse
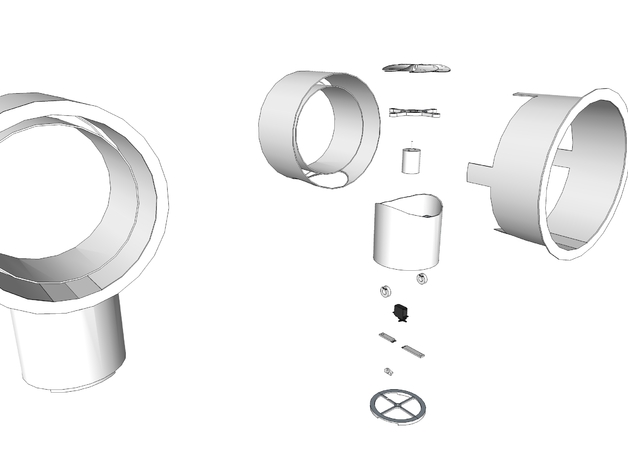
Edit: Added necessary parts for no YAW configuration. Updated base for no YAW configuration (3 Screw Halls). Bladeless fan with yaw provided as is, not tested for printing. Parts: Control circuitry (Arduino mini or Pro mini) with IR sensor or wifi or bluetooth for remote control (No buttons on the device). If you want to have Yaw control, otherwise just plug in power and it will turn on. Small DC motor 3. Small servo max height 17mm (Needed only if you want yaw) 2x 688-2rs ball bearings (Version with YAW) DC Power Jack (panel mount) 90mm Fan blade (Optional: 3D printable version available http://www.thingiverse.com/thing:966444 Screws and bolts Glue Resized version of the following blade is available. Post-printing instructions: 0a. Print all necessary parts. If you want to have YAW control, print the "Servo-mount(Version-with-YAW).stl". If you don't want YAW control, print the "No-Yaw-extra-parts.stl". 0b. Polish them (or not). With YAW: Take the DC motor and screw it to the motor mount. Take the servo and screw it to the servo mount. Take the servo assembly and screw it on the bottom side of the base housing facing down. Take the motor assembly and screw it on the top side of the base housing facing up. Take the fan blade and put it on the motor. Take the ball bearings and place them on the "safts" inside the base housing, using screws with a small flange to keep them in place. Take the DC jack printed part and glue it to the base (where there is a moon circle). Solder the wires to the DC jack and place it in the DC jack part. Take the base and screw it to the servo. Find the 2 extremes where the servo doesn't hit anything (or use limit switches). Place your control circuitry somewhere in the base housing, where you can reach it to program it in the future. Route the cables from the DC jack, servo, and DC motor to the control circuitry, making sure they don't interfere. Program your control circuitry and run a test. Glue the inner housing to the outer housing and then to the base housing. Without YAW: Take the DC motor and screw it to the motor mount. Take the motor assembly and screw it on the top side of the base housing facing up. Take the fan blade and put it on the motor. Take the no yaw extra parts and screw them to one side of the base housing. Take the ball bearing replacements from the extra parts and place them on the "safts" inside the base housing, using screws with a small flange to keep them in place. Take the DC jack printed part and glue it to the base (where there is a moon circle). Solder the wires to the DC jack and place it in the DC jack part. Take the base and screw it to the base housing and the long part of the extra parts. Place your control circuitry somewhere in the base housing, where you can reach it to program it in the future. Route the cables from the DC jack and DC motor to the control circuitry, making sure they don't interfere. Program your control circuitry and run a test. Glue the inner housing to the outer housing and then to the base housing.
With this file you will be able to print Bladeless fan (With Yaw) with your 3D printer. Click on the button and save the file on your computer to work, edit or customize your design. You can also find more 3D designs for printers on Bladeless fan (With Yaw).