Blastech A-180 with Working Trigger
thingiverse
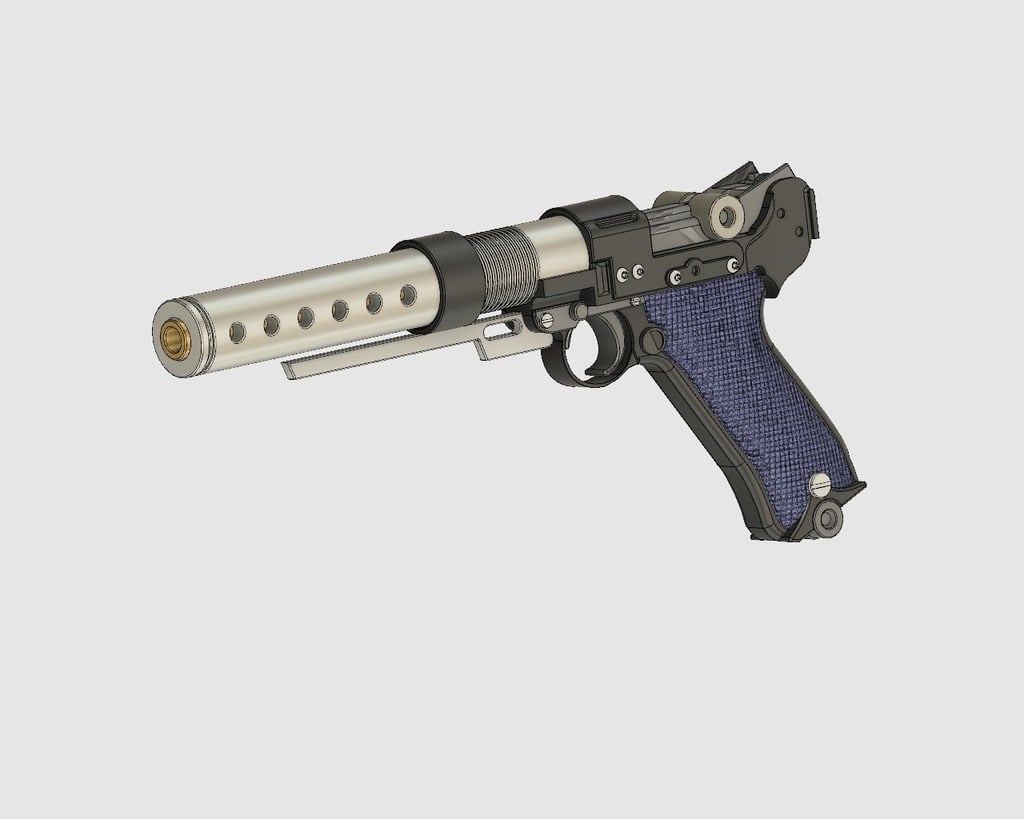
I was really let down by the other options for the A-180. So, I decided to create my own using 3D printing in mind and incorporating a fully functional trigger! To give it a more polished look, I wanted to include some parts that you can assemble after printing. It should be pretty clear where each piece goes based on their names. I've also included a few extra files to provide even more flexibility. I've included both a split and a complete version of the gun body, allowing you to print it all at once if you're feeling brave and have a good printer. Similarly, I've included models for both knurled and smooth handgrips - you'll only need one pair. I found that the knurling pattern can be quite challenging for most printers to produce, and the 3D printing process often leaves its own unique texture. However, if you're looking for authenticity, I've also included the knurled models. In the screenshot, you might notice a lot of screws - these are actual screws that you'll need to attach to the model to give it a more finished look. I found some really interesting-looking screws at Lowes that worked perfectly. The blaster is primarily held together with E6000 glue, but I did manage to salvage a spring from a ballpoint pen to use behind the trigger for an extra touch of realism. If you're not interested in going that route, you can simply glue the trigger in place instead. This model should be moderately challenging to print and assemble - if you enjoy it, please don't forget to like and leave some comments!
With this file you will be able to print Blastech A-180 with Working Trigger with your 3D printer. Click on the button and save the file on your computer to work, edit or customize your design. You can also find more 3D designs for printers on Blastech A-180 with Working Trigger.