Blinking Cat Glasses
prusaprinters
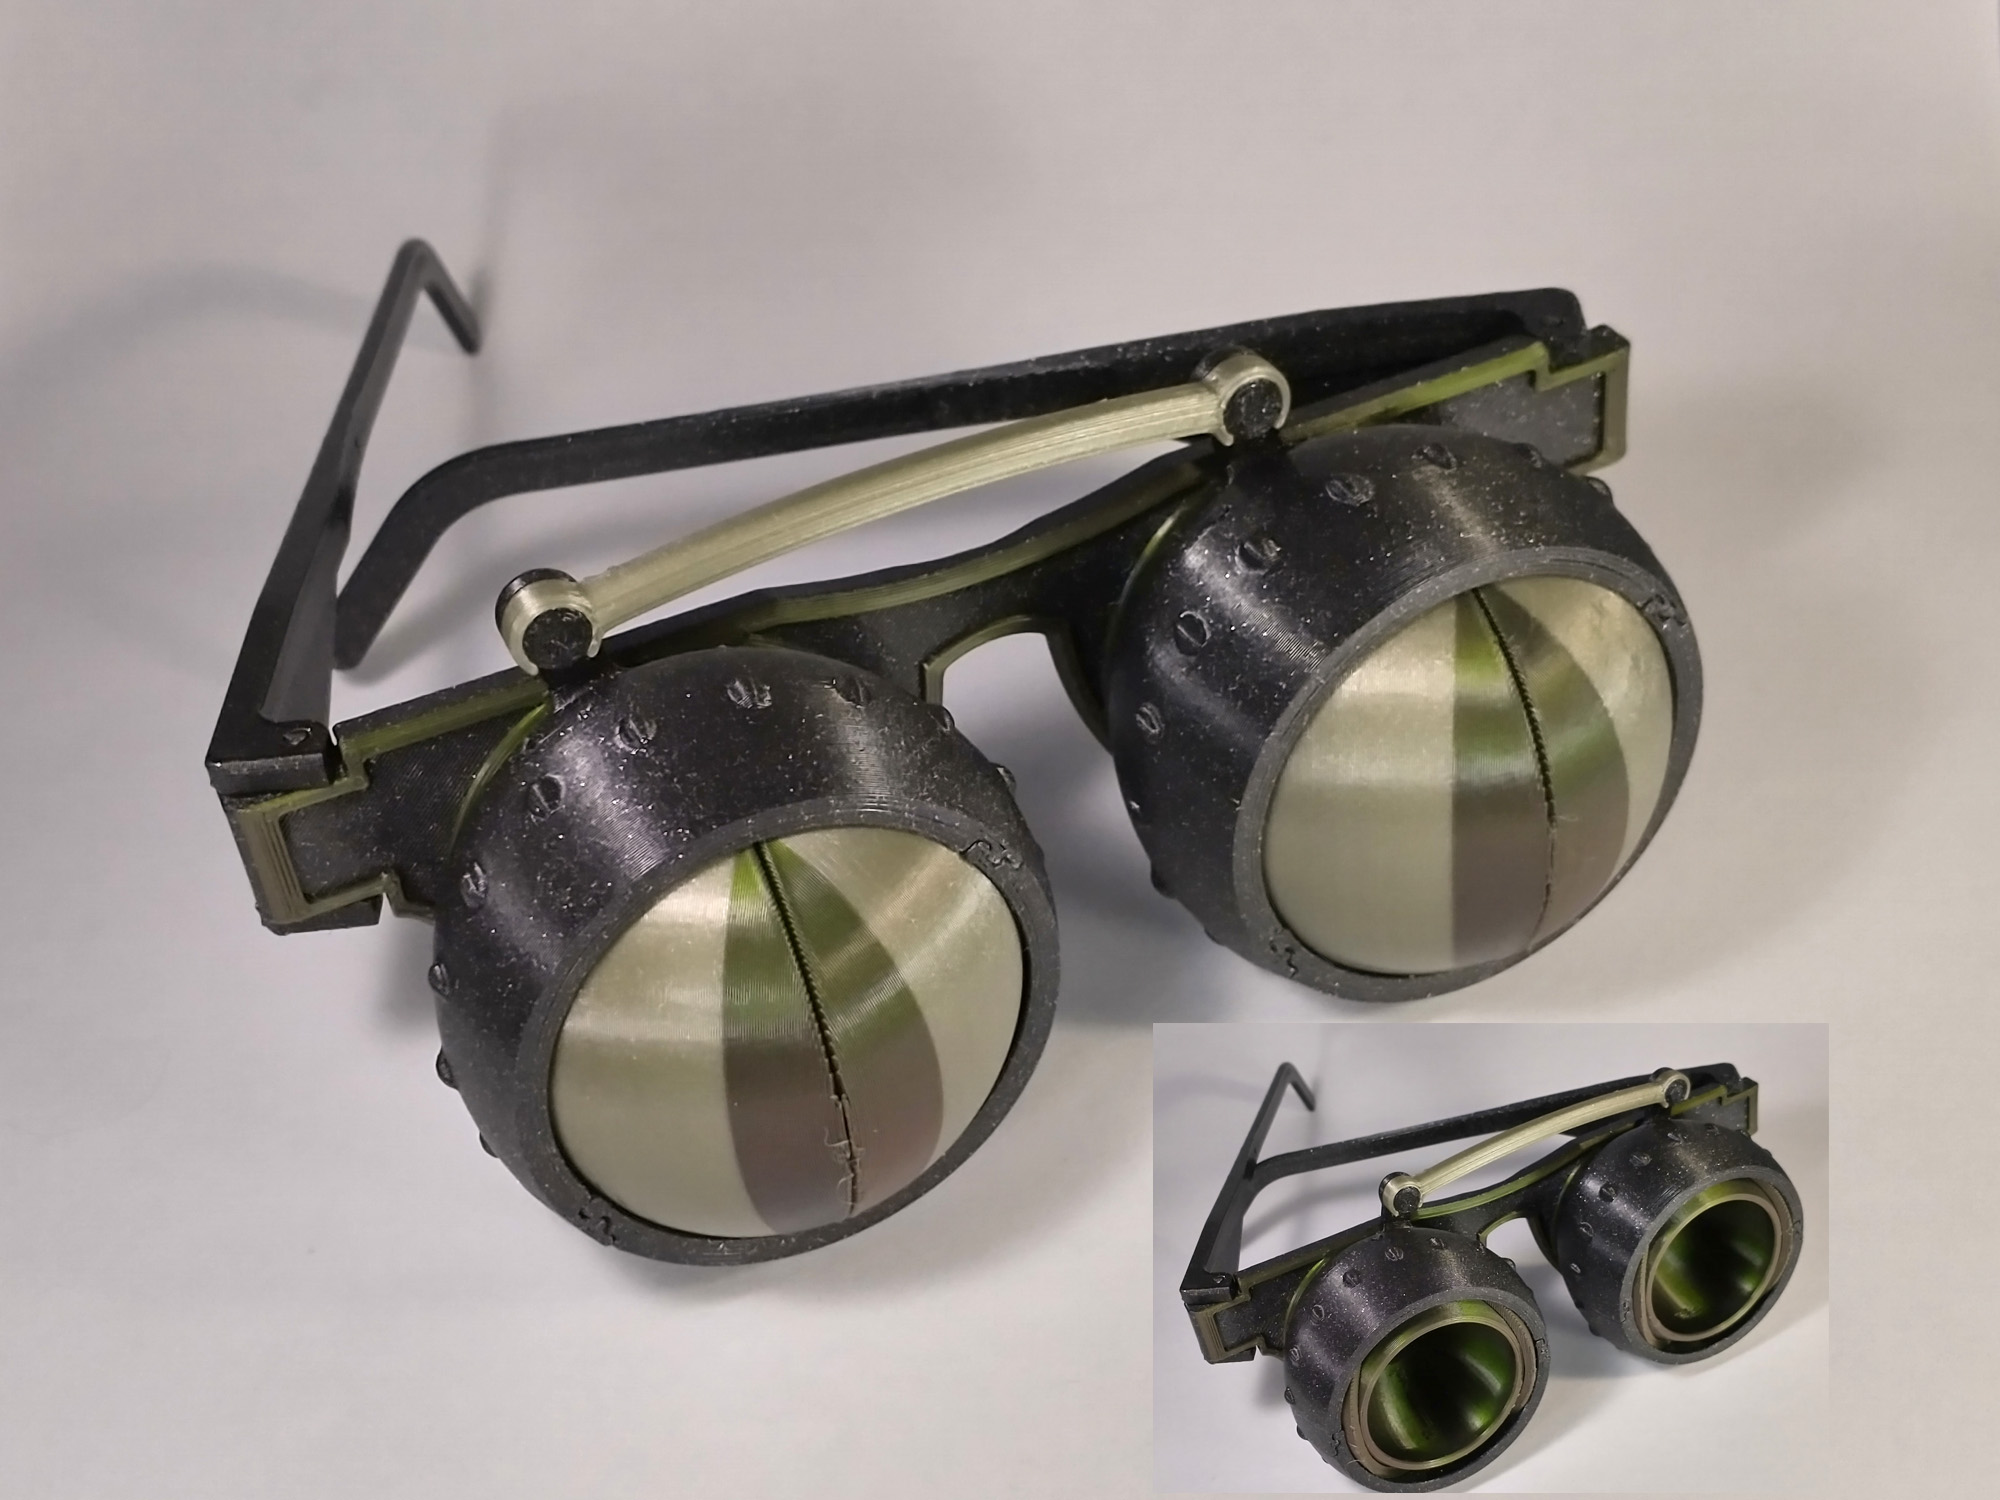
<figure class="image image-style-align-center image_resized" style="width:49.73%;"><img src="https://media.printables.com/media/prints/302389/rich_content/ede2af91-df7a-4322-bd04-fd6e3ff388d8/catblink.gif#%7B%22uuid%22%3A%22b02d5cbe-fd98-4a88-85c4-ee201a55e5ab%22%2C%22w%22%3A250%2C%22h%22%3A129%7D"></figure><p>Just in time for Halloween, fashionable eye-wear to go with that feline/reptile/alien costume. Or if you are lazy, just these and a pair of chinos. Just rotate the outer ring on either side to open and close both irises. Prints with no additional supports. All parts snap together with no glue or fasteners. And unlike those <a href="https://www.printables.com/model/132292-blinking-iris-goggles"><i>other</i></a><i> </i>fussy print-in-place iris boxes, these can be taken apart for mix-and-match color options.</p><p>Oh, and for anyone just looking for a fun iris box, I've posted this <a href="https://www.printables.com/model/302666-cats-eye-iris-box">stand-alone version</a>.</p><p><i>Update:</i> <a href="https://www.printables.com/social/20860-kelly-egan">Kelly Egan</a> has done a nice <a href="https://www.printables.com/model/306295-lid-with-small-hole-for-lobocnc-blinking-cat-glass">remix with holes in the pupils</a> so that you can still peek out when the iris is closed.</p><p><strong>Printing</strong><br>Print all parts with PLA and 0.2mm layer thickness. The models already include small built-in supports where needed (on the frame and lid parts) and small spot-brims where parts are inclined to lift (on the ring parts). Print 4 lid parts, 2 ring bottom parts, 2 ring top parts, 1 frame, 1 right ear and 1 left ear. (<i>Note: </i>to get the cool cat's eye effect, print the lids with a filament color change at a height of 21.5mm.)</p><p><i>Pro Printing Tip: When printing convex overhangs, the overhanging edge wants to warp upwards. The steepest overhangs in this model are the lower halves of the hemispherical pieces. To minimize warping, orient the hemispherical parts so that the fan is blowing onto the <strong>outside </strong>of the hemispheres. </i></p><p>The tolerances are pretty tight and all the parts need to operate smoothly, so make sure to clean up any nits or strings. Also, on the spherical surface (outside of the frame spheres, the inside of the lids and the inside of the ring halves), sand smooth any seams or over-extrusion at the edges with a small piece of sand paper. </p><p>Break away the small supports on the lid parts and on the sides of the frame spheres and clean up any nits on the underside where the supports attached. Also remove the tiny brims on the bottom of the ring pieces.</p><p><strong>Assembly</strong><br>First make sure that the holes in the sides of the lids fit over the pins on the side of the frame spheres. (Clean up the pins and the ID of the holes if necessary.) Next, slip the indented hole side of one lid over one pin and the indented hole side of the other lid over the opposing pin. It should look like the 6th photo above. You can then snap the other side of each lid over the other pin, as shown in the 7th photo. Both lids should pivot freely.</p><p>Next, cut off four 4mm long pieces of 1.75mm filament to act as actuator pins. Insert the pins in the small hole in the side of each ring part so that it is flush with the outer surface. The pin will protrude on the inside by 2mm as shown in the 8th photo. If the fit of the pins is not snug, you can gently squish one end of the pin with pliers to get a nice press fit in the hole.</p><p>For each iris: Hold both lids open all the way. Press the bottom ring part (the one without the little arm) over the lids so that the protruding pin fits into the slot in the lid on the bottom side of the iris. Take the top ring part (with the little arm) and place it on the opposite side and click the two halves together. If one or both pins push out, just push them back flush, and into the slots in the lids. With any luck, rotating the ring will push both lids open and closed together.</p><p>Once both irises are together, snap the coupler onto the two little control arms on the top of each iris, as shown in the 9th photo.</p><p>Finally, use another two short pieces of filament to act as hinge pins for the right and left ear pieces, as shown in the last photo.</p>
With this file you will be able to print Blinking Cat Glasses with your 3D printer. Click on the button and save the file on your computer to work, edit or customize your design. You can also find more 3D designs for printers on Blinking Cat Glasses.