Blok Bot
thingiverse
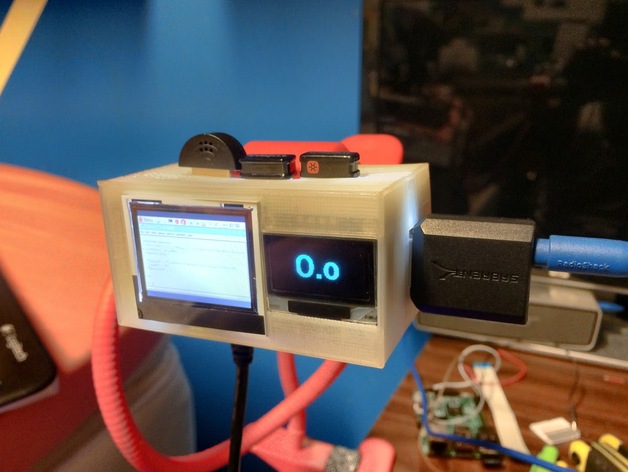
Shaped like a compact brick, the "Blok Bot" is the fundamental unit of bots. With the heart of a Raspberry Pi Zero, the Blok Bot can be programmed to be a loyal companion, assistant, teacher, listener, and more. You can program vision recognition, voice interactions, and responses to voice commands. IOT Robot that can be used for any project. Print Settings Printer: Flash Forge Creator Rafts: No Supports: No Resolution: .27 Infill: .10 Notes: The Resolution works well within the .20 to .27 range. Post-Printing Sanding + Xacto knife may be used. How I Designed This Designed using 123D SketchUp. The design was based on Polylines in combination with extrude function. Blok Bot Demo Here is a demo of BlokBot and MiniplanV5 Integration voice Recognition. Custom Section Project: BlokBot Pi Overview & Background: This project helps gain an understanding of designing a simple Blok Bot and learning how to program with different Speech API on the raspberry pi. Objectives: Let's use Sample.wav to test speaker alsamixer. Step 2: Press F6 to list all soundcards example │ │ │ │ │ │ │ │ │ ┌───── Sound Card ──────┐ │ │ │ │ │- (default) │ │ │ │ │ │0 bcm2835 ALSA │ │ │ │ │ │1 USB PnP Sound Device │ │ │ │▒▒│ │2 USB Audio Device │ │ │ │▒▒│ │ enter device name... │ │ │ │▒▒│ └───────────────────────┘ │ │ │▒▒│ │▒▒│ Based on the soundcard hardware selection aplay sample.wav -c2 -D hw:0,0 (Speaker) aplay sample.wav -c2 -D hw:1,0 aplay sample.wav -c2 -D hw:2,0 Step 3: Let's configure the Microphone arecord -d 2 -D plughw:1,0 -r 16000 -f S16_LE sample.wav (Tiny Microphone) Step 4: Once everything works let's install espeak sudo apt-get install espeak sudo apt-get install espeak python-espeak Step 5: In terminal type aplay -l to make a note on the USB audio device as the output Step 6: sudo nano /etc/asound.conf And set the code below for Espeak to work correctly. Save it defaults.ctl.card 2 defaults.pcm.card 2 defaults.timer.card 2 Alsamixer command helps for tuning sudo apt-get install libboost-regex1.49.0 sudo apt-get install git-core git clone git://github.com/StevenHickson/PiAUISuite.git cd PiAUISuite/Install/ ./InstallAUISuite.sh if you encounter "error while loading shared libraries: libboost_regex.so.1.49.0: cannot open shared object file: No such directory" sudo apt-get install libboost-regex1.49.0 Voicecommand -e Voice command setup config file To set up custom commands from words voicecommand -s There are two files included in the site, one is an .sh file and one is a python file. API used is Wit.Ai, you can use any API you want, I used Wit.API as an example. If you want to use Wit.Ai just change the token Key. Make sure both files have 777 permissions. Duration: 1 hour for printing. 1 hour for assembling and programming. Preparation: Rubric & Assessment: What implementations can the student add to further improve it? What did the student learn for building this? Any troubleshooting problems the student encounter? Handouts & Assets: https://www.raspberrypi.org/learning/getting-started-with-picamera/worksheet/
With this file you will be able to print Blok Bot with your 3D printer. Click on the button and save the file on your computer to work, edit or customize your design. You can also find more 3D designs for printers on Blok Bot.