Blue Snowball/Snowball iCE Shock Mount
thingiverse
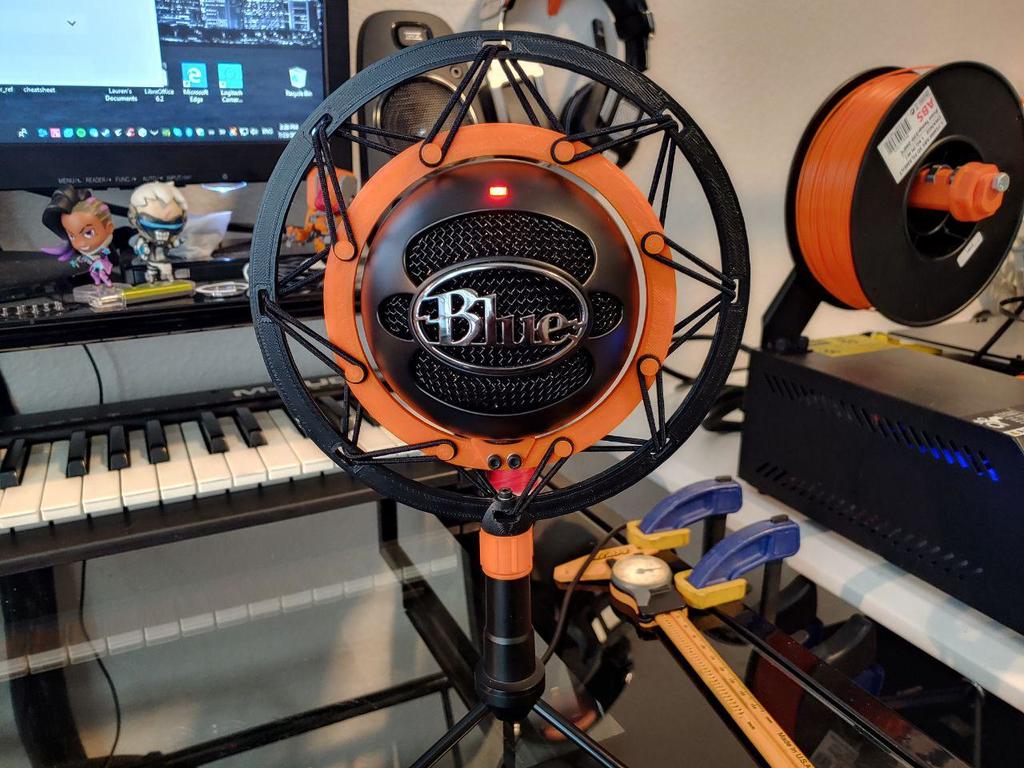
Update 08/02/2019 -------------------------- *The print I did of this has held up to testing extremely well, and is now mounted on a 20-dollar boom arm I picked up from Amazon -- HOWEVER, I wanted to let you guys know I'm working on a higher-resolution version of this. If you tried to print it, you may have noticed that the rings aren't perfectly round; that's because I designed this on TinkerCAD and the default 'cylinder primitive' has a maximum resolution of 32-64 divisions I think. I was able to find and modify a script to increase those divisions to 256-512 which should hopefully completely remove the visible lines on the rings. Will keep you posted* Foreword ------------- After looking through various other Shock Mounts for the **Blue Snowball** and **Blue Snowball iCE** here on Thingiverse, I decided to make one from scratch. Key differences from other mounts was the use of through-hole bolt-in mounts, a cord-clip, and precise thread printing for the 5/8-27 Microphone mount on the Blue Snowball and Blue Snowball iCE's OEM Stand. What you Need For this Mount ----------------------------------------- * Blue Snowball or Snowball iCE Microphone * Blue Snowball or Snowball iCE Microphone stand * Two (2) Prints of the Outer Rings * Two (2) Prints of the Inner Rings * One (1) Print of the Base Mount w/ Clip (See Notes) * One (1) Print of the Mic Mount (See Notes) * Eight (8) Elastic Hair Ties * One (1) m3-0.5 x 20mm Socket Cap Screw * Two (2) m3-0.5 x 16mm Socket Cap Screws * Three (3) m3-0.5 Nylon Lock Nuts * Five (5) M3 Washers * Gorilla Glue (for joining inner and outer ring) Recommended Materials ---------------------------------- ABS Filament Tough PLA* *I don't really recommend printing this in PLA. In testing, PLA sheared pretty easily under forceful 'shock testing' of the mount, particularly around the mic mount screw. If you do use PLA or Tough PLA, I highly recommend **Annealing**. Mic Mount Printing Note -------------------------------- Use a program like Cura 4.1 or similar to place *Support-blocks around the thread* of the Mic Mount part. This is the only part that needs to be printed with supports. I recommend 25% density Supports that **DO NOT** touch the 5/8-27 Thread, or it will not be usable. *If you find the thread feels a little 'too' loose, allowing the mic to turn freely under the tension of the cable, or similar, you can add some blue thread-locker. I left it able to 'spin' a bit to reposition the mic if needed. If that becomes problematic, let me know and I can update with a tighter Mic Mount Screw.* Base Mount Printing Note ----------------------------------- The Base mount will be a tight fit on the OEM Stand, that was intentional. Since you're screwing ABS onto Metal, go slow to make sure the thread lines up properly. The M3 inner anchor nut will be a tight fit too. Thread one of the smaller M3-0.5x16mm bolts in to 'sink it' into the plastic, once it's in there, it's ready to go. **I don't recommend trying to tap it in with a hammer.** Let me know if you have any questions!
With this file you will be able to print Blue Snowball/Snowball iCE Shock Mount with your 3D printer. Click on the button and save the file on your computer to work, edit or customize your design. You can also find more 3D designs for printers on Blue Snowball/Snowball iCE Shock Mount.