BLV Cube Tool Changer
thingiverse
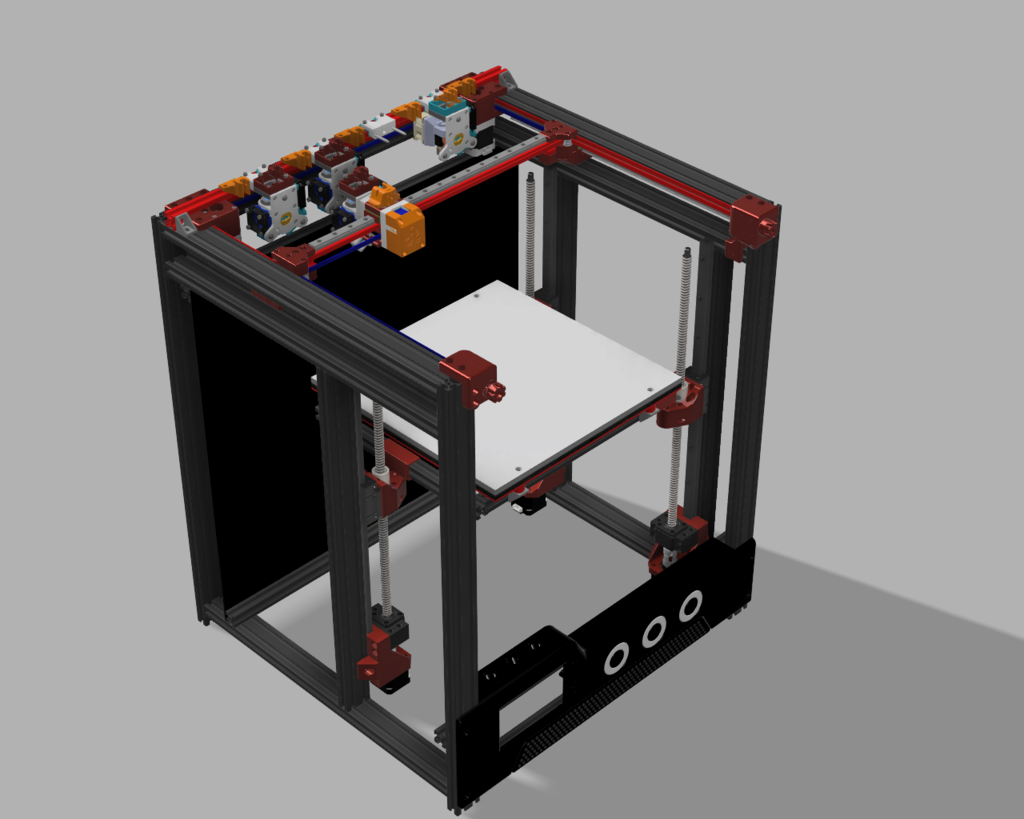
Converting the BLV Cube into a tool changer using E3D's motion system is not too difficul (but not so cheap). You will need: For the motion System: - 1x [ToolChanger ToolHead](https://e3d-online.com/products/toolchanger-toolhead) - 2-4x [Blank Tool Plate & Dock Kit](https://e3d-online.com/products/blank-tool-plate-dock-kit) - 2 [modified 2020 Alu Profile from Components Explorer Store, as seen in red in the rendering, 1 long extrusion for parking the tools, 1 shorter extrusion to replace X gantry](https://www.aliexpress.com/item/4000599661438.html?spm=2114.12010615.8148356.1.4b6e24daQ1yr9i) - 1x Duex5 expansion board for your duet wifi, or a Duet3 with its adaptor plates. - 2x [2020 aluminium corner bracket (should also come with the CNC extrusion kit](https://www.aliexpress.com/item/32804040333.html?spm=2114.12010615.8148356.15.32e073692Eqlm8) - Various screws, most of them you should already have from the BLV Cube. A bit special: to attach the Tool changer head to the MGN12 carriage, I used 4 long screws (M3x50mm) and 4 M3 hex standoffs (8mm heigh, should be in the E3D Toolhead kit) as fastener on the other side. For the Tools: Either buy a complete tool [from E3D](https://e3d-online.com/products/bowden-tools) or build your own. Some parts that I have used to build my NF Crazy Bowden tool: - 1-4x complete hotends with fans. e.g. [Print cooling fan](https://www.aliexpress.com/item/33025043602.html?spm=a2g0s.9042311.0.0.27424c4dtHgCQ9) and [hot end fan](https://www.aliexpress.com/item/32815685199.html?spm=a2g0s.9042311.0.0.27424c4dtHgCQ9) with the voltage you intend on using. - [10 meters of tubing to keep the cables clean](https://www.aliexpress.com/item/1005001349140769.html?spm=a2g0s.9042311.0.0.27424c4ddlKGv8) - 1-4x BMG Extruder drive, e.g. [trianglelabs](https://www.aliexpress.com/item/32917029058.html?spm=a2g0s.9042311.0.0.27424c4dcZLsYW) and a way to mount them to your back plate with the stepper motor of your choice. I used an aluminium back plate, into which I drilled some holes to mount the extruder assemblies. - 2 per tool: [M3x8mm screw](https://www.aliexpress.com/item/32910992506.html?spm=2114.12010615.8148356.13.85ac4a2eDYiwwL) to attach tool holders to extrusion (should also come with the CNC extrusion kit) and you will need to reprint all XY motion system parts, except the two belt tensioners in the front, to run the cables closer to the back of the frame to make space for the tools. Also, you will need a few screws that were not in the kit, but you can get locally once you need them. I've also used some M2 brass threaded inserts for the belt clamps at the tool head, and to attach the tool head cable holder. And some M3 inserts during the tool construction (e.g. to attach print cooling and hotend cooling fans). All the files can be viewed, downloaded and exported for printing [here](https://a360.co/39cFHJl) or as STEP from the files section. I am currently using the tool that's parked at dock number 4*. I've also made a video shortly after installing the first tool ([here](https://youtu.be/BGcpHbmMTmU)). Tool Head Assembly: I did assembly it a bit differently from the E3D instructions, since they used tapped metal parts and here, we use some printed parts. I've attached an image to make it a bit more clear. 1. Attach the MGN12 sled part on the sled 2. I attached the belts to the printed plates 3. Put the metal tool head plates over the 3d printed plates 4. Use 4 M3x50mm screws to go through everything (including the endstop holder for the bottom two screws). 5. Tighten the screws against M3x8mm Standoffs (supplied via E3D) on the front. Regarding firmware, I suggest you update to RRF3 on your Duet if you haven't already. Firmware files can be found from [E3D](https://github.com/e3donline/RepRapFirmware-SD) or [DC42](https://github.com/Duet3D/RRF-machine-config-files/tree/master/E3D_Tool_Changer/dc42-duet3-centreZero-2Titan-2Hemera) and are a good starting ground. *In case anyone is interested in building a Mosquito/NF Crazy bowden tool, the bowden adaptor I've used can be found [here, PC4-M6](https://www.aliexpress.com/item/4001021932385.html?spm=a2g0s.9042311.0.0.27424c4ddlKGv8) and I simply screwed it into the plastic above the hotend. If there is interest, I may make an instruction page for the tool itself, if the CAD files are not clear enough.
With this file you will be able to print BLV Cube Tool Changer with your 3D printer. Click on the button and save the file on your computer to work, edit or customize your design. You can also find more 3D designs for printers on BLV Cube Tool Changer.