BLV mgn Cube - version using Klipper & SKR PRO V1.1
thingiverse
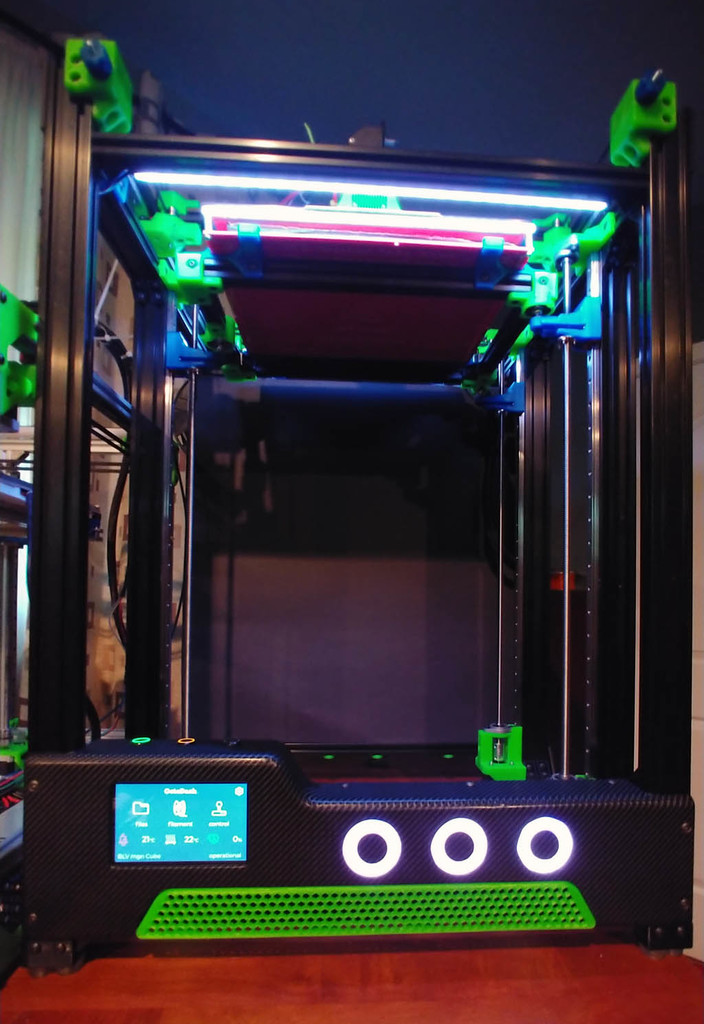
This is my remix of the BLV mgn Cube plus the triple Z axis running on Klipper with an SKR PRO V1.1 for the controller. The build volume is 320x320x565, but I lose a bit of the 565 due to the current Z axis configuration. There's still work to do as far as running the wiring from the carriage to the SKR and other places on the back, but it is running for now. One issue I had was installing the BLTouch and extending the wiring for it to 2 meters - I had to twist the wires to provide enough shielding for the signal, otherwise it wouldn't communicate properly. I may switch to a fully shielded extension to eliminate any issues as it's currently run out of the way of other powered items. The X-Carriage plates have been modified similar to how Ed did it on the BLV Hypercube fusion project - and I've included my STLs for those as well. This makes installing the belts simpler, as they do not need Ty-wraps on them - though it can be a bit fiddly to get them in place the first time, I use a small flat blade screwdriver to assist in the process. ### Electronics The controller is an SKR PRO V1.1 using TMC2225 drivers in UART mode for the X, Y (triple) Z & Extruder. Klipper runs on an RPi 4b along with Octoprint and an MQTT server - in order to drive the LED rings. ### Front Panel The 3 front panel buttons are all momentary type - monitored by an esp8266 - one per switch. The switches, from left to right, are on/off, lighting control and status rings on/off. The front panel was post processed by gluing it together into a single piece using an epoxy for plastics - along with some additional bracing. After gluing, it was filled & sanded prior to applying a carbon fiber look vinyl wrap. Custom lattice panels were designed that fit inside the 2020 extrusions - to act as wiring ducts for the additional wiring required due to the addition of the 3 esp8266 controllers - and also dress up the interior a bit. These panels are designed to snap into place - allowing easy removal for access if needed. #### On/Off Switch The on/off switch is multi-function with a 3 second press required to turn the printer on or off. Once the printer is on, a momentary press will send an Emergency Stop (via GPIO) to Octoprint. The esp8266 is powered by a 5V supply that's always on when the main power switch is on - and also controls an SSR to power on the main power supplies. The bed is AC powered while the rest of the electronics are DC powered. To turn the printer off, the button is held for 3 seconds which signals the RPi to shutdown. Once the RPi has cleanly turned off then the esp8266 commands the SSR to remove power from the rest of the electronics. Additionally, the esp8266 for the power button also supports a web interface - allowing full remote power on/off capability for the printer. #### Lighting Control The printer lighting is also a momentary style switch. A 1 second press turns on the LED lighting or will turn the lighting off. A momentary press of the button when the lights are on will cycle through various lighting levels from full brightness to 25%. #### Status Rings The status rings are driven by another esp8266 which communicates with Octoprint using IoT MQTT messages - to determine/display the status of the printer similar to the DuePanel implementation. #### Display The front panel display is an Osoyoo 5" DSI display running OctoDash.
With this file you will be able to print BLV mgn Cube - version using Klipper & SKR PRO V1.1 with your 3D printer. Click on the button and save the file on your computer to work, edit or customize your design. You can also find more 3D designs for printers on BLV mgn Cube - version using Klipper & SKR PRO V1.1.