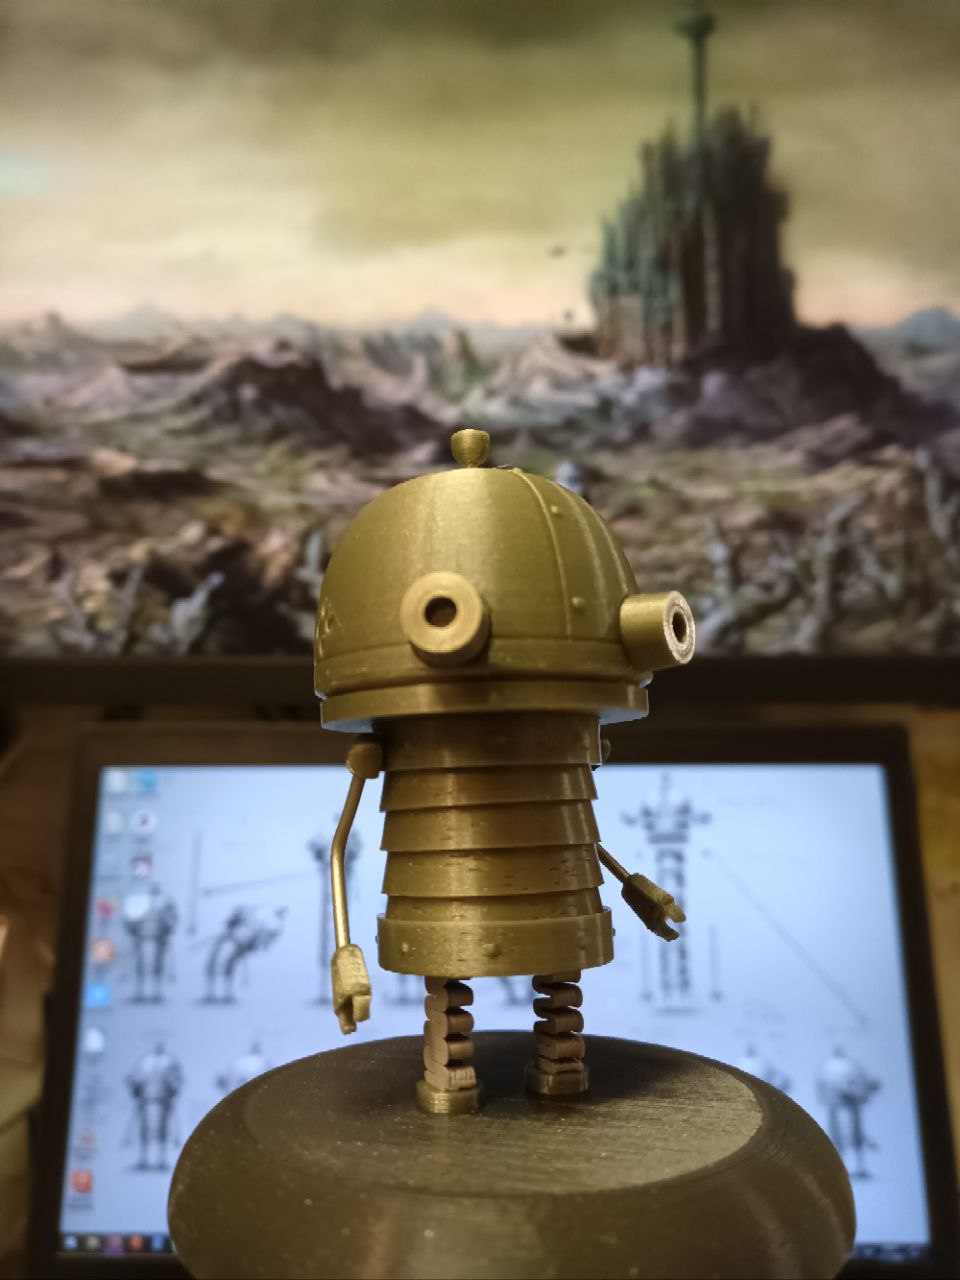
Bobblehead Josef the Robot from Machinarium
prusaprinters
<h3>Print and preassembly</h3><p>Dryfit before applying glue.</p><h4>Head</h4><ol><li>Print head, 2x eye and plug.</li><li>Cut a small length of filament (about 10mm) and glue it into the top hole on the head.</li><li>Before glueing the plug on the filament, cut the filament so about 5mm is exposed, or whatever looks good.</li><li>Glue eyes to head. But not your own eyes.</li></ol><h4>Body</h4><ul><li>Print either bodytop, 3x bodycone and bodybottom OR just body_onepart. If you print separate parts, you have a small range of customizing with glueing the segments in a pose. There is also a fiddly assembly option involving some string looped through the small tabs in bodybottom and top of the spinespring. This gives the body some movement and flexibility, but is likely not worth the effort.</li></ul><h4>Hands</h4><ol><li>Print 2x hand and 2x shoulder. </li><li>Cut 2x length of filament (about 30mm) and 2x length of filament (about 6mm).</li><li>Glue the 6mm length in the shoulder first, all the way to the bottom of the hole.</li><li>Glue the 30mm length in the other hole in shoulder, it should butt against the previously inserted filament.</li><li>Glue the hand to the 30mm filament.</li><li>Heat the 30mm filament with a lighter (carefully from a distance) and pose the arm however you wish.</li><li>Repeat for other side.</li></ol><h4>Springs</h4><ul><li>I had my PLA springs fatigue rapidly with heavier bobbleheads, so I used PC blend here. Not sure which plastic would make the best springs, so far the PC seems much better than PLA. Whatever plastic you choose, make sure you get two perimeters on the spring. I modified my print settings so my 0.6mm nozzle equipped mk3 would use 0.4mm extrusion to get two perimeters.</li></ul><ol><li>Print spinespring, 2x legspring and springconnector.</li><li>Depending on your prints, you may have to either shave some material off or glue the parts to make them fit and stay together.</li></ol><h4>Base</h4><ul><li>Print with a different color and do a colorchange for the feet. There is a hole in the bottom for a 20x3 magnet.</li></ul><h3>Assembly</h3><ol><li>Insert arm in to body (if you printed the body from parts, you need to drill the topmost cone for inserting the arm)</li><li>Heat the end of the short filament</li><li>Flatten the heated end of the short filament with a tool, so the arm is connected but free to rotate. You can also opt to glue the arm solidly in place.</li><li>Repeat 1-3 for other arm</li><li>Glue head to body. Carefully align concentrically.</li><li>It's easiest to insert the spinespring to the head, if the connection is loose and secured with some glue.</li><li>Insert legsprings to base. Done!</li></ol><figure class="media"><oembed url="https://youtu.be/Q2erEGLqfJM"></oembed></figure><p> </p>
With this file you will be able to print Bobblehead Josef the Robot from Machinarium with your 3D printer. Click on the button and save the file on your computer to work, edit or customize your design. You can also find more 3D designs for printers on Bobblehead Josef the Robot from Machinarium.