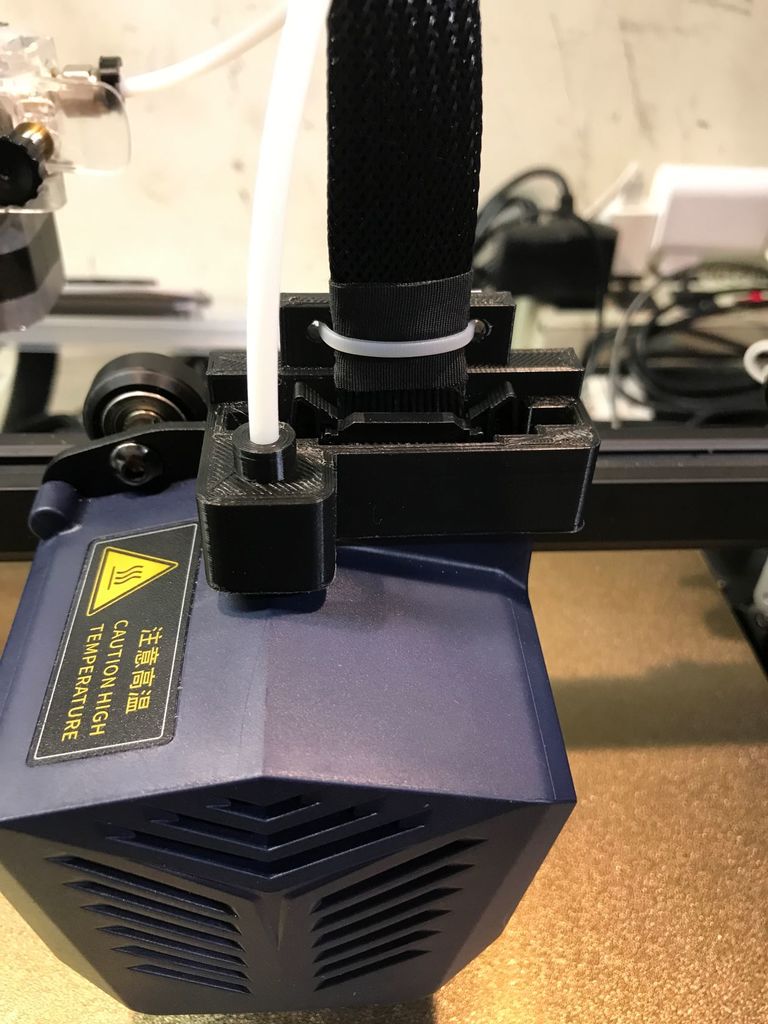
Boden Tube guide and cable stress relief device
thingiverse
This PTFE Boden Tube Guide and Cable Stress Relief Device (BTG-CSRD) will relieve stress on cable connector and boden tube flexing / bending and potentially causing false readings from bed leveling sensor (LED) operation due to bending of print head assembly circuit boards from boden tube and cable flexing. Especially when printing tall objects as print head moves and bends boden tube and cable at extreme angles. NOTE: This design will only work for AnyCubic Vyper second generation printer. The original printer has different cable connector and boden tube location/placement. Also needs two M3 screws and nuts to attach BTG-CSRD to print head assembly metal bracket. To install BTG-CSRD part: 1. heat print head hotend to 230C to remove filament from boden tube.. at least 100mm retraction. Then TURN OFF printer and cool down print head. 2. remove ZIP ties on printer control cable and boden tube collet connector (or remove collet clip) 3. Push down collet tube connector ring and pull out boden tube from print head assembly. 4. Pull (flip) out clips (latches/tabs) on cable connector socket and gently pop off the print head power/control cable connector from printer head assembly connector socket. 5. Slide Bboden tube through BTG-CSRD. 6. Replace boden tube into collet connector,- push down collet connector ring at top of connector and push tube all the way down into printer head assembly into heater block, and then reattach collet clip, or zip tie to top ring of boden tube collet connector to keep boden tube from getting loose. 7. Push in clips (latches/tabs) on cable socket connector so BTG-CSRD can slip down into place on top of print head assembly, line up the two holes in the BTG-CSRD and print head assembly metal bracket. 8. Attach two M3 socket headscrews and nuts to firmly attach BTG-CSRD to metal bracket. Do not tighten too much to avoid cracking BTG-CSRD block. I use Loc-Tite on screw threads to eliminate loosening of screws and nuts. 9. Pull out clips (latches/tabs) on cable connector socket and push in printer power cable into socket, (Please verify correct orientation of cable to socket pins and connector head before pushing into cable into socket). Firmly push in clips (latches/tabs) on each side of socket to firmly attach cable to print head assembly. 10. Attach zip tie to cable and through holes in BTG-CSRD to minimze/eliminate cable flexing/pulling against socket of print head assembly when in motion. Just 10 easy steps to having a happy printer that prevents false readings during bed leveling operations and protects printer head cable (and boden tube) from stress when printing tall objects. Please let me know if you would like any changes or improvements. I was considering adding cable drag chain links bracket to the top of the BTG-CSRD, or maybe a direct extruder on top of the printer hotend assembly, but my vyper is running so well and stress free that I dont want to add any extra weight ,or potential binding/interference issues that drag chains can present when printing. I use my printer at very high speeds (up to 100mm/sec) and have had no issues... so far...!
With this file you will be able to print Boden Tube guide and cable stress relief device with your 3D printer. Click on the button and save the file on your computer to work, edit or customize your design. You can also find more 3D designs for printers on Boden Tube guide and cable stress relief device.
