Bondtech BMG Extruder Mount
thingiverse
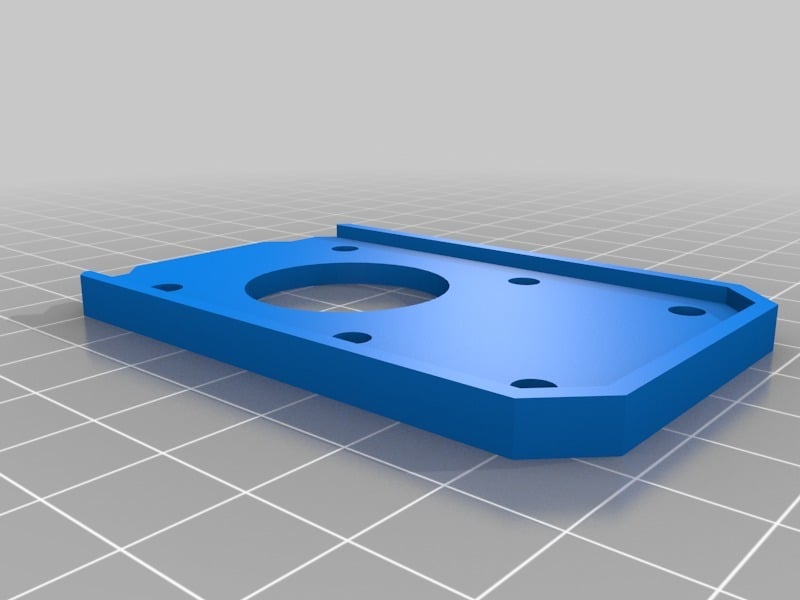
Hello all, This is a Mounting plate to attach a Bondtech BMG Extruder to a Rostock Max V3. My EZRstruder was nearing the end of its life and I decided on this as an upgrade. It is a direct replacement and uses the same lower hardware to attach to the melamine extruder plate. I ordered the standard BMG Extruder (BMGE) NOT the mirrored model. You will also need to order the Bowden Tube Adapter that clips into the bottom of the extruder. Note that you cannot advance filament manually (using your hands) with the BMGE. You will have to advance filament digitally either using MatterControl (https://www.seemecnc.com/pages/downloads) or OctoPrint (or similar web interface if you have that setup). I used MakerGeeks Raptor PLA (awesome filament), but if you are having stepper motor heat issues, you may want to use ABS or a higher temp filament alternative. I have heat sinks on my stepper and a 120mm case fan cooling off the brains of my operation - https://www.thingiverse.com/thing:2760454. Also note that this mount can be universally used for the standard or mirrored BMGE if you have a dual extruder setup. Installation is straight-forward: - Print. - Attach to melamine panel using (lower) existing EZRstruder hardware. - Attach BMGE through Mount to Stepper Extruder using BMGE provided hardware. - Insert Bowden tube into adapter at the bottom of BMGE. Don’t forget the locking thingamajig for the tube. - Insert filament and move onto configuration. Note that using the BMGE is different than the EZRstruder concerning ‘Steps per mm’ in the EEPROM. Configuration is needed: - You will need to configure the EEPROM to make proper use of the BMGE!!! - Go to this MatterHackers link and read it through. https://www.matterhackers.com/articles/how-to-calibrate-your-extruder - Using MatterControl, I set the ‘Steps per mm’ setting to 400 in the EEPROM. That will get the filament moving close to what your final number needs to be. - Using the information and math found on the MatterHackers link, set the ‘Steps per mm’ value. Most people never do this (myself included when I first built this great printer) and is necessary for reliable prints. Troubleshooting / Items I discovered and fixed after doing all this: - When advancing filament and the filament was in the hot end and being extruded, I would hear a creaking noise towards the end of the cycle. I dialed down the feed rate to 90-80%. The sound stopped and my filament stopped being eaten up. - While cleaning out the filament chips from the item above, I pulled the main drive gear assembly from the housing. When I put it back together, there was 'play' in the mechanism - so much play that I could manually advance the filament - this is bad. Upon further inspection of my surroundings, I noticed a bearing that the entire assembly rides on and inserts into the BMGE housing was on the floor. Cleaned up and reinserted bearing = no play. - Make the 20mm Calibration Cube - as many times as needed! It helped me to dial in the feed rate – a little work at the beginning saves much heartache at the end if prints are not coming out right. Enjoy!
With this file you will be able to print Bondtech BMG Extruder Mount with your 3D printer. Click on the button and save the file on your computer to work, edit or customize your design. You can also find more 3D designs for printers on Bondtech BMG Extruder Mount.