Bondtech BMG on a Taz 4 (or Taz 3-5--needs slight mod for Taz 6)
thingiverse
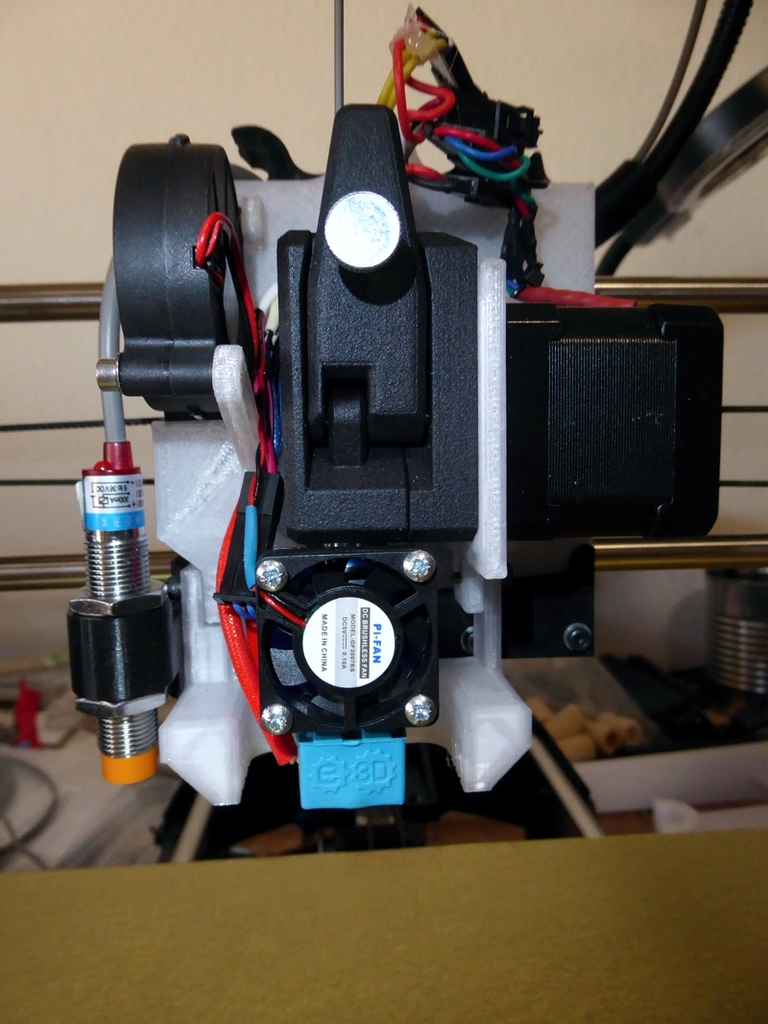
This is my Bondtech BMG with E3D V6 hotend mod for my Taz 4. I will also work on a Taz 3-5. It will work on a Taz 6 but it needs a minor mod to attach the +X limit switch. I will eventually get around to that and include the new part when i get time. You might be able to glue or drill a hole to attach the limit switch until I get around to it. This setup is great. Accurate and reliable, especially after my removable metal bed and precision bearing upgrades. I forgot to mention that I switched to 1.75mm filament. I don't recall if the Bondtech BMG has a 3.0mm filament model. When printing the lower air duct I did not use support inside of the duct itself. I used some on the outside. Internal walls are designed to eliminate the need for support which would be difficult to remove. The duct on the extruder holder needs some internal support. Try to keep it to a minimum because it can be difficult to remove if you over do it. Parts: Standard (not mirrored) Bondtech BMG E3d V6 hotend A 24V blower fan (the one in the photo is actually a 12V version which runs fast. I have 24V ones on the way but the 12V works. I just keep the speed turned down some). A 5V 30mm fan for the hotend cooling fins. The duct comes with the E3d kit. Also a short hunk of PTFE tube to connect inside the Bondtech BMG I used a NEMA17 40mm length stepper. The BMG and E3D I ordered from 3DMakerworld. Note that the extruder mounting bracket has two plugs for the duct to the left of the BMG extruder. The bottom screw on the BMG needs to be tightened from the left sid of the fan duct and the two plugs then cove the hole for the 2.5mm hex wrench. The outside left plug is not problem but the inner (right) plug require some finesse. I used some fine needle nose pliers and a small flat blade screwdriver to coax it into the hole. A few M3 x 10-12mm screws and washers. 2 M3 x18-20 screws and washers. I used 4 brass M3 inserts (3x3x4mm O.D.) for the hotend blower fan and in the lower air duct to attach it to the extruder holder. I also included the mount for the 12mm inductive probe which I show here, but really that should be elsewhere because it requires a metal bed to work. If you do not have a metal bed or intend to use a probe to auto level than just ignore the probe clamp. The interface between the air duct and the extruder holder duct should be clean and carefully fitted to prevent air leaks. You have to change your E-steps to about 455. I think that was the starting suggestion and after calibrating be extruding 100mm of filament a few times, I did not make any changes to the starting number. That cange can be made from the LCD panel Control settings. Remember to save the settings afterwards so it persists. This can also be accomplished from a command line in Simplify3D, Slic3r/Pronterface, etc. I'll try to add some more photos later.
With this file you will be able to print Bondtech BMG on a Taz 4 (or Taz 3-5--needs slight mod for Taz 6) with your 3D printer. Click on the button and save the file on your computer to work, edit or customize your design. You can also find more 3D designs for printers on Bondtech BMG on a Taz 4 (or Taz 3-5--needs slight mod for Taz 6).