Bone broth cup / soup bowl for Baby Yoda (The Child)
thingiverse
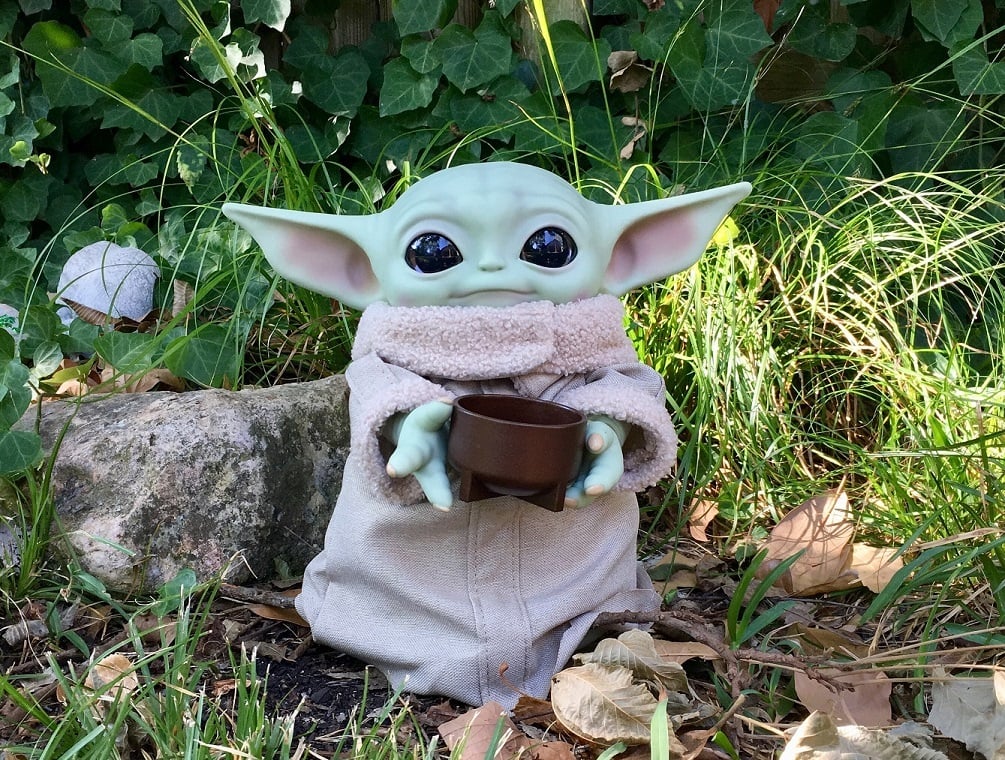
Edit (Nov 10, 2020): New bowl model posted with adjusted and improved geometry. The curved section is taller while maintaining overall cup height. New file is: "broth cup accurate mm revised.stl" Here's a soup cup for your "Baby Yoda"! Accurate foot geometry based on images from the fourth episode of "The Mandalorian" as well as accompanying behind-the-scenes footage from the Gallery specials. I made my best guess at the size of it and arrived at a 2 5/8" outer diameter, starting from an assumed 14" tall Child (the Mattel version pictured is a bit shorter and chibi-fied compared to the puppet). Two versions are posted; my first pass had the ends of the legs flush to the contour of the cup, but the Gallery footage revealed a slight step between the cup and the legs and this is reflected in the "idealized" and "accurate" files, respectively. A third version is included with notches in the feet to allow stacking: The cup has a very low center of gravity and is extremely stable due to the wide footprint; I found that my extra prints were really useful as parts dishes - screws, small printed components, model kit parts, etc. <B>Finishing Guide</B> Sand to knock down print lines, and use red glazing and spot putty or XTC-3D epoxy coating on the lower contours to fill the lines that are harder to reach at the base of the legs. The spot putty can be thinned with acetone or isopropyl alcohol to make a glaze. I don't use or recommend XTC-3D very often, but the shape of this is simple enough that no detail will be lost and it would work well in place of the spot putty. Since I printed my bowl upside down, the print finish was worse on the inside bottom than the outside. I sloshed a thin layer of casting resin around in the bottom to create a smooth surface, but sanding and spot putty or XTC-3D would have worked fine as well. If you don't have any resin on hand, printing the cup upright may result in less post-processing. Sand again to smooth the coating material and follow up with Dupli-color red filler primer. Check to see that all print lines are filled and if necessary, repeat the sanding and filler primer step. I painted the cup in multiple thin misted layers of metallic copper/brown colors. I try to avoid Rustoleum as it takes a long time to cure, but in this case only this brand had the mix of color I wanted. I used Metallic Rust and Burnished Amber but Rustoleum has at least half a dozen colors in the general ballpark that would work. Thin layers of alternating color give the paint depth; follow up with a grungy acrylic or oil wash for aging. The bowl on the show is made from wood, though the grain is very hard to see. Check out youtube tutorials for wood grain tumblers with alcohol inks for a great way to get a faux wood finish on your print! When finished as described above this cup is not food-safe!
With this file you will be able to print Bone broth cup / soup bowl for Baby Yoda (The Child) with your 3D printer. Click on the button and save the file on your computer to work, edit or customize your design. You can also find more 3D designs for printers on Bone broth cup / soup bowl for Baby Yoda (The Child).