Bottle Cap Opener/Shooter V3
thingiverse
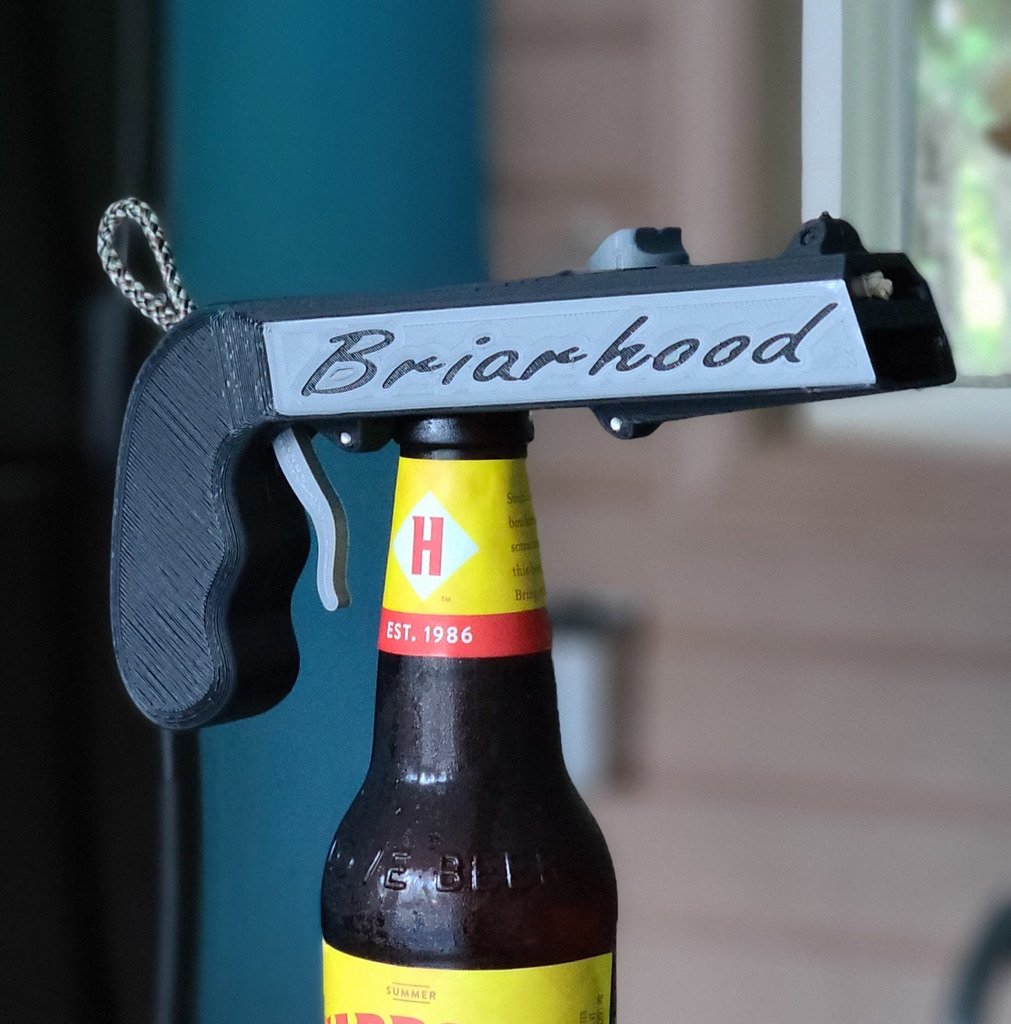
What a fun design from 3Deddy!! The pictures are of gifts I made for friends. The STL files do not contain any words on the sides of the barrel. There is a seperate STL which has the stripes on the barrel as seen on on the "Pola" version. I remixed this design to make a few improvements: - Added feature that ejects the cap if you mistakenly try to cock it AFTER removing the cap instead of before. - Increased inner dimensions of barrel slightly - Keeping them tight only limits cap compatibility. - Reduced friction in the bottom of the barrel by reducing the contact surface area. - Created snap-fit retaining feature for 12x2mm magnet and added another 6x12.9x3.75mm void in both halves to accommodate a larger variety of magnets. - Changed hole depths in the handle so that all six of the enclosure screws are the same M3x8 screw. - Changed the trigger geometry to make more room for your finger while opening the bottle. - Added 45deg chamfers along the top edge of the barrel to make it a little better looking. - Added hole at the top of the handle for your choice of hanging apparatus. I used some cord I had laying around (pictured). - Loosened hole IDs to require less post-processing. Parts: - 1 of each STL file, except the left and right halves, you choose between the one with or without stripes on the barrel. - 6 x M3x8 Screws - 1 x M3x16 Screw - 1 x M6x0.9 Rubber Band or similar. That's what I used. - 1 x US Nickel ($0.05 coin) - Lubricant. Your choice. I prefer Super-Lube, a general purpose, food-safe lubricant that I use on my 3D printers. See picture with red numbers 1-6 indicating lube points. - Bottled Beverage. I wont specify how many. You do you. Assembly Notes: - I twist the tip of my screw driver in the thread holes before threading the screws to help guide them in. Then I sand the mating surfaces of both sides with 250-500 grit to ensure a nice seam when they are joined. - Lubricate per the picture with numbers 1-6 indicating where to lubricate. Lubricate anywhere the stretching rubber band rubs against plastic like numbers 4 and 6. Number 5, the squiggly line applies to the slide area, not the band itself. - See picture indicating the approximate position of the "Spanner" when it is not cocked. This will help you determine where to tie the knot in the rubber band. - I'm in the USA so I use a Nickel (5 cents) for the bottle opener. - Use a flat-head screwdriver to press an M12x2 magnet into the snap fit slot - may require some force. I created more voids near the cap so you can use super glue to install whatever magnet you happen to have. - Assemble everything into the left half as pictured, with the rubber band extended. Then lower the right half onto it. Flip it. Install the screws starting with the one closest to the trigger, then alternate screws left-right, moving outward. Usage Notes: - Make sure to cock the gun BEFORE opening your beverage of choice. That means pull the "spanner" all the way back until the trigger clicks, then open the bottle, aim, fire! - If you want to be slick, install the opener on the bottle, pull the trigger, aim, then move the bottle instead of the gun to open it. The cap will shoot out as soon as you pull the bottle away. - Be safe. - Have fun.
With this file you will be able to print Bottle Cap Opener/Shooter V3 with your 3D printer. Click on the button and save the file on your computer to work, edit or customize your design. You can also find more 3D designs for printers on Bottle Cap Opener/Shooter V3.