Bow and Arrow - Shoot an arrow / Valentines Day Heart Arrow up to 5 metres!
thingiverse
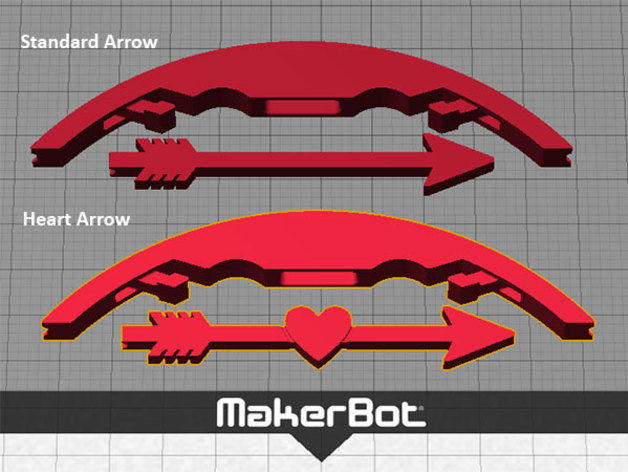
This is a rubber band powered bow and arrow system, ideal for Valentines Day fun. Two versions are available - one with a heart-shaped arrow tip, perfect for love-struck archers, and the other with a simple plain arrow for more straightforward shooting. A separate file contains extra arrows with and without heart tips, so you can customize your setup. To use this system, simply replace the included instructions' suggested small household rubber band with a similar item approximately 37mm round x 2.0mm x 1.0mm thick. Follow the provided assembly images to install it correctly. Please be aware that, depending on the chosen rubber band, the bow can propel arrows up to 5 meters or more, so handle with care when firing in public areas. Take necessary precautions not to point the arrow at anyone's face during playtime. For optimal results, please refer to the provided instructions for detailed assembly guidance. If you enjoy this creation, be sure to explore my other unique designs. Happy crafting! **Instructions:** On a Replicator 2 printer, set Raft to standard resolution (0.20mm), with 4 shells and 50% infill to achieve the required strength when the rubber band is tensioned. Once printed and the raft removed, you should be shooting within a few minutes. To ensure proper assembly, use a standard household rubber band approximately 37mm in diameter x 2.0mm wide x 1.0mm thick. First, create a loop with the rubber band and push it through one end of the bow's hole. Next, hook the loop over the retaining lug on the bow. Proceed by wrapping the rubber band around the front of the bow (doing so reduces tension) before pushing both strands of the unattached rubber band (again creating a loop) through the second hole at the opposite end and hooking it onto the corresponding lug. Now, position the rubber band over each end of the bow by feeding both strands to the back. Then, guide your arrow through the centre slot in the bow and secure both rubber band strands in the arrow's notch. Using your fingers comfortably place within the inner finger recesses and around the front of the bow for a secure hold that allows clear passage for the arrow. Pull the arrow back until only the rubber band tip is protruding from the bow's centre. Take aim, release the arrow, and enjoy!
With this file you will be able to print Bow and Arrow - Shoot an arrow / Valentines Day Heart Arrow up to 5 metres! with your 3D printer. Click on the button and save the file on your computer to work, edit or customize your design. You can also find more 3D designs for printers on Bow and Arrow - Shoot an arrow / Valentines Day Heart Arrow up to 5 metres!.