"Brass Qwistle" - Penny Whistle
thingiverse
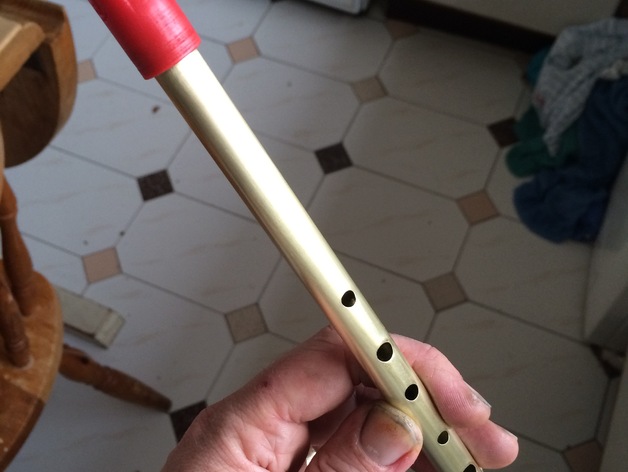
These files provide two versions of a head piece, and a separately printed windway, for a version of the "Qwistle" 3D printed penny whistle. The original Qwistle is a fully-printed penny whistle in the key of "D", and can be found (both as a file set, and as a laser sintered, hand finished instrument) by visiting : http://www.lindstruments.com The files are as follows : BQShort - this is the standard head piece BQShortInchSlide - this is the head piece, with a longer "tuning slide" BQFlat - this is the windway, which will slot into the head piece To make a completed head piece, choose & print one of the head pieces, and one of the wind ways. You'll find that they push together, however the joint should be glued with for example epoxy before playing, to ensure that there are no leaks. If this isn't done, the whistle may not speak, or may sound very weak - likewise, make sure there are no leaks between the brass tube of the body, and the 3D printed head joint. Please read the Print Settings and Post-Printing sections of this guidance in detail before attempting to print and use these files. Print Settings Rafts: No Supports: No Resolution: Higher the better - 0.12 or 0.06 if poss. Infill: Has to be 100% infill Notes: Don't use rafts or supports, they'll mess up the whistle. Only print at 100% infill, or you won't be able to finish the parts properly without introducing leaks. If you print below 100% infill, you will probably have leaks before finishing anyway, making the parts useless. Resolution-wise, if you know how to finish the parts then a layer height above 0.2mm will be fine. If you've not done anything like this before, then print at a low layer height as the part is more likely to be reasonably playable in an unfinished condition. Hand finishing is best though, and is the only way to get a decent whistle out of an FFF printer. Post-Printing Post Print - Constructing Your Qwistle The files provided here are for a narrower bore (15/32") version of the Qwistle. The components provided will make up the head of the whistle, while the body should be made from stock brass tube with an OD of 1/2" and an ID of 15/32". Precision brass tube to these sizes can be obtained easily and cheaply online. To place the fingerholes, you'll first need to decide what scale(s) and key(s) you would like to play. A "standard" penny whistle in the key of "D" will be easy enough to make, and in due course I'll post the sizes for that here (unless someone beats me to it). Other keys such as C, Eb, E, should all be easy enough to implement. I recommend not trying to use this as a mouthpiece for lower pitched whistles however, as the bore will be too narrow. You can find guidance both online and in print. I'd recommend browsing Amazon (I've found Bart Hopkin's book particularly useful), and having a look at the "How to Make Your Own" section of Guido Gonzalo's excellent site (he also makes great whistles in PVC) : http://www.ggwhistles.com When reading advice such as that given above however, remember that the bore of this whistle is 15/32", and any plans provided for whistles of other bore sizes will not translate directly to this one. Important - if you're using an FFF printer, you may need to clean out the inside bores before the tube will fit, and to avoid inconsistencies in the mouthpiece bore. FFF printers generally print inside diameters slightly undersized. If you're seriously into the idea of making whistles using your printer, then the best way to do this is by investing in a couple of parallel hand reamers - 1/2" and 15/32" respectively, and obviously they don't need to be too long. The undersized inside diameter that the printer will leave you with, will usually provide enough of an allowance for the reamer to cut a fairly smooth surface on the inside of the tube - this will considerably improve the sound. The labium (the ramp/blade that cuts the air) will also need carefully finished, and the best thing here is fine sandpaper / wet & dry. By progressing through grades of wet & dry, and using a lubricant (oil or water will work), you'll be surprised at the surface finish you can get. A smooth surface on the labium, and also inside the windway (not so easy to do), will significantly improve the whistle's performance. Be aware when doing this, that anything you do to these areas will change the sound and response of the whistle. Aim to print quite a few mouthpieces, and experiment with finishing and adjusting them until you understand the parameters and can produce the kind of sound you want. How I Designed This For background information on the Qwistle, see : http://lindstruments.com/pages/the-qwistle Custom Section To obtain a full printable (no brass), wide-bore version in the key of D, you can find the file set here : http://lindstruments.com/products/qwistle-printable-file-kit-stl-format And if you'd like a laser sintered & hand finished Qwistle "in your hand" to play, try here : http://lindstruments.com/products/qwistle-3d-printed-whistle
With this file you will be able to print "Brass Qwistle" - Penny Whistle with your 3D printer. Click on the button and save the file on your computer to work, edit or customize your design. You can also find more 3D designs for printers on "Brass Qwistle" - Penny Whistle.