Bronze Bushing Upgrade (w/ PTFE) for FF Creator
thingiverse
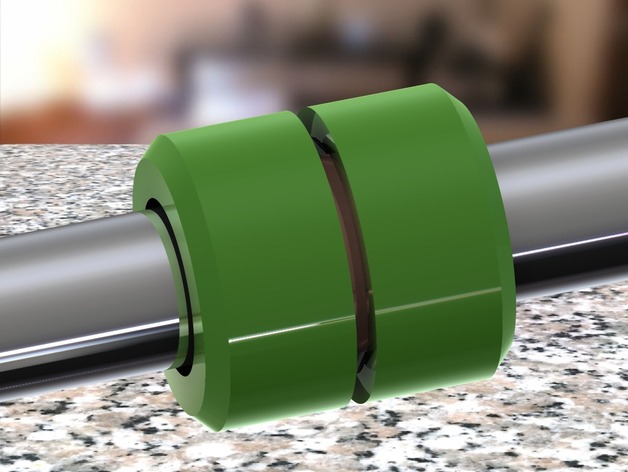
Anyone with a FlashForge Creator knows it's a loud machine. Improvements upon the MakerBot Replicator are nice, but they could be more refined. After 3 Km+ of filament through my machine I got tired of hearing its loud noise. Seeing some designs to replace the crappy roller bearings with bronze bushings (get PTFE lined ones to help wear on your shafts), I wanted to upgrade. The only problem was that I couldn't get the bushings the designs were for. I also decided to go with PTFE lined bushings to reduce wear on the shafts. Hopefully McMaster-Carr will keep these in stock for a while. I already replaced my fans with quieter ones from Digi-key, and added active cooling (I have a good design I've been sitting on for a year that I need to finalize and upload). Now, all I need is pillow blocks and my machine will be fully upgraded! (open to suggestions) Edit 7/5/16 (EXTREMELY IMPORTANT): Finally got around to installing this and while it works well, I must have shorted a thermocouple wire because I have tool 0 failure and my bot won't work. Be careful when removing/installing the carriage! This can also happen from natural fatigue of the metal as the printer moves. I just may have accelerated it. After you've installed your new pillow blocks, make sure they're properly aligned with your machine's frame to avoid any further issues. Also, consider using a level tool to ensure your build platform is perfectly flat. In the meantime, I'll show you how to make some spacers for those bushings. They have an ID of 8 mm, OD of 10 mm and a length of only 12 mm. (see pic above) These spacers for those bushings have an ID of 8 mm, OD of 15 mm, and length of 16 mm when assembled on the bushing. Minor reaming/fitting may be required, as you don't want them to fit too snugly or it might crush down on your shaft and damage it. Hehe. The loose version has an ID of 10.6 instead of 10. I recommend printing both first and seeing what fits best for you. Print "Spacer.stl" with the following settings: (or really whatever you want) 200 micron layer height (.2 mm) 1 shell 100% infill I recommend printing them individually for uniformity (mine leaves stringy things when it moves from part to part on the build platform), but I understand that is a pain so feel free to load up a whole tray of them and fire away. Edit: Just be consistent, so if you do 4 at a time, keep doing 4 at a time until you have enough because they may shrink slightly differently depending on cool time between layers. I have definitely noticed this effect when printing in ABS. Once your spacers are printed, check every single part off your production line to make sure it is to spec. This is nothing new to the cartridge reloaders out there (or methodical maker). The part should fit snug inside the spacers when pushed inside in a perfectly orthogonal manner. You shouldn't have to beat it in there with a hammer or womp on it with your thumbs. Too tight and you induce premature wear on your parts, too loose and you get slop. If it doesn't fit, break out your trusty calipers and go to work. I have found that many times it is just a small part with plastic sticking out (where each circular layer starts and stops) that is causing bad fit which can be remedied with a pocket knife. If the whole thing is small, try scaling. The model is made to spec (as if being fabbed with metal or a real 3D printer) so it's up to you to make it work for your machine. Remember, if using ABS (like I am) to scale by 2-3%. Edit: Improved Method: Order an extra bearing. Take a Dremel and put notches in it to make a die. They should be as orthogonal to the edge as possible, not angled one way or another (see below). Now, use your die to clean out the inside, it is shown below with my hands, but I used my trusty Leatherman to get more leverage. Make a die such that the grooves cut into the sides are 90 deg from the outer surface Turn the die inside a part to ream out the inside. Be sure to clear the chips after any decent amount of removal because these improvised dies will not clear them well. Install two finished parts onto a bushing
With this file you will be able to print Bronze Bushing Upgrade (w/ PTFE) for FF Creator with your 3D printer. Click on the button and save the file on your computer to work, edit or customize your design. You can also find more 3D designs for printers on Bronze Bushing Upgrade (w/ PTFE) for FF Creator.