Bruder Toy Truck and Trailer Ramps and Ramp Mount
thingiverse
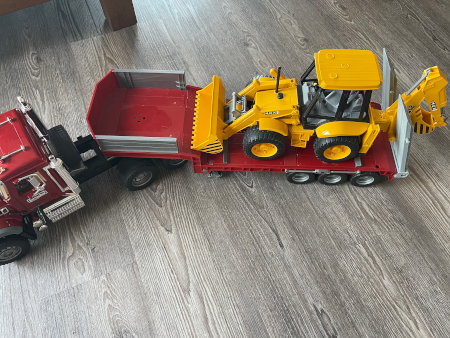
My son kept ripping the ramps off of the flimsy mounts on his Bruder trailer so I rebuilt a heavy duty set that are holding up to the little monster just fine. I removed all of the original mounts from the back of the trailer with a dremel and side clippers then sanded it down to a nice smooth finish using a sanding block and 220 paper. The new mount covers the majority of the back of the trailer so you dont have to worry about what it looks like. I printed two ramps and the new mount using some gray PLA filament I had laying around that happened to match the toy gray close enough. I used 10mm round rod that I cut to 180mm and smoothed both ends with a sander. I test mounted the rod into the mount and through the ramps and then marked where the holes for securing the rod would go using a fine tipped black pen. I removed the rod and used a drill press to drill two holes through it where indicated that would allow a M3 bolt to pass through. I then test fitted it all again to make sure the holes in the ramp mount lined up well enough with the holes in the rod. I disassembled everything and then used CA glue (super glue) to attach the main ramp mount to the back of the trailer. Once it was dry, I installed the ramps and rod using M3x12mm bolts and nuts. I had printed the ramps with the intention of adding grip tape (like a skateboard top) to each ramp so I had indented the surface of each ramp and then used supports to support while printing. Turns out the supports kinda look like a roughed up surface of a ramp so I just left them in place for aesthetics.
With this file you will be able to print Bruder Toy Truck and Trailer Ramps and Ramp Mount with your 3D printer. Click on the button and save the file on your computer to work, edit or customize your design. You can also find more 3D designs for printers on Bruder Toy Truck and Trailer Ramps and Ramp Mount.