Bubble Machine V0.1
thingiverse
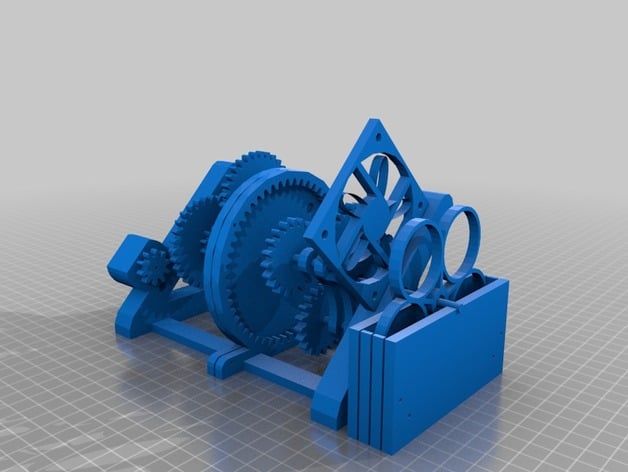
This DIY soap bubble machine is dedicated to the creator's girlfriend and features a planetary gear transmission system with a rotor that creates bubbles when powered by a battery, motor, and fan. However, the airflow from the fan currently needs adjustment for optimal bubble production. The bill of materials includes laser-cut acrylic parts, a motor, fan, and various nuts and bolts. The assembly process involves gluing and attaching components together to form the soap bubble machine. There are several areas for improvement, such as fixing the entire assembly, securing the motor and fan, adjusting the distance between the fan and rotor, determining the best soap mixture for bubbles, and potentially adding an adjustable gear ratio or additional fan blades. The project was inspired by open-source models and the creator's girlfriend.
With this file you will be able to print Bubble Machine V0.1 with your 3D printer. Click on the button and save the file on your computer to work, edit or customize your design. You can also find more 3D designs for printers on Bubble Machine V0.1.