Bug Spinner
prusaprinters
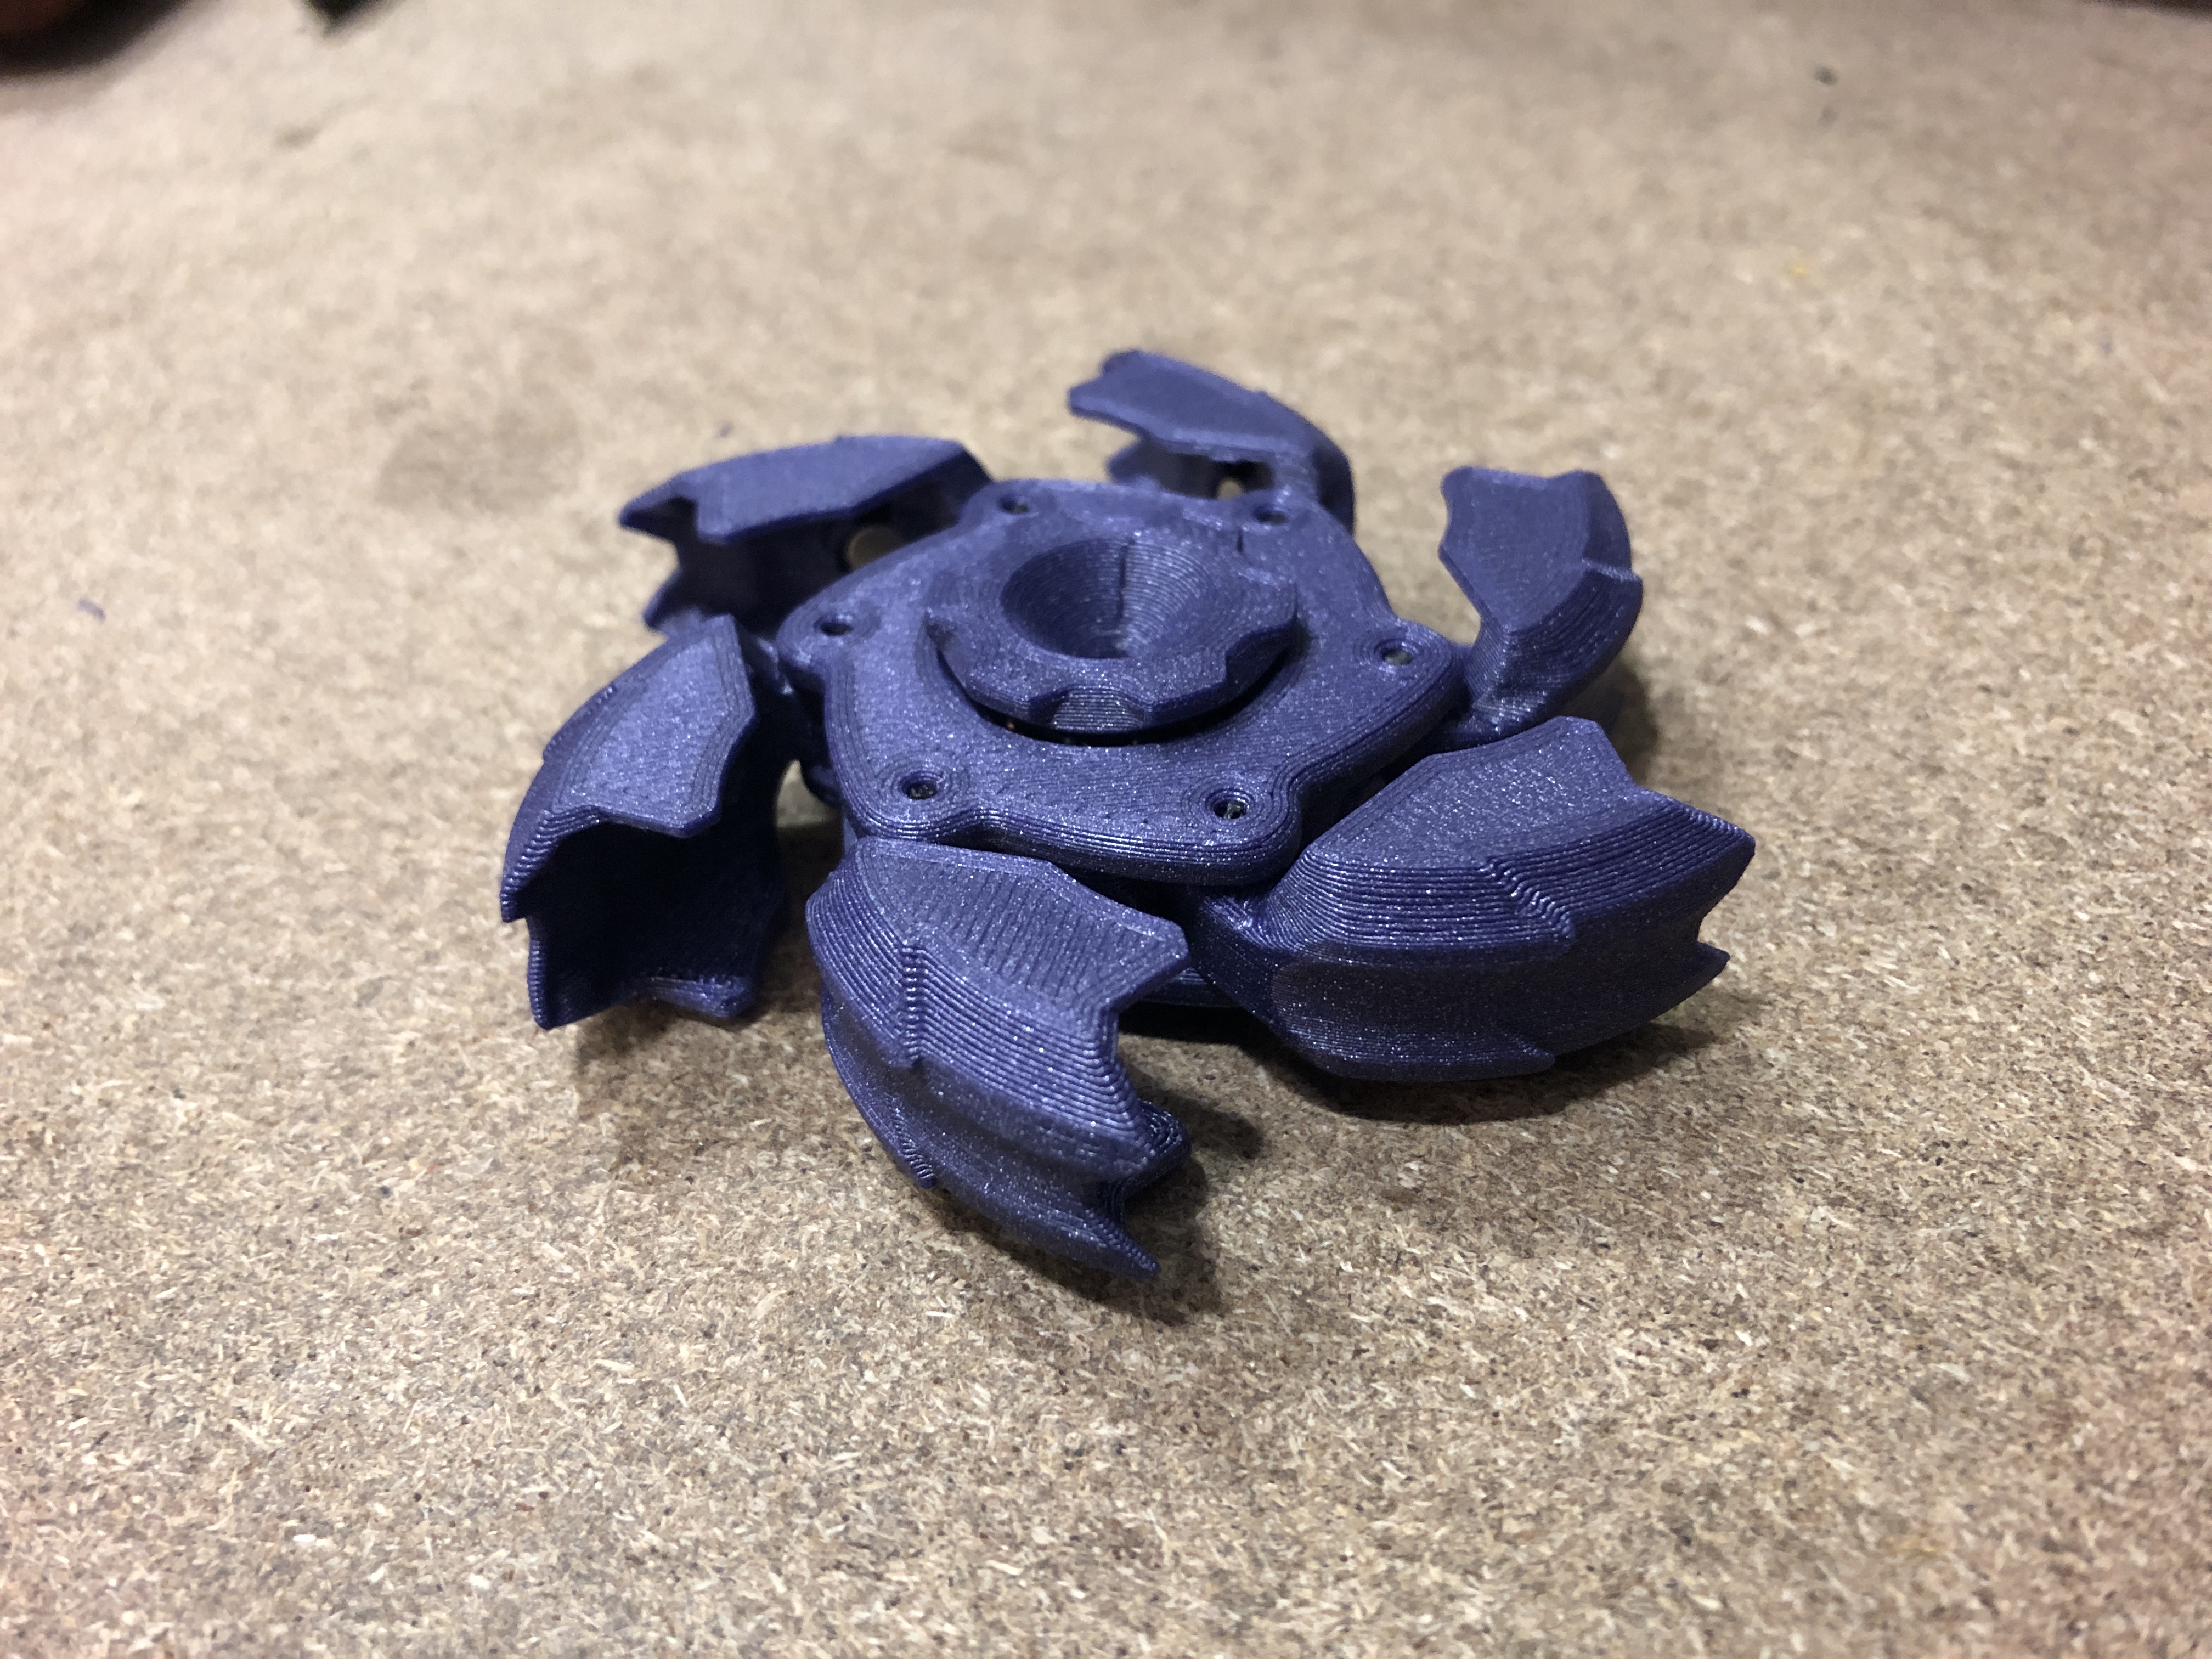
<p>The idea comes from this fidget spinner: <strong>Gobigger Pillbug Spinner Fidget Toy. </strong></p><p><strong>https://fablades.com/product/gobigger-pillbug/</strong></p><p>Look for it on the internet and see what I am talking about.</p><p>The metal version is obviously better but it is pretty expensive too and I wanted to see what was possible with 3D printing. You will need some hardware like magnets and a bearing but at least screws are not.</p><p> </p><p><strong>PARTS NEEDED</strong></p><ul><li>12 x Magnets 5x5 mm cylindrical (<a href="https://it.aliexpress.com/item/1005001991829706.html">aliexpress</a>)</li><li>1 x Bearing 8x22x7 mm freely moving; I stole it from an old fidget spinner but you can deep clean a common skateboard bearing. You can also print one of <a href="https://www.printables.com/it/model/120591-custom-parametric-bearing-with-steel-balls">mine</a>, they should be frictionless enough</li></ul><p> </p><p><strong>PRINTING</strong></p><p>PLA or other materials, no requirements. You can visualize the full assembled model and divide it into pieces in the slicer or just print what follows:</p><ul><li>Core 1-2</li><li>Ring 1-2</li><li>6 x Wing</li></ul><p>The wings are the only parts that need supports, so I attached a support enforcer file: supports are placed in the overhanging areas, like in the joint and the upper half of the wing. I suggest snug supports for better cleaning.</p><figure class="image image_resized image-style-align-left" style="width:47.27%;"><img src="https://media.printables.com/media/prints/295128/rich_content/3a3dff04-0ec2-4164-a5bb-680908ad830b/img_7309.jpg#%7B%22uuid%22%3A%22adfbc3bd-ee9c-4ca2-a5d3-fcf5898ac6b1%22%2C%22w%22%3A3024%2C%22h%22%3A4032%7D"></figure><p><img class="image_resized" style="width:47.12%;" src="https://media.printables.com/media/prints/295128/rich_content/057146c2-30ce-440d-8a39-d6c699a37246/img_7310.jpg#%7B%22uuid%22%3A%2251c546d9-7a61-4924-a4ff-3c70bd07e820%22%2C%22w%22%3A3024%2C%22h%22%3A4032%7D"></p><figure class="image image_resized image-style-align-left" style="width:50%;"><img src="https://media.printables.com/media/prints/295128/rich_content/f16944fb-1d07-4892-b384-29711b1a9681/support-1.png#%7B%22uuid%22%3A%229172b754-f1d6-4d0f-ad3e-1b07248233a8%22%2C%22w%22%3A1033%2C%22h%22%3A795%7D"></figure><p><img class="image_resized" style="width:45.45%;" src="https://media.printables.com/media/prints/295128/rich_content/9a1bf802-b6f4-4e24-9fd5-97eaff8f1ffe/support-2.png#%7B%22uuid%22%3A%220893ccb4-f06f-4510-8492-0612f61e544d%22%2C%22w%22%3A896%2C%22h%22%3A753%7D"></p><p>You will need to cut 6 pieces of filament about 11mm long: straighten a filament section and cut 6 segments with at least one end at 45° making it pointy. It is possible to make them longer and trim them later, no need for precision now.</p><figure class="image image_resized" style="width:71.09%;"><img src="https://media.printables.com/media/prints/295128/rich_content/250141e2-3150-4303-a469-967813ba73cc/img_7269.jpg#%7B%22uuid%22%3A%22706e8559-a583-41e8-b359-52ee97cb1fc2%22%2C%22w%22%3A4032%2C%22h%22%3A3024%7D"></figure><p>If you have problems with the tolerances of the parts try adjusting them before printing in the slicer, using the XY compensation for holes and perimeters.</p><p> </p><p><strong>ASSEMBLY</strong></p><figure class="image image_resized image-style-align-left" style="width:50%;"><img src="https://media.printables.com/media/prints/295128/rich_content/24537118-e198-452d-ab97-94bbb19d4bdb/img_7265.jpg#%7B%22uuid%22%3A%227020b3ad-9773-4b07-8784-61a8735f7904%22%2C%22w%22%3A4032%2C%22h%22%3A3024%7D"></figure><p>Prepare the Wings: remove the supports and clean them as good as possible. I know it can be difficult but it works better with flat faces. Use an exactor knife to make the contact surface with the supports as flat as possible.</p><p> </p><p> </p><p> </p><figure class="image image_resized image-style-align-left" style="width:50%;"><img src="https://media.printables.com/media/prints/295128/rich_content/8e861864-0b4d-485e-8123-29e712a60b66/img_7267.jpg#%7B%22uuid%22%3A%22d86c5459-55ac-41b9-ba7f-71f37791be6b%22%2C%22w%22%3A4032%2C%22h%22%3A3024%7D"></figure><p> </p><p>Insert the magnets inside the wings. Check for polarity: it must be the same for every wing.</p><p> </p><p> </p><p> </p><p> </p><p> </p><figure class="image image-style-align-left image_resized" style="width:50%;"><img src="https://media.printables.com/media/prints/295128/rich_content/235dd435-1bab-4928-a438-2c19e4aad695/img_7271.jpg#%7B%22uuid%22%3A%224a5e1962-4406-4ac2-be3a-9b7b65dc9a82%22%2C%22w%22%3A4032%2C%22h%22%3A3024%7D"></figure><p> </p><p>Put the remaining magnets in a radial configuration around the bearing and place it inside a Ring part. The polarity of the magnets must attract the wings on their insides. </p><p> </p><p> </p><p> </p><p> </p><figure class="image image_resized image-style-align-left" style="width:50%;"><img src="https://media.printables.com/media/prints/295128/rich_content/d5feca81-cbd4-4b10-851c-896f11782712/img_7272.jpg#%7B%22uuid%22%3A%22ad6d782a-5f29-4fc0-b428-1060238a9608%22%2C%22w%22%3A4032%2C%22h%22%3A3024%7D"></figure><p>I tried different approaches to perform the last step and you can try inserting the filament segments as shown in the picture but it is not the best way.</p><p>Try instead this way: close the bearing with the leftover Ring part; insert one by one, in order, the wings with the corresponding segment and push it all the way in. Trim the excess filament flush to the rings using a plier.</p><p> </p><figure class="image image-style-align-left image_resized" style="width:50%;"><img src="https://media.printables.com/media/prints/295128/rich_content/3a3db6bf-3901-4f1a-bae7-781bbe5250ef/img_7313.jpg#%7B%22uuid%22%3A%220842b686-a399-4554-a033-fe1b4477b868%22%2C%22w%22%3A4032%2C%22h%22%3A3024%7D"></figure><p>Check for the correct opening of the wings: they should open without friction and snap close when released. </p><p>Insert the two sides of the Core and you are done!</p><p>Everything should stay together with friction but if it is not enough just use a drop of super glue between the rings or the core.</p><p> </p><p> </p><p>If you spin it fast enough the wings will open out and should stop without closing them. Just a touch and it snaps close. It could also be a satisfying action to open and close manually the wings.</p><p> </p><p><strong>DESIGN PROCESS</strong></p><p>I made several versions and this is the simplest one and easy to assemble. I tried avoiding supports but there was no good or pleasing way, or I did not like the geometry of the parts. I also used screws at the beginning making them pretty strong but finding the correct length ones with flush head was too hard to present here so I just used filament friction.</p><p> </p><p>Hope you like it. Let me know your opinions.</p><p>Videos of it will be available on my <a href="https://instagram.com/hexagon_3dstudio?igshid=YmMyMTA2M2Y=">Instagram</a>.</p>
With this file you will be able to print Bug Spinner with your 3D printer. Click on the button and save the file on your computer to work, edit or customize your design. You can also find more 3D designs for printers on Bug Spinner.