Bullet Comparator Vx - COL/OAL
thingiverse
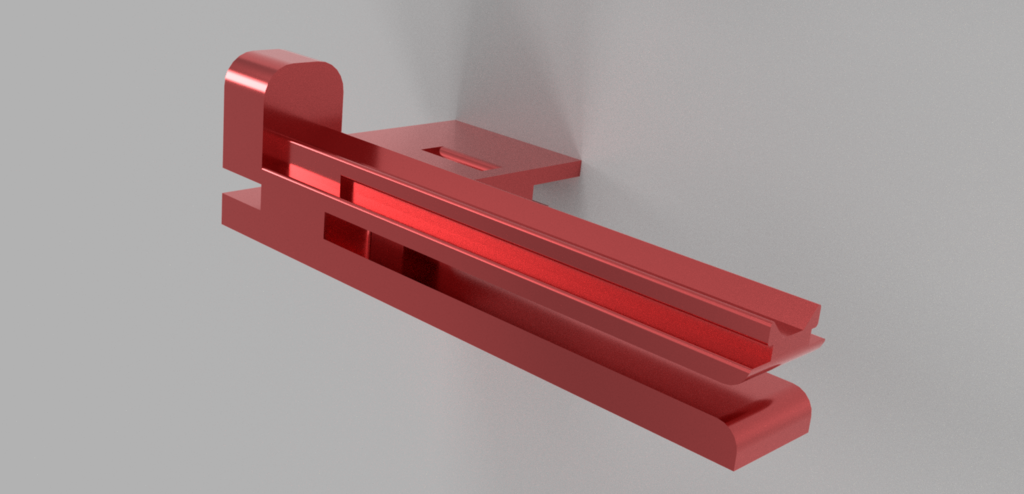
Hello everybody, Here is the new version of the Bullet Comparator Vx. I already deleted the two old versions in Thingiverse. To use this tool, simply attach it to any caliper and slide the measure tool onto it. You should already have enough hold with a standard caliper, but you can also use a small piece of velcro tape to secure it. To get started, turn on your caliper as usual in the closed state and attach the comparator body. Then, insert the lower slide of the caliper into the gap of the head (refer to the picture). This will allow you to move the head with the caliper. The body and head part are designed to work together, giving you an exact measurement of the cartridge length to the ogive. To determine the hole size for your comparator, simply turn the head and observe where the bullet dips at the specified diameter. Once you've made this adjustment, slide the head back into its correct position so that it's lined up with the caliper. This will give you an accurate measurement of the cartridge and its ogive length. The current design is optimized for each hole diameter, which means the hole is tapered to a specific angle until it reaches the specified size. I've tested this design with .223 mm bullets and found that it works well with rifle ammunition across all calibers. However, if you're using handgun ammunition, you may need to adjust the head so that it's measuring from the back of the caliper instead of the front. Keep in mind that the PLA material used for the comparator is softer than a metal caliper. Be gentle when measuring, as applying too much pressure can alter the accuracy of your readings. If the head is difficult to slide over the body at first, don't worry! Just push it back and forth a few times until it starts moving smoothly. This should happen automatically after you've used the comparator for a while. I'm happy to report that this design has worked well for me so far, but I'd love to hear from anyone who encounters any issues or has suggestions for improvement. In fact, I'll be uploading more heads in different sizes soon, ranging from 2.5mm to 8.0mm in 0.5mm increments. This will cover rifle cartridges up to 9mm and smaller, including the 45ACP. To print your own Bullet Comparator Vx, simply follow these instructions: 1. Print without raft or support. 2. Use a 20% infill for stability. 3. Refer to the provided pictures for visual guidance. 4. Make any necessary adjustments as you go along. Happy printing!
With this file you will be able to print Bullet Comparator Vx - COL/OAL with your 3D printer. Click on the button and save the file on your computer to work, edit or customize your design. You can also find more 3D designs for printers on Bullet Comparator Vx - COL/OAL.