Cable guide for Ikea Lack enclosure V2 (with sabot)
prusaprinters
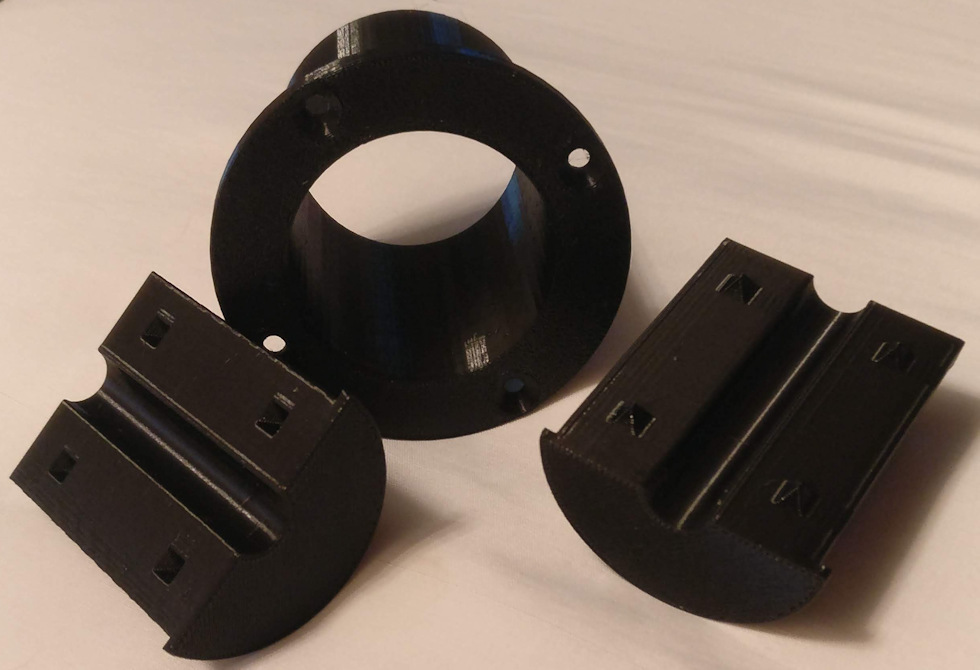
<p>The Ikea Lack V2 enclosure makes it difficult to remove the printer when the PSU is external to the enclosure.</p> <p>There is not enough room to easily disconnect the power and panic cables from the printer inside the enclosure, meaning the cables have to be disconnected from the PSU underneath and then be threaded back up through the tiny cable guide. This guide is so tiny that it requires the power cables are tightly flexed to thread them back and forth, which will damage them on repeated use.</p> <p>This print contains a large outer sleeve that the cables can easily pass through, and an inner "sabot" - two halves of a cylinder designed to interlock and fit snugly into the outer sleeve, with a central groove that the cables can be held tightly within.</p> <h3>Print instructions</h3><p>Print using PETG.</p> <p>Use a 5cm hole saw to cut a hole in the Ikea Lack enclosure base, centred on where you want the cable to protrude. Ensure there will be enough slack to gather the cable up into the enclosure.</p> <p>Fit the outer sleeve down the hole, securing with countersunk screws.</p> <p>Disconnect the cabling from the PSU.</p> <p>Place the printer in the enclosure, thread the cabling down the hole and reconnect with the PSU on the underside.</p> <p>Pull the cabling slightly back up into the enclosure, clasp in the groove between the two halves of the interlocking sabot, and slide into position in the outer sleeve.</p>
With this file you will be able to print Cable guide for Ikea Lack enclosure V2 (with sabot) with your 3D printer. Click on the button and save the file on your computer to work, edit or customize your design. You can also find more 3D designs for printers on Cable guide for Ikea Lack enclosure V2 (with sabot).