Calibration Flat panel Astrophotography (82mm Redcat 51)
thingiverse
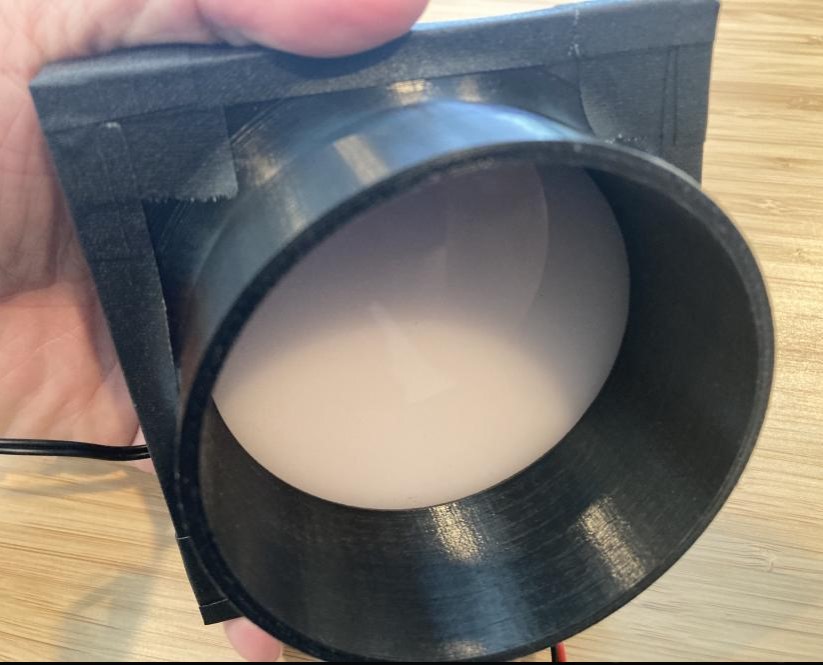
Problem: - taking calibration frames is very important for deep space astrophotography. The traditional method is "a white T-shirt and tablet (light source)". That's still the answer even if you have a >1000 USD telescope. It leaves dust, and after a night of shooting the stars, you may not have a white T-shirt - Also, if you are in an Astro club on a "dark site", your white tablet light will make others' dark experience less enjoyable, in particular the visual observers. - You can also use a blue/even sky during daytime, this does require you to leave your whole setup the same (same zoom, no dust particles can move). Not many people have time or the skies for that. This will remain the best option for narrow band flats, as real light contains the best spectrum. - commercial flat panels and flat-flips are available, they are all >200USD, that's money most beginners would like to save for a better Go-to mount, telescope or mini PC. Commercial flat panels have better "true white" EL-panels, but that's not always needed for the flat algorithm (for example if you are shooting color). Solution: - Use an amazon grade EL panel, some plexiglass as diffusor and a 3D printed cover mount. Design is for 82mm and smaller diameters - costs, roughly 40USD Build list: - EL panel - 10 * 10cm. EL Panel Electroluminescent Light Sheet Backlight with Battery Inverter (White), 19USD amazon. The panel is actually blue-ish, not true white, it should not matter. You can use the battery powered inverter that's there (holds 2 AA batteries) or buy a customer inverter (to connect to 12V and a switch). - Falken Design Acrylic Plexiglass Sheet, White Translucent 55% (2447), 12" x 12" x 1/8", amazon 10USD - black TPU filament, for example PRILINE TPU, Black. Roll is 22 USD on amazon - Some gaffer tape - kitchen aluminum foil (light blocker) - 3D prints: Holder (square mount with tube), ld (the tube that fits inside the tube of the holder) Building: - cut two 11cm x 11cm squares plexiglass using a hobby saw - make a sandwich : (outside) plexiglass, alu-foil, EL panel, Plexiglas (inside) - fit the 3D printed holder on the sandwich and secure it all together with strips of gaffer tape. Make sure all edges are closed off (no light can get in or out) - check that the lid fits on the holder Using: - without lid, put the holder over your telescope - switch on the EL panel light - choose exposure time so that spectrum is in the middle of your histogram. On DSLR cameras "AV" mode is not enough, you need to increase your exposure time a bit (e.g. from 1/125 on AV mode to 1/50 with manual mode) - for darks, biases: leave the kit on, it will be dark enough - the lid protects the kit during transportation and storage, ofcourse you would like the light-surface area to be dust and scratch free Future ideas: - make a small Arduino and driver chip so it can interface with NINA and you can do the flats, biases, darks in one routine after you put the kit on your telescope - use the inverter from 12V to EL-panel, see if I can increase or adjust brightness on EL panel - different or more layers of diffusors. One layer of plexiglass worked very well so far - further robustify the kit to make it dummy proof (connector EL is rather exposed)
With this file you will be able to print Calibration Flat panel Astrophotography (82mm Redcat 51) with your 3D printer. Click on the button and save the file on your computer to work, edit or customize your design. You can also find more 3D designs for printers on Calibration Flat panel Astrophotography (82mm Redcat 51).