Calibration v08 - B9creator
thingiverse
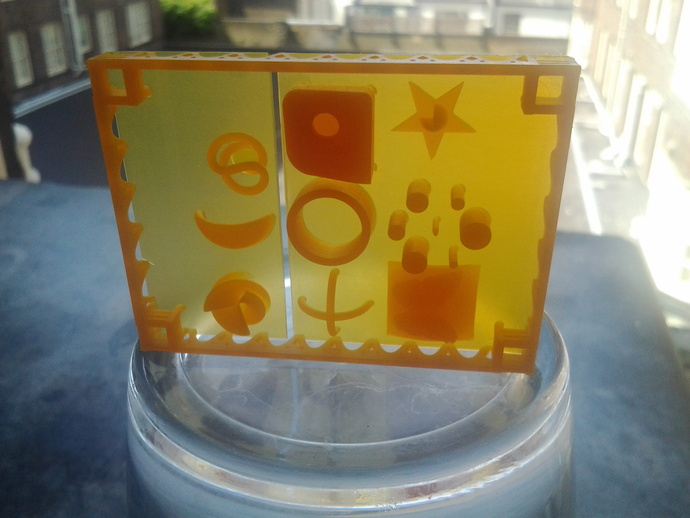
This quick-to-print, 100-layer calibration model is sliced at 50.8 microns, resulting in a 5mm height. The STL for printing is within the ZIP file; avoid downloading the unzipped STL solely for visualization. The base layer splits into two to minimize shrinkage during printing, with ease of filling gaps in the B9C editor. One base layer can be added with the B9C editor; a perimeter wall ensures print retention. Four towers are included for calibration purposes, checking projector focus and z-calibration parallelism with the surface. Indentations on towers mark 1mm intervals, while various items test resin escape and printing capabilities. Two B9J files containing depth-map butterflies (rotated 180° on the z-axis) are also provided. Comparing prints can help identify issues like resin shrinkage or incorrect z-calibration. A photo highlights a print flaw, indicating base layer detachment in one corner due to potential causes such as resin shrinkage, incorrect z-calibration, build table cleaning errors, projector calibration issues, or non-planar coating.
With this file you will be able to print Calibration v08 - B9creator with your 3D printer. Click on the button and save the file on your computer to work, edit or customize your design. You can also find more 3D designs for printers on Calibration v08 - B9creator.